CUTTING WHEEL ASSEMBLY
Refer to Figure 3
WARNING
To prevent serious personal injury. The maximum wheel
capacity for this saw is 7". Do not use wheels larger or
smaller than those which are recommended. Only use
continuous rim wheels, do not use serrated or tooth edged
wheels. Replace damaged cutting wheel before operating.
1. Remove bevel table. NOTE: The folded legs located
on the underside of the bevel table may come loose
during shipping, if this happens snap them back into
the underside of the bevel table while lifting the bevel
table from the top of the saw.
2. Slide inner wheel washer onto arbor.
3. Place the cutting wheel onto the arbor.
4. Place outer wheel washer onto arbor. The double
“D” flats on the wheel washers align with the flats on
the spindle.
5. Install arbor nut onto arbor. Place the hex wrench onto
the arbor nut and the arbor wrench onto the arbor,
while holding the arbor in place tightening the arbor
nut securely.
6. Replace bevel table.
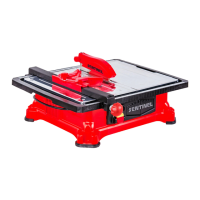
Figure 3
Inner Wheel Washer
Arbor
Outer Wheel Washer
Arbor Nut
Cutting Wheel
To Remove Cutting Wheel
1. Remove bevel table.
2. Place the hex wrench over the arbor nut and the arbor
wrench onto arbor.
3. Hold arbor wrench firmly to prevent the wheel from
moving and turn the arbor nut counterclockwise with
the hex wrench to loosen.
4. Remove arbor nut, outer wheel washer and
cutting wheel.
TO INSTALL SPLASH HOOD
Refer to Figure 4
1. Remove bevel table.
2. Place the L-shaped splash hood bracket into the
recess on the table located behind the wheel. Attach
with the supplied washers and screws. DO NOT
tighten screws at this time.
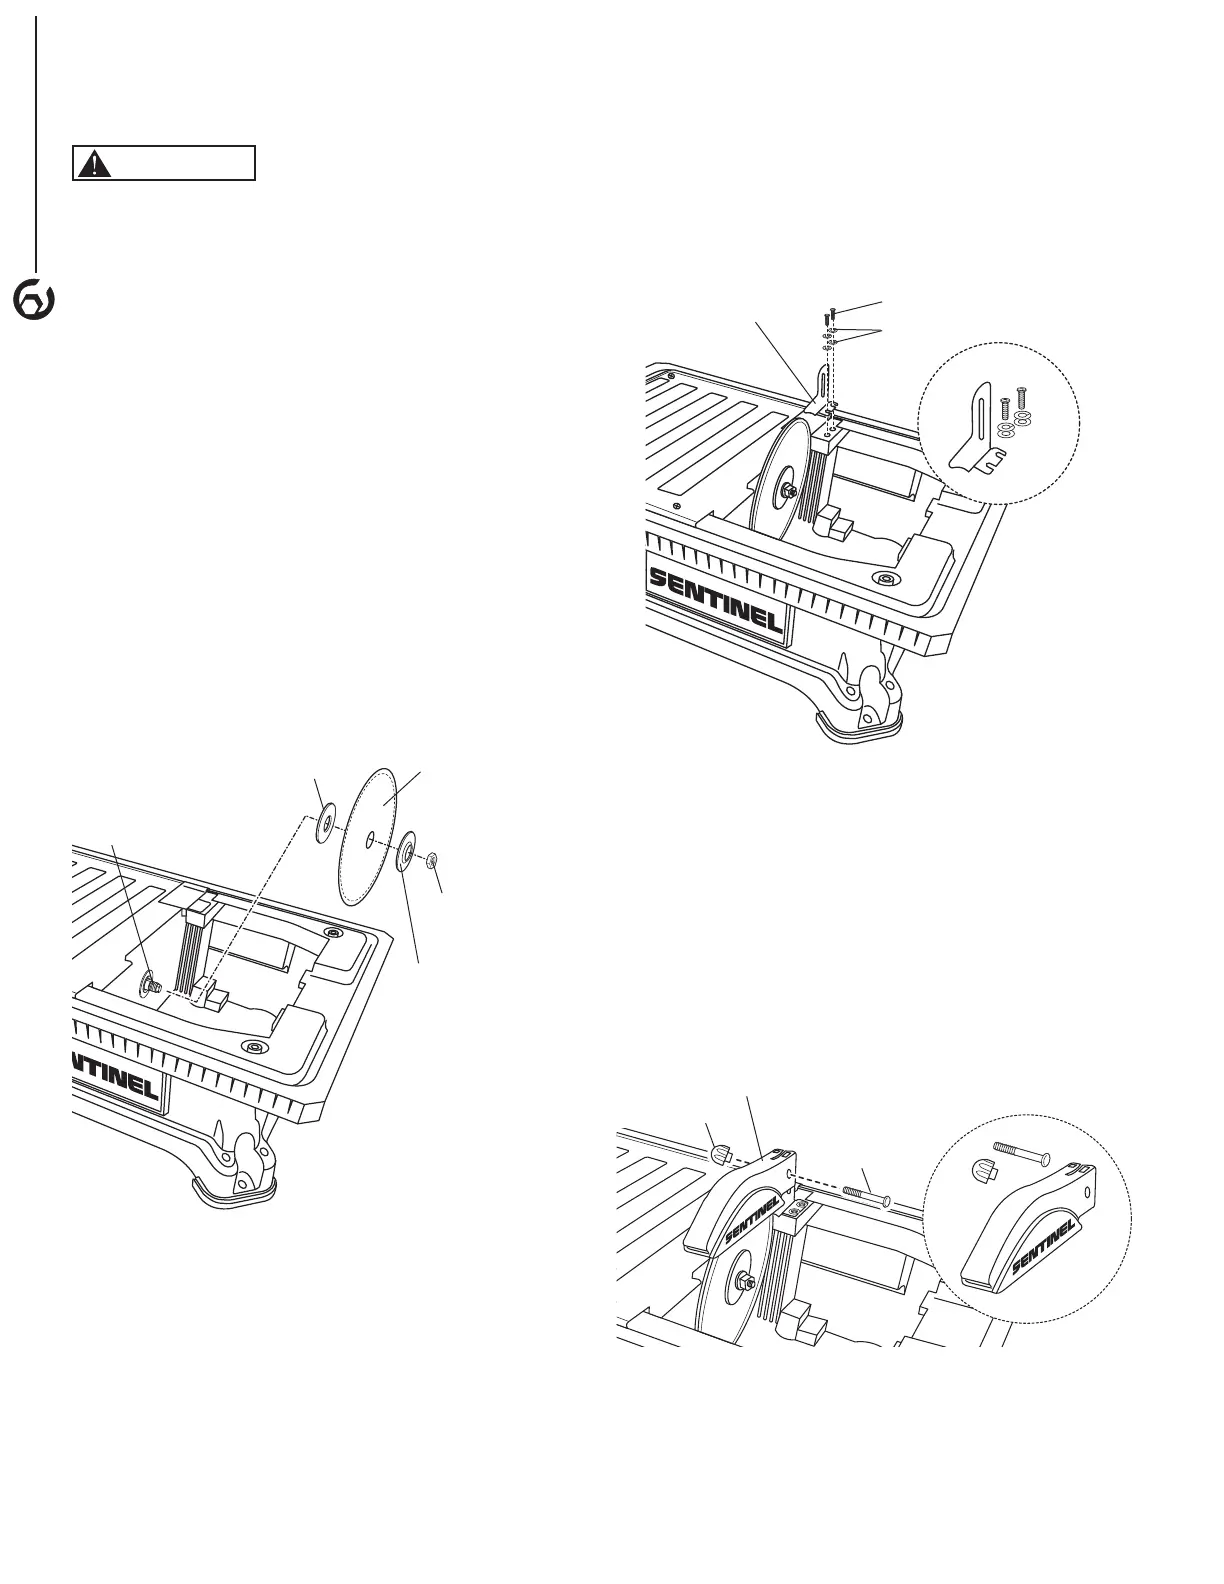
Figure 4A
Splash Hood Bracket
Washers
Screws
3. Align splash hood bracket with cutting wheel. Once
aligned tighten the screws.
4. Remove the bolt and knob from the splash hood.
5. Align splash hood with wheel and slide over bracket.
Insert bolt through splash hood and splash hood
bracket. Install knob and loosely tighten.
6. Adjust splash hood horizontally to table and slightly
above tile thickness. Hood should not be touching tile.
Fully tighten knob when splash hood is adjusted.
7. Replace bevel table.
Figure 4B
Splash Hood
Knob
Bolt
4
ASSEMBLY
 Loading...