5
ASSEMBLY
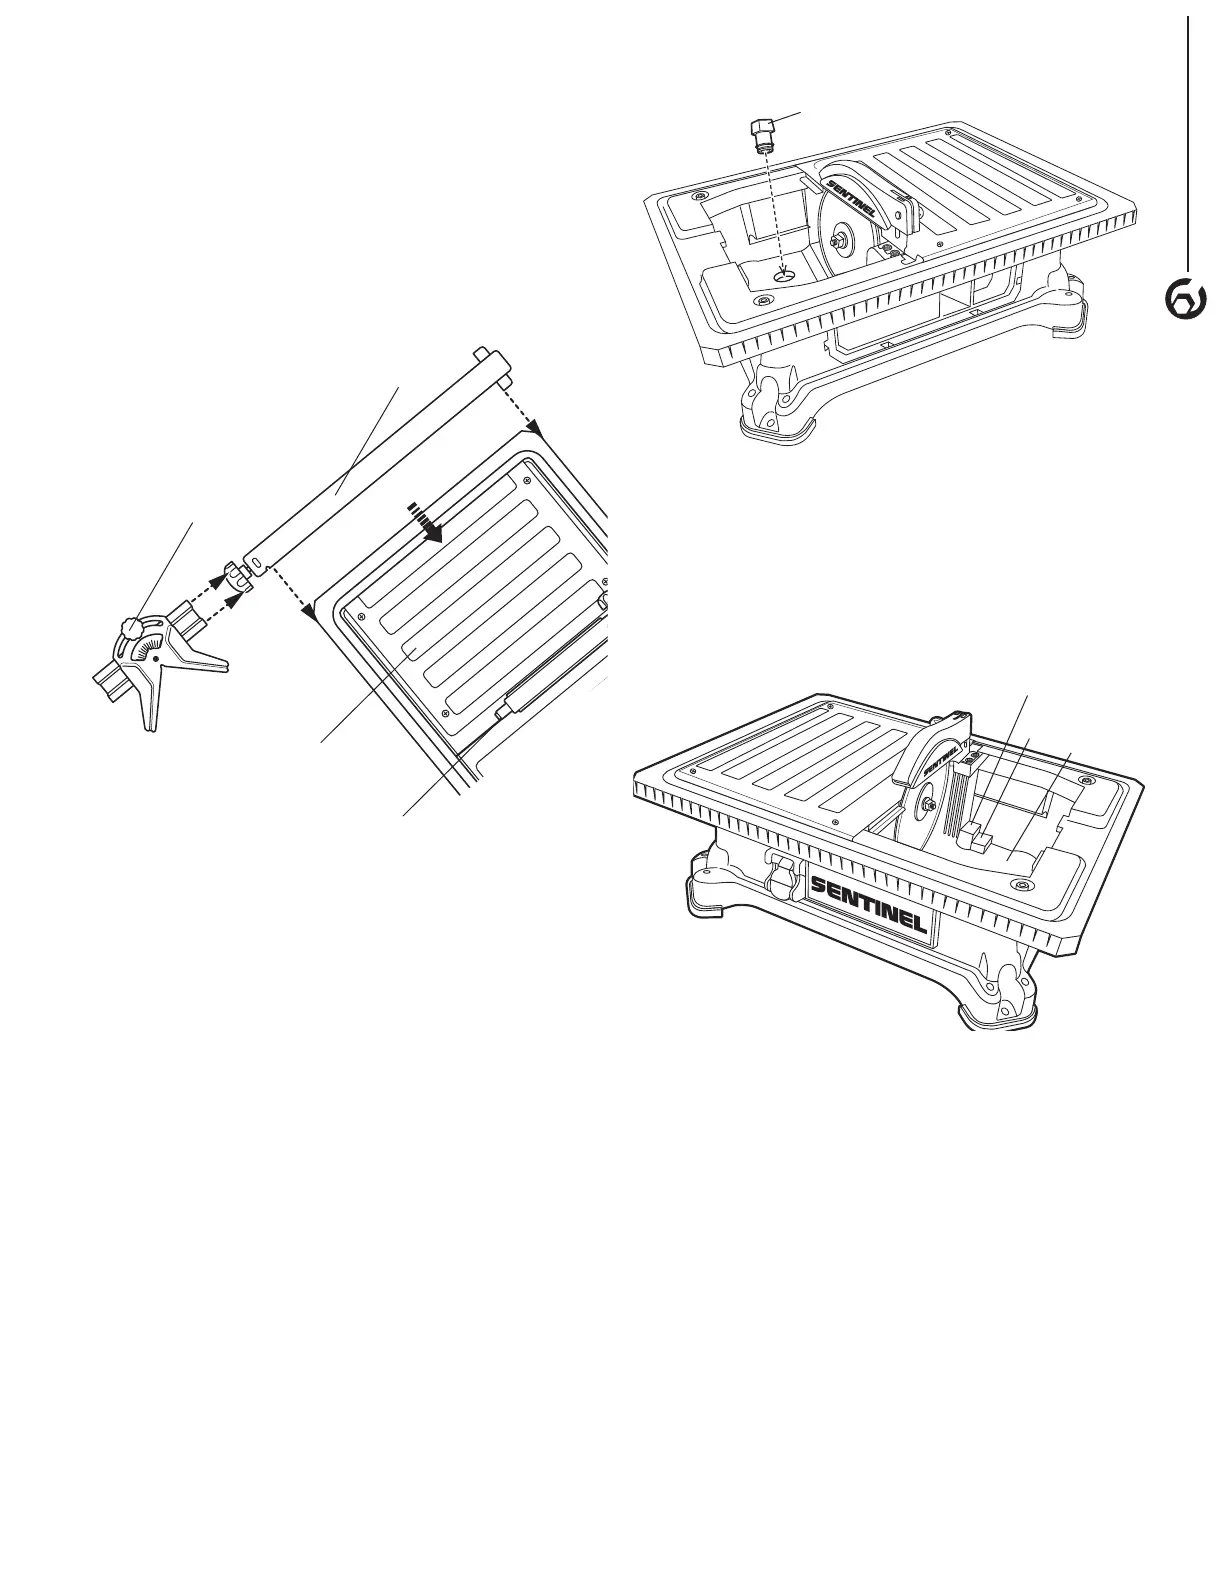
TO INSTALL THE RIP GUIDE
See Figure 5 and 13A
1. Loosen knob on rip guide by turning it
counterclockwise.
NOTE: If using the miter guide install it now.
2. Slide rip guide onto side of table. Use the lines on
the top of the table or a square to align rip guide to
the blade, see Figure 13A.
3. Turn rip guide knob clockwise to tighten securely.
Figure 5
Rip Guide
Miter Guide
Use these lines to align the
rip guide to the cutting wheel
Cutting Wheel
TO INSTALL THE MITER GUIDE
See Figure 5
1. Loosen rip guide knob and removed rip guide from
table and then slide the miter guide onto rip guide
as shown.
2. Adjust rip guide to desired position and tighten rip
guide knob.
3. Adjust miter guide to desired angle using angle scale
and tighten miter guide knob.
TO INSTALL THE OVERFLOW DRAIN
See Figure 6
1. Remove bevel table.
2. Locate hole on bottom of water fill reservoir.
3. Push overflow drain into hole firmly.
4. Replace bevel table.
Figure 6
Overflow Drain
TO FILL WATER RESERVOIR
See Figure 7
1. Remove bevel table.
2. Fill water reservoir with clean tap water to fill line.
NOTE: Overflow drain prevents overfilling.
3. Replace bevel table.
Figure 7
Reservoir
Low Water Line
Fill Line
To Drain Reservoir Water
1. Unplug tile saw.
2. Place a bucket under the overflow drain hole.
3. Remove overflow drain and empty into the bucket.
DO NOT allow water to splash onto ground or
around machine.
4. Discard waste water in accordance with
local regulations.
 Loading...