8
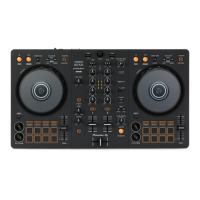
17. Stem-Split: Pressing this button performs the Stem-Split function
within Serato DJ. The track that is loaded to the deck is instant
doubled to the layers of the respective side. Decks 1/2 are always
set to the acapella stem and decks 3/4 are always set to
instrumental stem regardless of what deck is in focus when the
Stem-Split button is pressed. This allows you to adjust level, EQ,
and apply effects to the instrumental or acapella independently.
By default, deck functions are locked together, press one of the
deck buttons to manipulate the stem elements independently
from each other. Press the Stem-Split button again to sync the
stem elements.
Tip: Ensure the level of your desired channels are the same before triggering
Stem-Split.
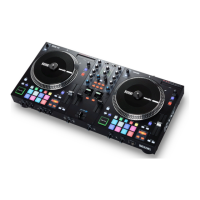
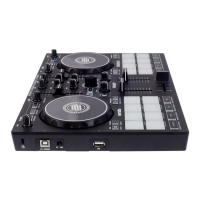
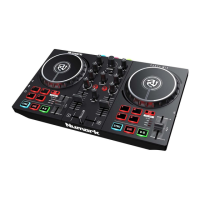
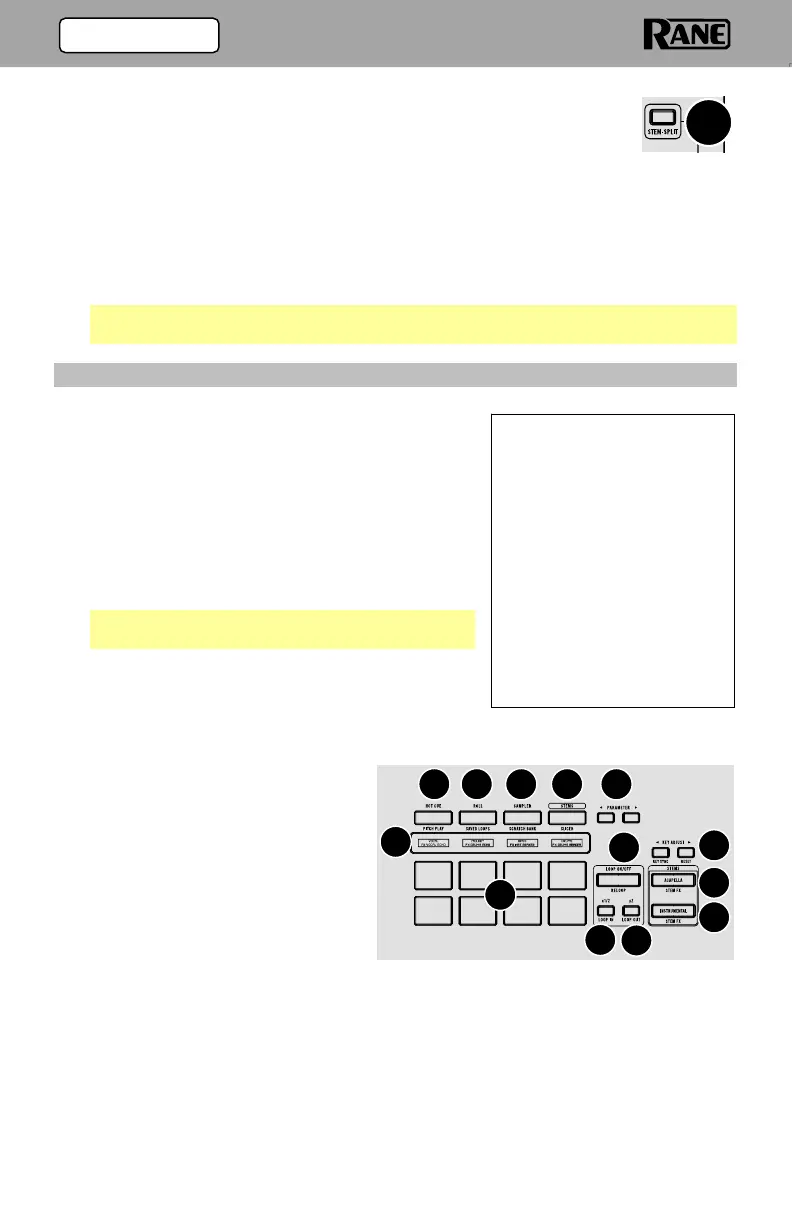
(3.1.2) Performance Pads
1. Hot Cue / Pitch Play: Single press this button
to enter the first pad mode, Hot Cue mode.
Press the button two consecutive times in
quick succession to enter the secondary pad
mode, Pitch Play mode.
Custom User Mode: Press and hold Shift and
press this button to access the custom user
pad mode where all 8 pads and the parameter
buttons can be assigned to various software
features.
Note: The Serato Pitch N Time plugin is
required to use Pitch Play mode.
2. Roll / Saved Loops: Single press this button to
enter the first pad mode, Roll mode. Press the
button two consecutive times in quick
succession to enter the secondary pad mode,
Saved Loop mode.
3. Sampler / Scratch Bank: Single
press this button to enter the
first pad mode, Sampler mode.
Press the button two
consecutive times in quick
succession to enter the
secondary pad mode, Scratch
Bank mode.
4. Stems: Single press this button
to enter the first pad mode,
Stem mode. Press the button
two consecutive times in quick
succession to enter the
secondary pad mode, Slicer
mode.
5. Parameter </>: Use these buttons to access various functions in each pad
mode.
6. Pad Display: Displays the current pad mode and/or specific pad info such as
sample name and hot cue names.
Combination Pad Mode:
Pressing and holding one of
the pad mode buttons and
then pressing another one will
enter combination pad mode.
The first button pressed from
the top row of pads (1-4) will
be the first pad mode and the
second pad mode will be
accessed from the lower pads
(5-8). While in combination
pad mode the parameter
buttons control the first pad
mode.
2 3 4 5
6
7
8
9
10
11
13
1
12
17
(3.0) FEATURES