Home
serverLink
LCD Drawer
LKS-CD17SR
Page 21 (Step a (Install Console))
serverLink LKS-CD17SR - Step a (Install Console)
34 pages
Manual
Save Page as PDF
To Next Page
To Next Page
To Previous Page
To Previous Page
Loading...
LKS-CD17SR / CD19SR User Manual
15
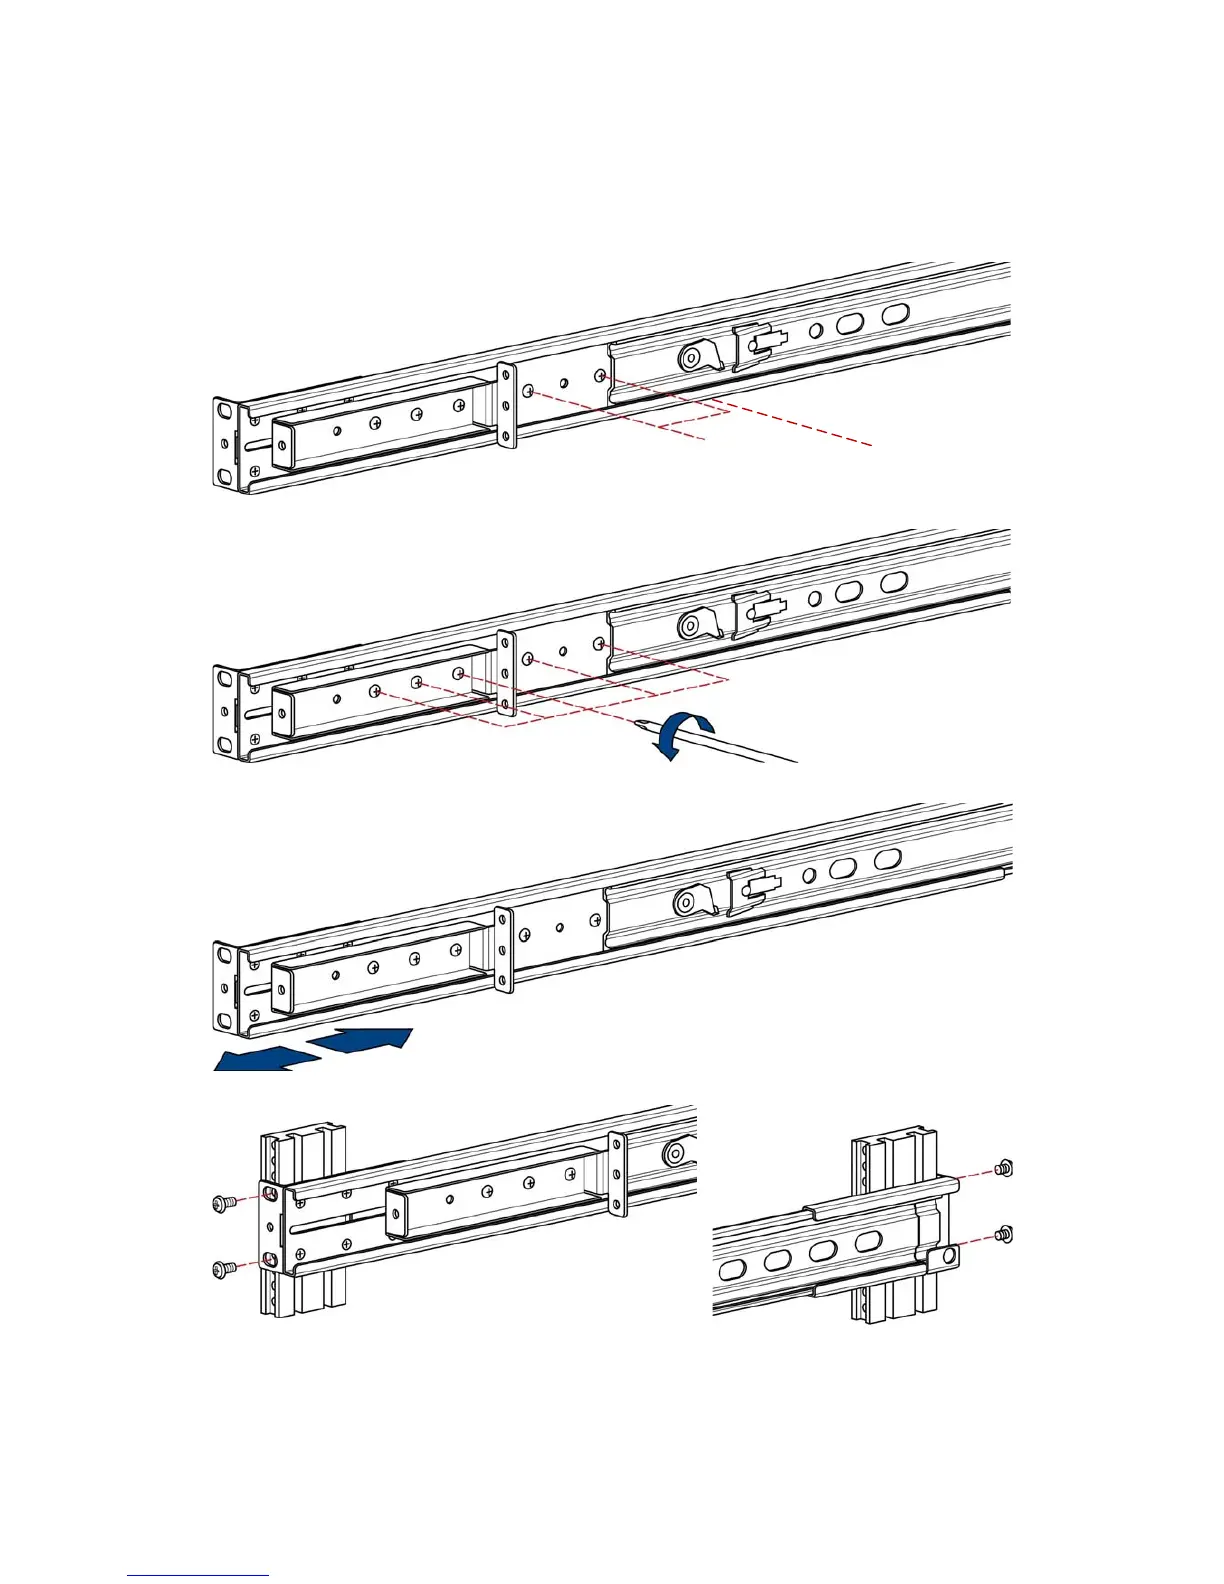
3.1.3
Step
A
(Install Console)
1. Adjust rail until
two screws appear.
2. Loosen (Do not rem
ove) five screws.
3. Adjus
t rail to fit you
r cabinet
4. Install front and r
ear
bracket on cabinet.
two screws
rail
20
22
Table of Contents
Main Page
Default Chapter
2
Packing List
2
Safety Instructions
3
Table of Contents
5
1 General Information
7
Features
7
Benefits
8
Product Specification
9
LKS-CD17SR Specification
9
LKS-CD19SR Specification
11
2 Panel Controls and OSD Function
13
Auto Tune
13
Input Source
14
Brightness
14
Contrast
15
Color
15
Position
16
Language
17
Recall
17
Exit
18
Power Indicator
18
3 Installation
19
Install 17" / 19" Single Rail Console into Cabinet
19
Notes
19
Hardware Kits Contents
19
Step a (Install Console)
21
Step B (Replace Short Bracket)
23
Step C (Replace Extended Bracket)
24
Install Modular KVM Switch
26
Install KVM Switch (8 / 16 Port High Density 15 Pin KVM)
26
Install KVM Switch (8 / 16 / 32 Cat 5 KVM)
27
Unload Steps
30
Installing the Video Card and Video Driver
32
Configuring the Display Settings
32
Connecting the Console
33
Turning on the Console
33
Testing the Console
33