27
ENGLISH
Instruction Manual
5.
Press button A once to increase the frequency by 1 Hz. Press
button B once to reduce the frequency by 1 Hz. Press the
corresponding button several times to adjust the frequency by
several levels. If the button remains pressed, the currently-set
tone is activated and can be checked. Check to see whether the
changed pitch is as desired.
6.
After the settings have been made, slide both DIP switches
to the OFF position (see small illustration).
Attention: After setting the desired pitch, wait for five seconds
until the setting can be stored in the processor.
7.
Fine tone adjustments can be made by turning the screw cap (see
chapter ‘Fine Pitch Adjustment’).
8.
After adjusting the desired pitch, unscrew the bottom cover
and remove the battery. Then slide on the titanium housing,
place the battery in the battery compartment and screw
on the bottom cover tightly.
Fine Pitch Settings
If the tone is too ‘unclear’, the screw cap must be screwed on more tightly. Please be careful
not to turn the screw cap too far, as it could be damaged in the process. To achieve a pure
tone at maximum volume, the screw cap can be loosened slightly.
Switching off the Device
The device can be turned off by turning the bottom cover rotation to the left (e.g. to avoid
unwanted sounds being emitted while carrying it).
Speech Melody
The tone sequence is not set or activated ex-works. If desired, it can be set individually using
the PC Transfer Set (contains an additional titanium housing, the data transfer cable and the
software on a CD-ROM).
It is recommended that the speech melody settings be integrated into speech therapy.
Carrying Cord
You can wear the device around your neck using the carrying cord. To remove or replace the car-
rying cord, proceed as follows:
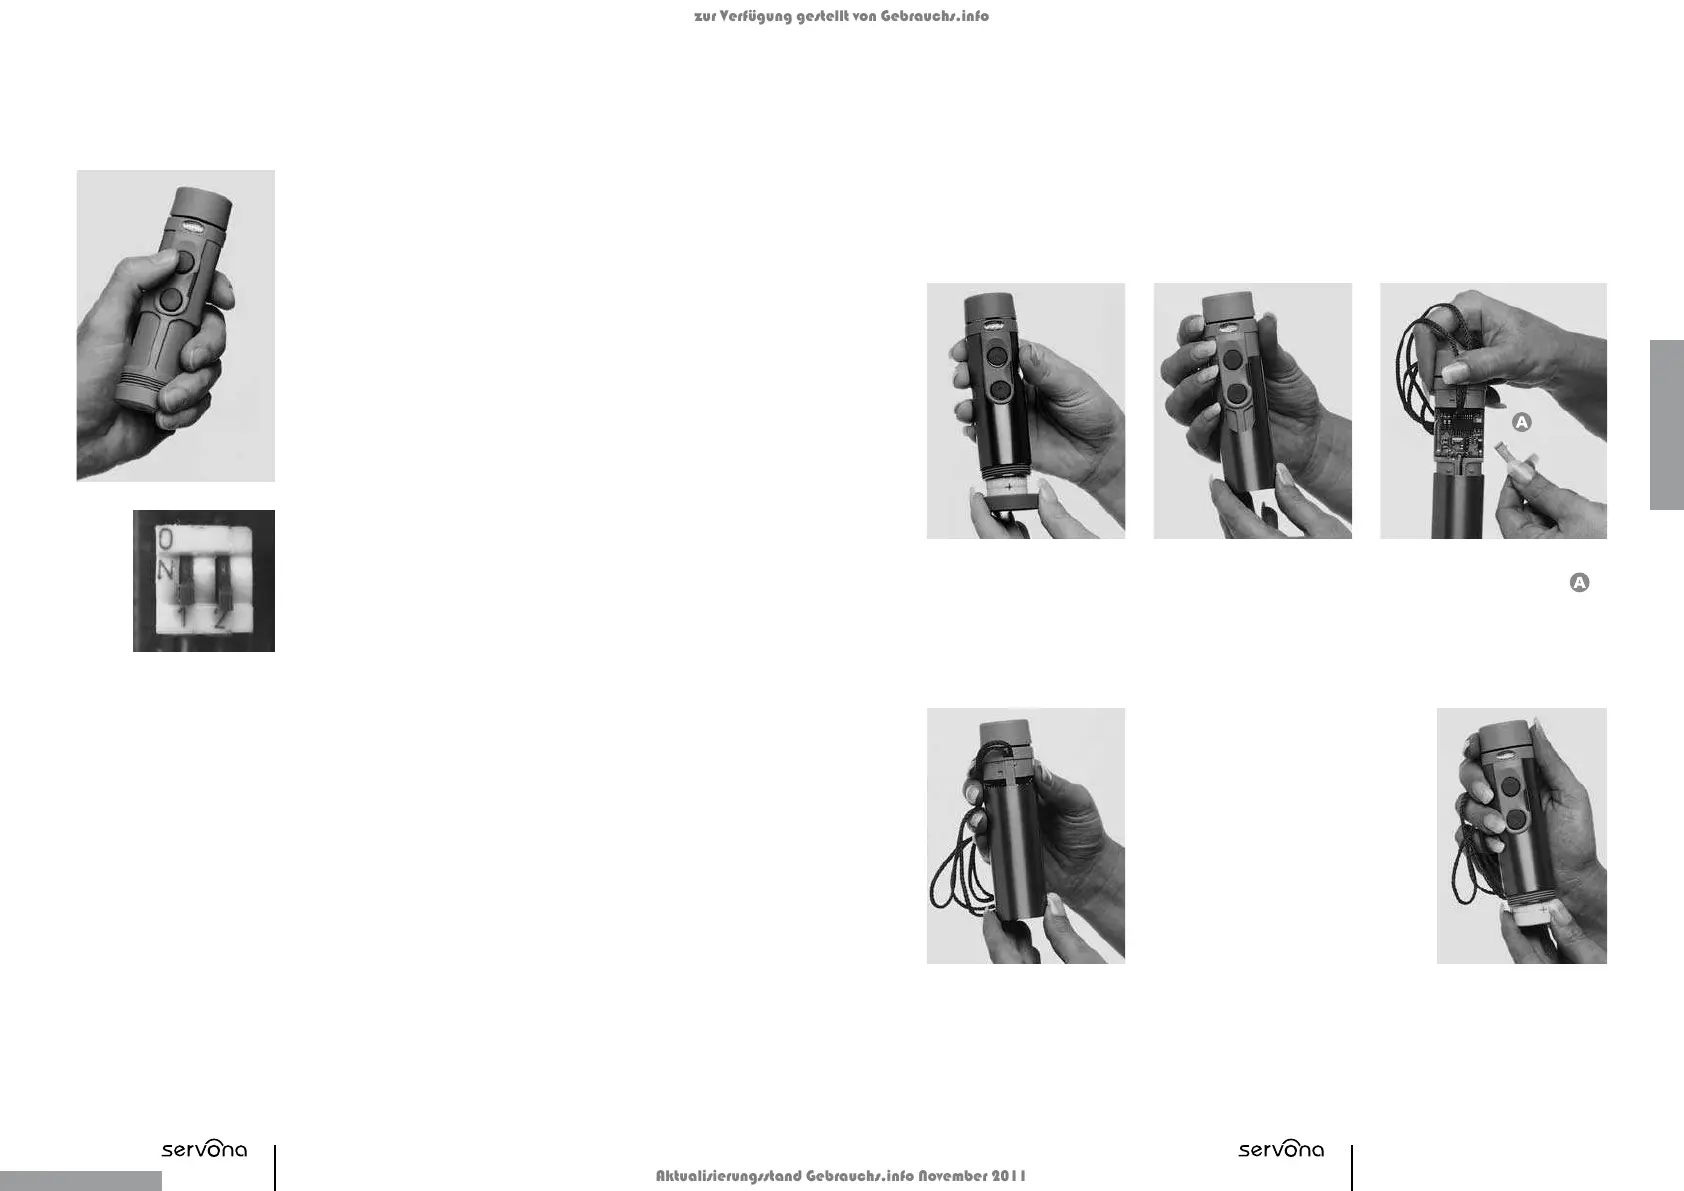
1.
Unscrew the bottom
cover and remove the bat-
tery.
2.
Hold the device at
the top and slide off the
titanium housing.
4.
Fix the cord using the cord protector
(the u-end of the cord protector
should point in the direction of the
head of device) and slide on the
titanium housing again.
Important: The titanium housing
should be easy to slide on. If this
is difficult, or it gets stuck, then the
cord protector needs to be turned.
If no safety cord is used, then the
cord protector is turned and in-
serted. It serves as a covering for the opening and prevents dirt from
getting into the inner part of the housing. The cord protector will in
this case be put into the top of the device with the sloped side. Here
also, the titanium housing should be easy to slide on.
5.
Place the battery back
into the battery com-
partment and screw the
bottom cover back on.
3.
Remove the cord protector
and pass the closure of the
carrying cord behind the slot
perpendicular to the electronics.
zur Verfügung gestellt von Gebrauchs.info
Aktualisierungsstand Gebrauchs.info November 2011