◎ Charging the internal battery while using the camera function etc. may
lengthen the charging time.
◎ If you perform various operations with a specified charger (sold
separately) connected to the product, charging/discharging may take
place repeatedly in a short time. Frequently charging the internal battery
shortens its service life.
◎ If you charge the internal battery when the battery has run out, the
charging/incoming indicator may not illuminate soon. However, charging
is in progress.
◎ If the charging/incoming indicator flashes in red, force the power off
(zP. 11) and turn the product on again. If the indicator continues to
flash, stop charging the internal battery and contact an au shop or the
Repair and Delivery Service Center.
Charging with the Specified AC Adapter (Sold
Separately)
The followings are the explanation of how to connect TypeC Common AC
Adapter 02 (sold separately) to charge. For details on the specified AC
adapter (sold separately), refer to “Peripheral Devices” (zP. 21).
A
Insert the power plug of TypeC Common AC Adapter 02
(sold separately) into a 100V AC outlet.
B
Insert the USB Type-C plug of TypeC Common AC Adapter
02 (sold separately) to the external connection jack of the
product in the direction of the arrow.
outlet
02 (sold separately)
External
connection jack
C
When charging is finished, pull out the USB Type-C plug of
TypeC Common AC Adapter 02 (sold separately) straight
from the external connection jack of the product.
D
Unplug the power plug of TypeC Common AC Adapter 02
(sold separately) from the outlet.
◎ Although you can charge the internal battery while the power is turned
on, charging time lengthens.
Turning the Power On/Off
Turning the Power On
A
f (hold down for at least 3 seconds) while the product
is turned off.
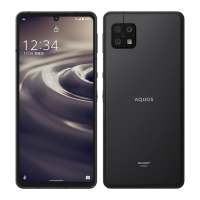
◎ The initial setting of the touch panel will be executed until “AQUOS”
disappears from the screen after the power is turned on. Do not touch
the screen, otherwise touch panel operations may not be performed
properly.
◎ When you turn the power on for the first time after purchasing the
product, the initial setting screen is displayed automatically. For details
on the initial setting, refer to “Setting Guide” available on the au
homepage.
10