TUNING/
TIME
( )
MEMORY/
SET
CLOCK
ON/
STAND-BY
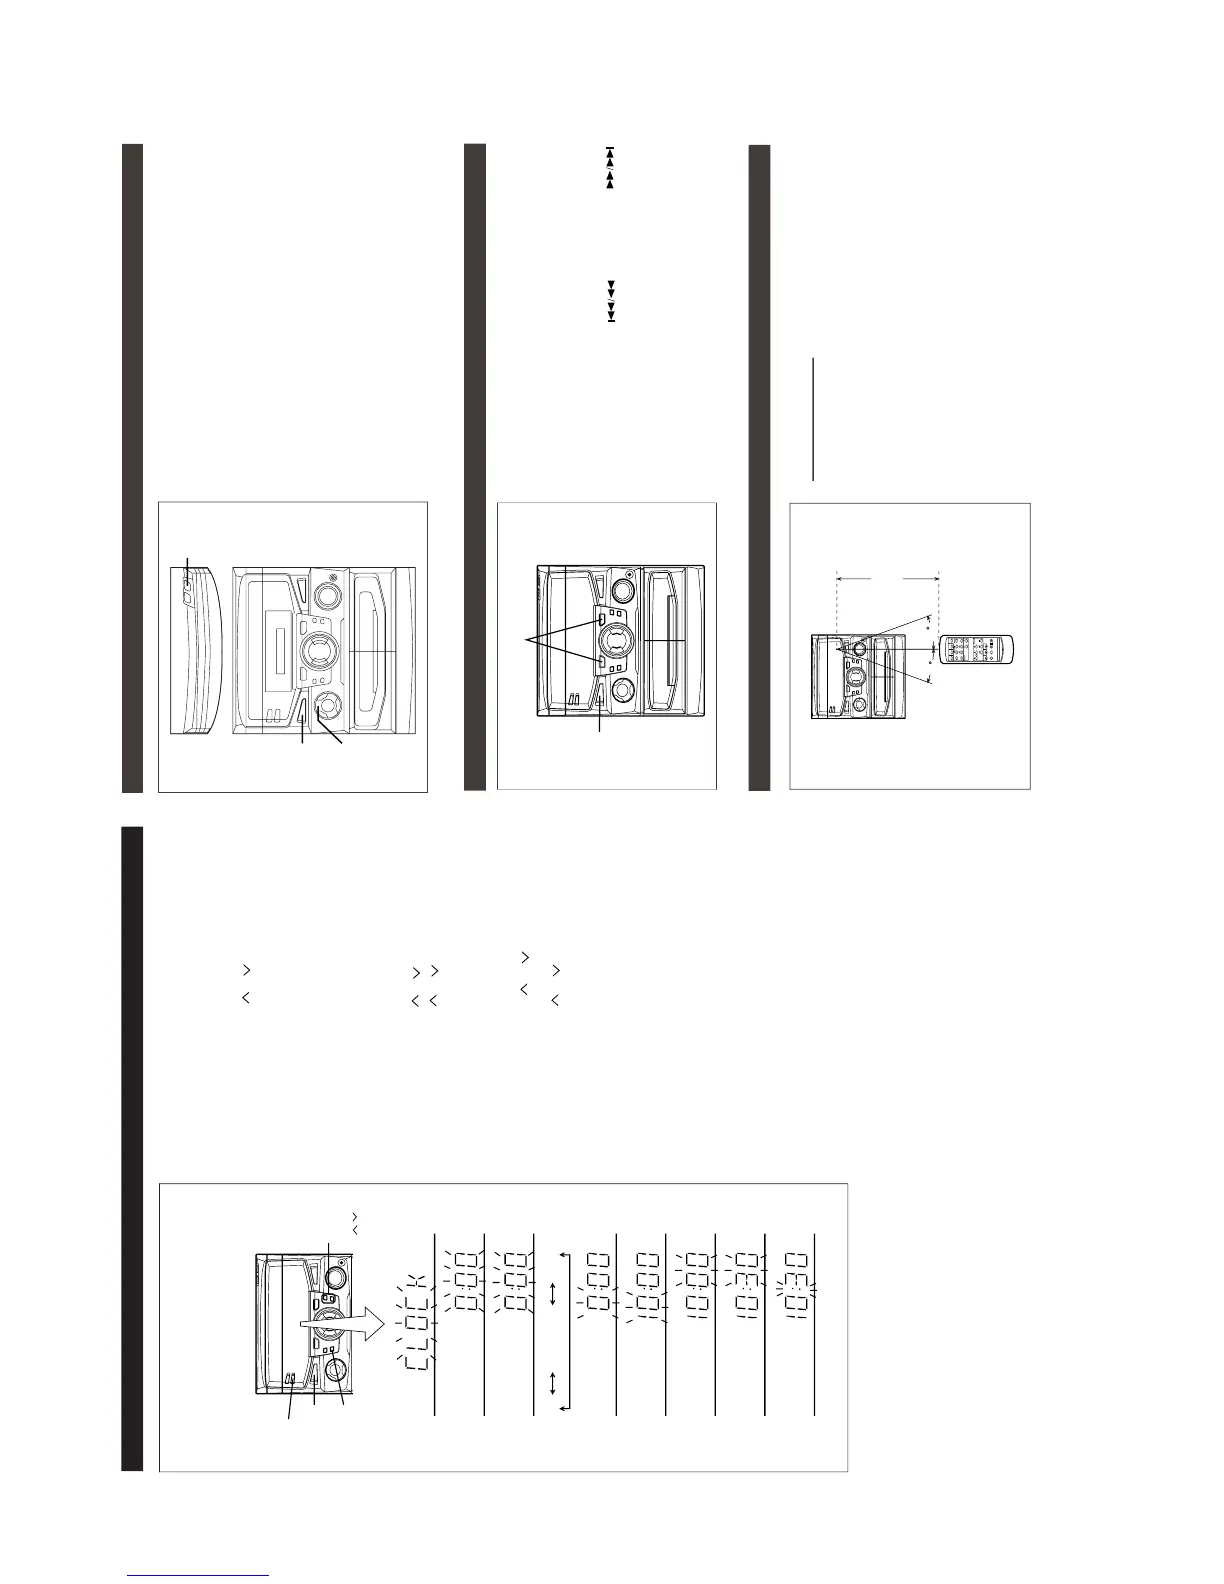
SETTING THE CLOCK
1 Press the ON/STAND-BY button to enter the stand-by mode.
2 Press the CLOCK button.
3 Within 5 seconds, press the MEMORY/SET button.
4 Press the TUNING/TIME ( or ) button to select the time
display mode.
"0:00" → The 24-hour display will appear.
(0:00 - 23:59)
"AM 12:00" → The 12-hour display will appear.
(AM or PM 12:00 - 11:59)
"AM 0:00" → The 12-hour display will appear.
(AM or PM 0:00 - 11:59)
●Note that this can only be set when the unit is first installed
or it has been reset.
5 Press the MEMORY/SET button.
6 Press the TUNING/TIME ( or ) button to adjust the hour.
● Press the TUNING/TIME ( or ) button once to advance
the time by 1 hour. Hold it down to advance continuously.
● When the 12-hour display is selected, "AM" will change auto-
matically to "PM".
7 Press the MEMORY/SET button.
8 Press the TUNING/TIME ( or ) button to adjust the
minutes.
● Press the TUNING/TIME ( or ) button once to advance
the time by 1 minute. Hold it down to change the time in 5
minute intervals.
● The hour setting will not advance even if minutes advance from
"59" to "00".
9 Press the MEMORY/SET button.
● The clock starts operating from "0" seconds.
(Seconds are not displayed.)
To see the time display:
Press the CLOCK button.
● The time display will appear for about 5 seconds.
Note:
● The clock display will flash on and off at the push of the CLOCK
button when the AC power supply is restored after a power
failure occurs or after the AC power lead is disconnected.
If this happens, follow the procedure below to change the clock
time.
To change the clock time:
①Press the CLOCK button.
②Within 5 seconds, press the MEMORY/SET button.
③Perform steps 6 - 9 above.
To change the time display mode:
①Perform steps 1 - 2 in the section "RESETTING THE MICRO-
COMPUTER".
②Perform steps 1 - 9 above.
(Main unit operation)
In this example, the clock is set for the
24-hour (0:00) system.
AM 0:00AM 12:000:00
2
3
4
7
6
5
8
9
2
1,2
RESETTING THE MICROCOMPUTER
Reset the microcomputer under the following conditions:
● To erase all of the stored memory contents (clock and timer
settings, and tuner and CD presets).
● If the display is not correct.
● If the operation is not correct.
1
Press the ON/STAND-BY button to enter the stand-by mode.
2
Whilst pressing down the button and the
button, hold down the ON/STAND-BY button for at least 1
second.
Caution:
● The operation explained above will erase all data stored in
memory including clock and timer settings, and tuner and CD
presets.
TRANSPORTING THE UNIT
Before you move this product to a new location, proceed as
follows:
1
Press the ON/STAND-BY button to turn the power on.
2
Press the CD button.
3
Press the OPEN/CLOSE button to open the disc tray.
● Remove all CDs inserted in the unit.
4
Press the OPEN/CLOSE button to close the disc tray.
● Make sure that "NO DISC" is displayed.
5
Press the ON/STAND-BY button to enter the stand-by mode,
and then unplug the AC power lead from the AC socket.
1,5
2
3,4
15
15
PREPARATION FOR USE
■ Remote control
Notes concerning use:
● Replace the batteries if the operating distance is reduced or if
the operation becomes erratic.
● Periodically clean the transmitter LED on the remote control
and the sensor on the main unit with a soft cloth.
● Exposing the sensor on the main unit to strong light may in-
terfere with operation. Change the lighting or the direction of
the unit.
● Keep the remote control away from moisture, excessive heat,
shock, and vibrations.
0.2 m - 6 m
(8" - 20')