DW-R249A_eng
A clogged filter will result in reduced dehumidification efficiency and higher power
consumption. It can also cause odor.
If you operate the unit without the filter, dust will accumulate in the unit, which may result in malfunction.
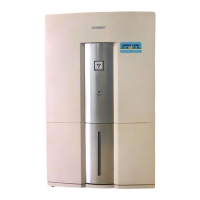
Main body
Wipe off any dirt from the unit using a piece of soft cloth soaked in warm water (40¡C max.) or with detergent.
(About once a month)
If detergent is used, make sure to wipe off the detergent with a damp cloth.
The air intake and outlet become dirty easily, so make sure to clean them well.
If water is allowed to splash on the unit, electrical insulation may be affected and corrosion of the unit may eventually result.
Use a neutral detergent (e.g. for dish washing) for cleaning.
Do not use the following types of cleaning agents as they will damage plastic parts.
Thinners, benzine, alcohol, petrol, powder soap, powder polish, alkaline washing agents, hot water, acid or scrubbing brushes.
Do not scrub or expose the unit to chemically treated cloths for any prolonged period of time as this may damage the surface of the unit.
Caution
Maintenance
For safety purposes, turn off and unplug the unit
before carrying out any maintenance.
For clean, sanitary and pro-long use, regular
maintenance is recommended.
E-16
Power supply
cord
Band
Empty the water tank completely.
Wind the power supply cord around the clamp on the rear panel.
If the unit is not used for a long time
Storage
Dry the unit thoroughly and cover with a sheet for dust protection. Store the unit in a well ventilated
place that is not exposed to direct sunlight. If the unit is left uncovered without any protection, dust
will accumulate so that the air emitted by the unit will be dusty next time the dehumidifier is used.
1
1
2
2
3
3
Clean the filter.
See above
See above
(1) Detach the tank lid gradually from the left or right toward the opposite side.
(2) Drop the tank handle to the front position as shown in the illustration on the
right, and slightly spread out the left and right side arms of the handle so that
the shafts come out, and remove the handle from the water tank.
(3) Push the float in the direction shown in the diagram and remove
it from the hole. With the float in this state, pull it out in direction .
(4) To reinstall, follow the above procedure in reverse ( ).
Float
Lever
Water
tank
* After having reinstalled these parts, make sure to move the float lever up and down with your finger to confirm that it moves smoothly.
If the float sticks, the overflow protection device located behind the lever will not work and the tank may overflow.
Removing and installing the tank lid, tank handle, and tank float.
Wash the inside of the water tank.
Wipe the water tank with a soft cloth, and install the tank lid, tank handle, and tank float.
(About once a week)
Water tank
If you do not insert the tank float securely, the tank can overflow, and the unit
will not stop. Take due care.
After prolonged use, the drain water may cause the tank to go black.
If this happens, wash the tank with a sponge, warm water and a mild detergent.
Remove the tank lid, tank handle and tank float, and wipe off any
excess water in the tank.
Filter
Filter
(About once 2 weeks)
* This filter is not intended for air
purification.
Dirty side up
Cleaning the filter
Remove dust and dirt with the corner tool of your vacuum cleaner.
If the filter is very dirty, wash it with neutral detergent diluted in
warm water. Rinse it off and let it dry well in the shade.