8
This section explains how to install the software and configure settings so that the printer and scanner function of the
machine can be used with a Windows computer.
OPENING THE SOFTWARE SELECTION
SCREEN (FOR ALL SOFTWARE)
1
Insert the "Software CD-ROM" into your
computer's CD-ROM drive.
• If you are installing the printer driver or printer status
monitor, insert the "Software CD-ROM" that shows
"Disc 1" on the front of the CD-ROM.
• If you are installing the PC-Fax driver or scanner
driver, insert the "Software CD-ROM" that shows
"Disc 2" on the front of the CD-ROM.
• If you are installing the PCL6 printer driver or PS
printer driver, insert the "Software CD-ROM" that does
not show "Disc 1" or "Disc 2" on the front of the
CD-ROM.
2
Click the [Start] button ( ), click
[Computer], and then double-click the
[CD-ROM] icon ( ).
In Windows 8/Server 2012, right-click in the startup
window (or swipe upward from the bottom edge), then
select [Taskbar] → [All Applications] → [Computer] and
then double-click [CD-ROM].
3
Double-click the [Setup] icon ( ).
4
The "SOFTWARE LICENSE" window will
appear. Make sure that you understand
the contents of the license agreement
and then click the [Yes] button.
5
Read the message in the "Welcome"
window and then click the [Next] button.
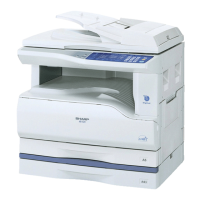
6
The software selection screen appears.
Before installing the software, be sure to click the
[Display Readme] button and view the detailed
information on the software.
* The above screen appears when using the
"Disc 1" CD-ROM.
For the steps that follow, see the appropriate page below
for the software that you are installing.
2
SETUP IN A WINDOWS
ENVIRONMENT
•
In Windows 7/8/Server 2012, if a message screen
appears asking you for confirmation, click [Yes].
• In Windows Vista/Server 2008, if a message screen
appears asking you for confirmation, click [Allow].
You can show the "SOFTWARE LICENSE" in a
different language by selecting the desired language
from the language menu. To install the software in the
selected language, continue the installation with that
language selected.
INSTALLING THE PRINTER DRIVER / PC-FAX DRIVER
•
WHEN THE MACHINE IS CONNECTED TO A NETWORK*
1
- Standard installation: page 10
- Advanced installation: page 12
-
Installation by specifying the machine's address: page 14
- Printing using the IPP function and the SSL
function*
2
: page 17
• WHEN THE MACHINE WILL BE CONNECTED WITH A
USB CABLE: page 19
•
USING THE MACHINE AS A SHARED PRINTER: page 23
INSTALLING THE PRINTER STATUS MONITOR: page 27
INSTALLING THE SCANNER DRIVER: page 28
*
1 If the machine is being used on an IPv6 network, see
"Installation by specifying the machine's address" (page 14).
*
2 Depending on the models, this function may not be available.