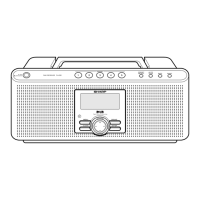
This document describes the SHARP FV-DB1E DAB Receiver, a digital audio broadcasting (DAB) and FM radio designed for private domestic use.
Function Description
The SHARP FV-DB1E is a DAB receiver that allows users to listen to digital audio broadcasting (DAB) and FM radio stations. DAB is a digital transmission system where audio signals are converted to digital signals for broadcasting. DAB broadcasts are organized into multiplexes (ensembles), each containing one or more stations (services), which may also include secondary services. This system allows multiple programs or services to be transmitted on a single frequency, providing a wider range of listening options and often better sound quality compared to traditional FM.
The device features an auto-tune function that automatically scans and creates a station list when first turned on. This list is stored in alphanumeric order, and the first station is automatically selected for listening. Users can also manually tune in stations, which is particularly useful if auto-tune cannot find certain stations or if reception is poor. The manual tune function also allows for sensitivity adjustment.
The receiver includes memory preset capabilities, allowing users to store up to 20 DAB and FM stations (5 stations for each of four zones: A, B, C, D). These stations can be recalled with the press of a button. For FM stations, both stereo and mono modes are memorized.
Beyond basic radio listening, the FV-DB1E offers advanced features such as an alarm function and a sleep operation. The alarm can be set to either a tone or a radio station, functioning as a wake-up call or for listening to the radio at a specific time each day. The sleep operation allows the user to set a timer after which the sound will be muted and the unit will power off, useful for falling asleep to the radio.
The device also supports external connections, enabling users to enhance their audio system. It can be digitally connected to an MD recorder for recording DAB sound, connected to a stereo system via an analogue line output for enjoying sound through external speakers, and has a headphone socket for private listening.
Usage Features
General Control:
- Power On/Stand-by: The unit is turned on or put into stand-by mode by pressing the ON/STAND-BY button.
- Volume Adjustment: Volume is controlled using the VOLUME (+ or -) button.
- Sound Mode: The SOUND button allows selection and adjustment of bass and treble levels.
- Clock and Date: When a DAB station is received, the date and time are automatically set. The CLOCK button can be pressed to display the current time and date.
- Backlight: The display backlight dims after 30 seconds of inactivity (when using AC adaptor) or turns off (when using batteries) to conserve power. Pressing any button will turn it back on.
DAB Operation:
- Aerial Adjustment: For optimal reception, the telescopic rod aerial should be raised, extended, and adjusted in position and length.
- Auto Tune: Automatically scans for and stores available DAB stations. The progress of the scan and the number of received stations are displayed.
- Selecting Stations: Once stations are scanned, they can be selected from the station list using the TUNING (✓ or ^) buttons. The display shows the current station name and the name of the station being scanned. If a station has secondary services, a ">" indicator appears, allowing selection of those services.
- Manual Tune: Allows users to manually tune in stations not found by auto-tune or to adjust sensitivity for poor reception. The reception sensitivity is displayed, showing minimum required level and current level.
- Station Order: Users can change the order of stations in the list (alphanumeric, favorite, active, or multiplex order) and trim inactive stations.
- DRC Value (Dynamic Range Control): Adjusts the sound level to make it more audible at low volumes. Options include DRC 1 (controlled as set for broadcast), DRC 0 (off), and DRC 1/2 (controlled half as much as broadcast level).
- Information Display: The INFO button cycles through various information displays, such as scrolling text (program information), program type, multiplex name, channel, mode (data transfer speed and channel type), and signal quality. Scrolling text can be paused, forwarded, or reversed.
FM Operation:
- Tuning: The TUNING (✓ or ^) buttons are used for both manual and auto-tuning of FM stations. Auto-tuning scans for receivable broadcast stations.
- FM Stereo: The BAND button can be pressed to display the "ST" indicator for FM stereo reception. If reception is weak, pressing the BAND button again extinguishes the "ST" indicator, changing reception to monaural for clearer sound.
Advanced Features:
- Storing Stations: Tune to the desired station, select a preset zone (A-D) using the PRESET SELECT button, then hold down a PRESET button (1-5) to store the station.
- Recalling Stations: Select the desired preset zone, then press the corresponding PRESET button (1-5) for less than 1 second.
- Erasing Presets: Hold down the PRESET SELECT button for 2 seconds or more, then press ENTER to clear all memory.
- Alarm Operation: Set the alarm time (hour and minute) and type (tone or radio) using the CLOCK and TUNING buttons. The alarm sounds or the radio turns on at the set time, with volume gradually increasing. It stops after 5 minutes (tone) or 1 hour (radio).
- Snooze Function: Pressing any button other than ON/STAND-BY during an alarm will pause it for 7 minutes. Repeated snoozing disables the alarm after 1 hour.
- Sleep Operation: Set a sleep timer (1-120 minutes) using the CLOCK and TUNING buttons. The sound will mute and the unit will power off after the set time, with volume gradually decreasing in the last minute.
External Connections:
- MD Recorder: Connect an optical digital cable to the DIGITAL OUT socket for recording DAB sound. FM signals are not sent through this socket.
- Stereo System: Connect an audio cable to the LINE OUT socket to enjoy sound through an external stereo system.
- Headphones: Plug headphones (3.5 mm stereo mini plug, 16-50 ohms impedance) into the HEADPHONE socket for private listening. Plugging in headphones automatically disconnects the speakers.
Maintenance Features
Cleaning the Cabinet:
- Routine Cleaning: Periodically wipe the cabinet with a soft cloth and a diluted soap solution, followed by a dry cloth.
- Chemical Avoidance: Do not use chemicals such as petrol or paint thinner for cleaning, as they may damage the cabinet finish.
- Oil Avoidance: Do not apply oil to the inside of the unit, as this may cause malfunctions.
Troubleshooting:
The manual provides a comprehensive troubleshooting chart to help users resolve common issues without needing service. This includes problems like the unit not responding, no sound, inability to receive DAB channels, interrupted or distorted sound, issues with secondary services, alarm malfunctions, and problems with station storage or clock keeping time. Solutions often involve resetting the unit, adjusting the aerial, or checking battery status.
If Trouble Occurs (Resetting):
In cases of strong external interference or incorrect operation, the unit may malfunction. To resolve this, users are advised to:
- Set the unit to stand-by mode and turn it back on.
- If the issue persists, unplug and replug the AC adaptor, and replace both main and memory batteries.
- Caution: This operation will erase all data stored in memory, including clock, alarm settings, tuner presets, and station list.
Clearing All Memory (Hard Reset):
To perform a complete memory clear:
- Enter stand-by mode.
- While holding down the PRESET 1 button and PRESET SELECT button, press the ON/STAND-BY button until "All clear ok?" appears.
- Within 30 seconds, press the ENTER button. "Complete" will appear, indicating memory is cleared.
- Caution: This operation will erase all data stored in memory, including clock, alarm settings, tuner presets, and station list.
Condensation:
Condensation can impair unit function. It may form after turning on a heater, in a room with excessive steam/moisture, or when moving the unit from a cool to a warm place.
- To Remove Condensation: Leave the unit for approximately 1 hour to allow the condensation to evaporate, after which it should function properly.
Battery Precautions:
- Correct Installation: Insert batteries according to the direction indicated in the battery compartment.
- Long-term Storage: Remove batteries if the unit will not be used for prolonged periods to prevent damage from leakage.
- Replacement: Replace all old batteries with new ones at the same time. Do not mix old and new batteries.
- Memory Batteries: Memory batteries maintain clock settings and preset stations. If they are not inserted or are low, these settings will be lost. Replace them approximately once a year.
- Rechargeable Batteries: Do not use rechargeable batteries.
AC Adaptor Usage:
- Unplugging: Unplug the AC adaptor from the wall socket if the unit will not be used for a prolonged period.
- Supplied Adaptor: Use only the supplied AC adaptor to prevent electric shock or fire.
- Main Batteries: Connecting the AC adaptor disconnects the main batteries.
Environmental Considerations:
- Ventilation: Ensure at least 10 cm (4") of free space around the unit for proper ventilation. Do not cover ventilation openings with items like newspapers or curtains.
- Placement: Keep the unit away from direct sunlight, strong magnetic fields, excessive dust, humidity, and electronic/electrical equipment that generates electrical noise. Do not place anything on top of the unit.
- Temperature: Do not expose the unit to temperatures higher than 60°C (140°F) or extremely low temperatures. The apparatus is designed for use in moderate climates (5°C - 35°C / 41°F - 95°F).
- Moisture: Do not expose the appliance to dripping or splashing. No objects filled with liquids, such as vases, should be placed on the apparatus.
- Naked Flames: No naked flame sources, such as lighted candles, should be placed on the apparatus.
- Battery Disposal: Attention should be drawn to the environmental aspects of battery disposal.
Safety:
- AC Adaptor: Hold the AC adaptor plug by the head when removing it from the wall socket to avoid damaging internal wires.
- Covers: Do not remove outer covers, as this may result in electric shock. Refer internal service to a SHARP service facility.
- Voltage: The voltage used must be the same as specified on the unit. Using a higher voltage is dangerous and may result in fire or other damage. SHARP is not responsible for damage resulting from incorrect voltage use.
- Volume Control: Avoid exposure to high volume levels. Do not turn on the unit with maximum volume. Keep the volume moderate.
- Electrical Storms: Unplug the unit for safety during an electrical storm.