LC-42XL2E/S/RU, LC-46XL2E/S/RU, LC-46X20E/S/RU, LC-52XL2E/S/RU, LC-52X20E/S/RU
3 – 1
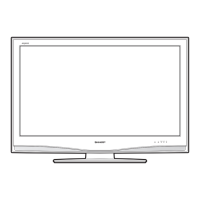
LC42XL2E
Service Manual
CHAPTER 3. ADJUSTMENT PROCEDURE
[1] ADJUSTMENT PROCEDURE
1. Adjustment method after PWB and/or IC replacement due to repair
The unit is set to the optimum at the time of shipment from the factory. If any value should become improper or any adjustment is necessary due to
the part replacement, make an adjustment according to the following procedure.
1. Procure the following units in order to replace the main unit, IC3301, IC8101, IC3501, IC3502, IC8301, IC8302, IC8303, or IC8304.
NOTE: [Caution when replacing ICs in the main unit (IC1501/IC1502/IC1503/IC2002) or the mini av unit (IC802)]
The above ICs are EEPROMs storing the EDID data of HDMI and the monitor microcomputer. Before replacing the relevant part, procure the
following parts in which the data have been rewritten.
2. After replacing the LCD panel or LCD control PWB, check PANEL_SIZE in the following procedure.
1) Enter the process adjustment mode.
2) Use the cursor keys / and P / of R/C to select the item [PANEL_SIZE] on the page 33/33.
3) Verify that the panel size is displayed.
4) If the size doesn't match, select the values of the panel size with the Vol / keys.
5) After selection in Step 4), press the OK key, and it is completed with OK displayed.
3. After replacing the LCD panel or LCD control PWB, adjust the VCOM in the following procedure.
1) Enter the process adjustment mode.
2) Use the cursor keys / and P / of R/C to select the item [VCOM ADJ] on the page 10/33.
3) Press the OK key to verify that the adjustment pattern is displayed.
4) Use the +/- keys of VOL of L/C to adjust the flicker in the center of the screen to minimum.
5) When the optimal state is achieved in Step 4, press the OK key to turn the pattern to OFF.
4. After replacing LCD panel or LCD control PWB, perform the up/down brightness difference adjustment in the following procedure. (Note: It is appli-
cable to LC-42/46/52XL2E only.)
1) Enter the process adjustment mode.
2) Use the cursor keys / and P / of R/C to select the item [LCD_LUMA_ADJ] on the page 10/33.
3) Press the OK key to verify that the adjustment pattern (all gray) is displayed.
4) Use the VOL +/- keys of R/C to adjust the upper/lower brightness difference in the center of the screen to minimum.
5) When the optimal state is achieved in Step 4, press the OK key to turn the pattern to OFF.
NOTE: LCD LUMA UD ** ←The value at the ** part is changed.
LCD LUMA DOWN 0 (Note that the value is changed if the P / keys are pressed in Step 4 above.)
MAIN UNIT: DUNTKE186FM01 (LC-42/46/52XL2E)
DUNTKE186FM02 (LC-46/52XL20E)
IC2002 RH-IXB986WJN8Q Monitor microcomputer
IC802 RH-IXC284WJQZS HDMI_EXT4
IC1501 RH-IXC285WJQZS HDMI_EXT5
IC1502 RH-IXC286WJQZS HDMI_EXT6
IC1503 RH-IXC287WJQZS RGB (PC)_EXT7