MX-TR10 8 - 1
[8] MX-TR10
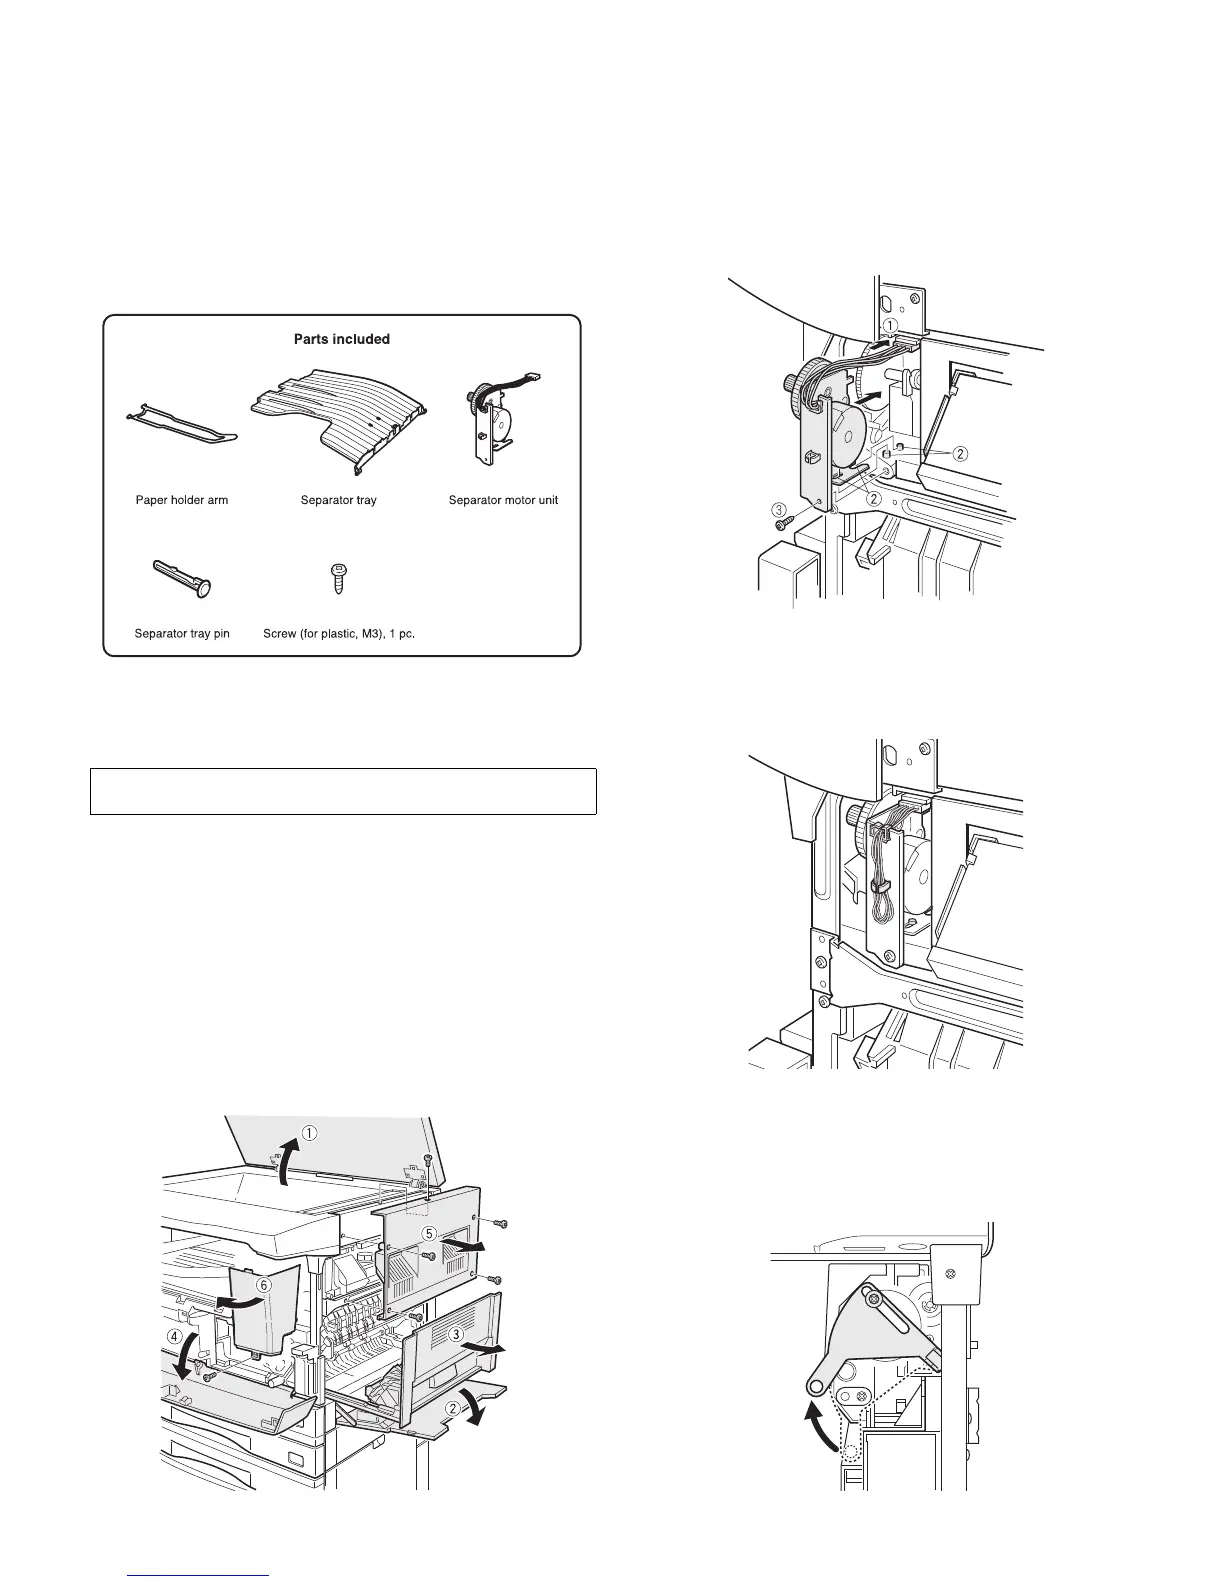
1. Unpacking
<Before installation>
• For improvement of workability, some description in this manual as
well as components and accessories may change without prior
notice.In this case, refer to the service manual.
2. Installation
2-1. Remove the right cabinet and the right front cab-
inet.
1) Open the document cover or the document feeder.
2) Open the bypass tray.
3) Remove the right door.
4) Open the front cover
5) Remove the five screws and then remove the right cabinet.
6) Remove the screw and then remove the right front cabinet.
2-2. Attach the separator motor unit.
1) Connect the connector.
2) Insert the two bosses of the copier into the positioning holes of the
separator motor unit and secure it with the supplied screw.
2-3. Arrange the wiring of the separator motor unit.
1) Insert the excessive cord into the clamp attached on the separator
motor unit and arrange the wiring as shown in the illustration.
2-4. Move the separator lever.
1) Rotate the separator gear to move the lever to the position shown in
the illustration. Do not move the lever position until operation check
is performed.
Turn off the main switch of the copier and then remove the power plug
of the copier from the outlet.