MX-M182 DISASSEMBLY AND ASSEMBLY 10-10
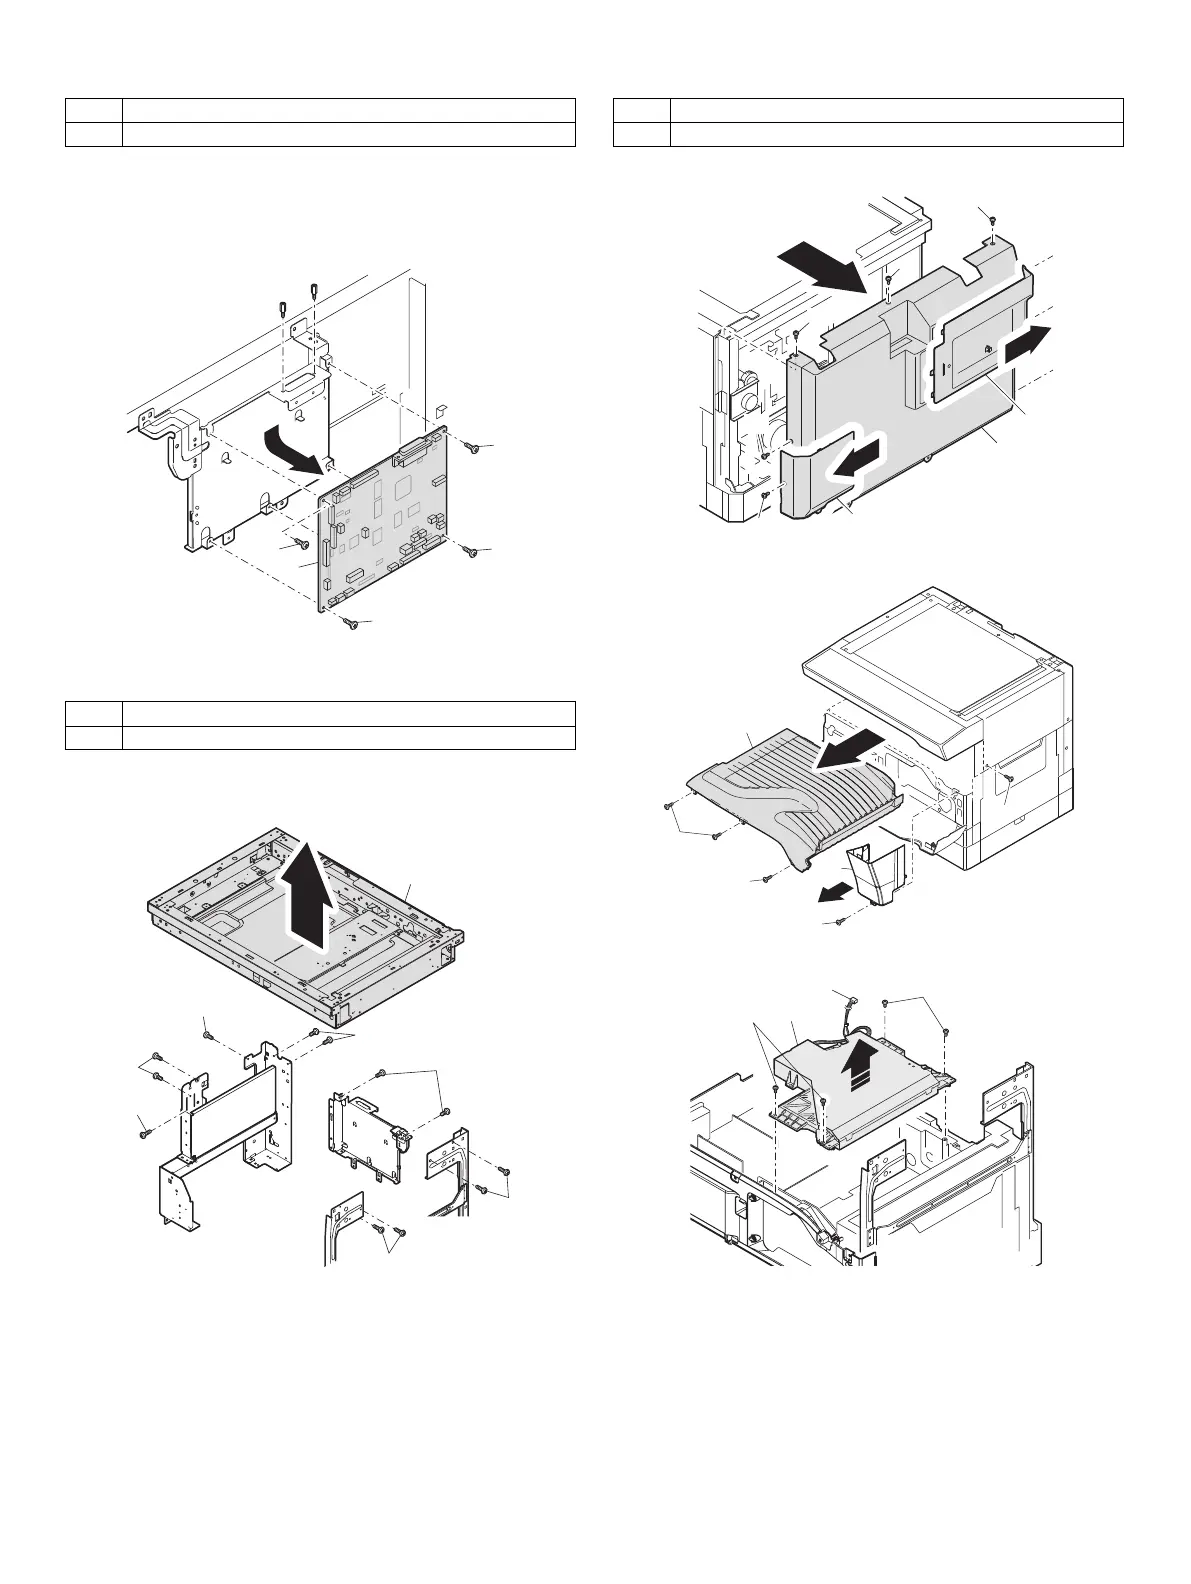
5. MCU
A. MCU disassembly
Disassembly: The connector, the harness, and the screw are removed.
Note:When replacing the MCU PWB, be sure to replace the EEPROM of
the MCU PWB to be replaced.
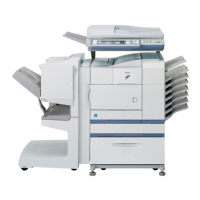
6. Optical frame unit
A. Optical frame unit
Installation: Install the optical unit in the sequence shown above.
7. LSU
A. LSU unit
Note:Do not disassemble the LSU.
Note:When replacing the LSU, be careful not to touch the dust-shield
glass.
Note:Turn OFF the machine power, anddisconnect the power plug from
the power outlet.
Adjustment:
•Image lead edge position adjustment
•Image left edge position adjustment
•Paper off-center adjustment
No. Content
A MCU disassembly
No. Content
A Optical frame unit
(2)
(1)
(1)
(1)
(1)
(1)
(1)
(1)
No. Content
A LSU unit
(1)
(3)
(3)
(1)
(4)
(2)