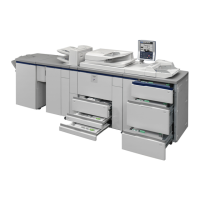
MX-M200D EXTERNAL VIEWS AND INTERNAL STRUCTURES 5-3
3. Operation Section
21 22 23 24 25
16 17 18 19 20
11 12 13 14 15
06 07 08 09 10
01 02 03 04 05
EXPOSURE
COLOR MODE
PROGRAM
COPY
SCAN
FAX
SPECIAL
FUNCTION
FAX STATUS
SHIFT
SYMBOL
SPACE/–
SPEAKER
REDIAL/PAUSE
SPEED
COMM. SETTING
LINE
DATA
DATA
ON LINE
FAX
SCAN
PRINT
COPY
32 64
1
5157
ABC DEF
JKLGHI MNO
TUVPQRS WXYZ
@.-
_
READ-END
ACC. #-C
BACK
OK
INTERRUPT
ZOOM
ADDRESS
ADDRESS
DUPLEX SCAN
DUPLEX SCAN
DUPLEX
PAPER
RESOLUTION
RESOLUTION
AUTO%
FORMAT
BROADCAST
OUTPUT
ORIGINAL SIZE
ORIGINAL SIZE
8 910 11 1412
16 17 18 19 20 21 22 262523 24
13
1 Keys for fax function (when the fax option is installed)
These are used in fax mode.
14 [INTERRUPT] key ( ) / INTERRUPT indicator
Interrupts a copy run to allow an interrupt copy job to be performed.
2 [COPY] key / indicator
Press to select copy mode.
If pressed when "Ready to copy." appears or during warm-up, the
total number of sheets used appears while the key is pressed.
15 [EXPOSURE] key
Use to select the exposure mode. "AUTO", "TEXT", or "PHOTO" can
be selected.
3 [PRINT] key / indicator
Press to select print mode.
n ONLINE indicator
Print jobs can be received when this indicator is lit.
n DATA indicator
This lights steadily when there is a print job in memory that has not been
printed, and blinks during printing.
16 [PAPER] key
Use to manually select a paper tray.
4 [SCAN] key / indicator
Press to select scan mode. (To connect a computer to the USB port
on the machine and use the scanner function. To use the machine
as a network scanner.)
17 [ZOOM] key
Press to select a reduction or enlargement copy ratio.
5 [FAX] key / indicator (when the fax option is installed)
LINE indicator, DATA indicator This key is used in fax mode.
18 [AUTO%] key
Press to have the copy ratio selected automatically.
6 [FAX STATUS] key (when the fax option is installed)
This key is used in fax mode.
19 [OUTPUT] key
Use to select the sort function.
7 [SPECIAL FUNCTION] key
Press to select special functions.
20 [DUPLEX] key (only on models that support two-sided printing)
Select the two-sided copying mode.
8 Display
Shows various messages.
21 Arrow keys
Press to move the highlighting (which indicates that an item is
selected) in the display.
9 Copy number display
The selected number of copies appears. During copying, this shows
the remaining number of copies.
22 [ACC.#-C] key ( )
Press the end the use of an account and return the display to the
account number entry screen.
10 [BACK] key
Press to return the display to the previous screen.
23 [0] key
Press during a continuous copy run to display the number of copies
completed.
11 [OK] key
Press to enter the selected setting.
24 [READ-END] key ( )
When copying in sort mode from the document glass, press this key
when you have finished scanning the original pages and are ready to
start copying.
12 Numeric keys
Use to select the number of copies.
25 [CA] key
Clears all selected settings and returns the machine to the default
settings.
13 [C] key
Press to clear the set number of copies or stop a copy run.
26 [START] key ( ) / indicator
Copying is possible when this indicator is on. Press the key to start
copying.