EasyManua.ls Logo

Sharp R-308KK User Manual

Sharp R-308KK
41 pages
To Next Page IconTo Next Page
Page #1 background imageLoading...
Page #1 background image
PRECAUTIONS TO BE OBSERVED BEFORE AND
DURING SERVICING TO AVOID POSSIBLE EXPO-
SURE TO EXCESSIVE MICROWAVE ENERGY
BEFORE SERVICING
CHAPTER 1. WARNING TO SERVICE PERSONNEL
CHAPTER 2. MICROWAVE MEASUREMENT PRO-
CEDURE
CHAPTER 3. FOREWORD AND WARNING
CHAPTER 4. PRODUCT DESCRIPTION
CHAPTER 5. GENERAL INFORMATION
CHAPTER 6. OPERATION
CHAPTER 7. TROUBLESHOOTING GUIDE
CHAPTER 8. TEST PROCEDURES
CHAPTER 9. TOUCH CONTROL PANEL ASSEMBLY
CHAPTER 10. PRECAUTIONS FOR USING LEAD-
FREE SOLDER
CHAPTER 11. COMPONENT REPLACEMENT AND
ADJUSTMENT PROCEDURE
CHAPTER 12. CIRCUIT DIAGRAMS
Parts Guide
No. S2504R308KPKW
MICROEAVE OVEN
R-308KK
R-308KW
SERVICE MANUAL
R-308KK
R308KW
MODELS
CONTENTS
SHARP CORPORATION
This document has been published to be used
for after sales service only.
The contents are subject to change without notice.
In the interest of user-safety the oven should be restored to its origi-
nal condition and only parts identical to those specified should be
used.
WARNING TO SERVICE PERSONNEL: Microwave ovens con-
tain circuitry capable of producing very high voltage and cur-
rent, contact with following parts may result in a severe,
possibly fatal, electrical shock. (High Voltage Capacitor, High
Voltage Power Transformer, Magnetron, High Voltage Rectifier
Assembly, High Voltage Harness etc..)

Table of Contents

Question and Answer IconNeed help?

Do you have a question about the Sharp R-308KK and is the answer not in the manual?

Sharp R-308KK Specifications

General IconGeneral
BrandSharp
ModelR-308KK
CategoryMicrowave Oven
LanguageEnglish

Summary

Precautions for Microwave Energy Exposure

Before Servicing

General safety checks and procedures before starting service work.

Chapter 1. Warning to Service Personnel

Before Servicing Procedures

Steps to take before performing service on the oven.

Post-Testing Procedures

Procedures to follow after completing service tests on the oven.

After Repair Procedures

Final steps and checks after completing repair work.

Chapter 2. Microwave Measurement Procedure

Measurement Requirements

Specifies the necessary conditions for microwave emission testing.

Preparation for Testing

Outlines the steps to prepare for microwave leakage measurement.

Leakage Test Procedure

Details the procedure for measuring microwave leakage.

Chapter 3. Foreword and Warning

Foreword

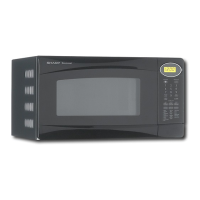
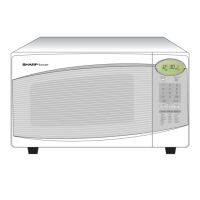
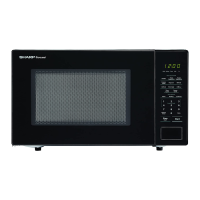
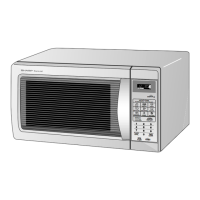
Introduction to the service manual for specific models.

General Warnings

Lists essential checks before operating the oven.

Danger High Voltage

Highlights hazardous parts and risks during servicing.

Chapter 4. Product Description

Specifications

Provides detailed technical specifications of the microwave oven.

Chapter 5. General Information

Grounding Instructions

Explains proper grounding procedures for safety.

Oven Diagram

Illustrates the internal and external parts of the oven.

Chapter 6. Operation

Operating Sequence Description

Details the functional sequence of the oven during operation.

Oven Schematic Diagrams

Presents the schematic diagrams for the oven's electrical circuits.

Component Functions

Explains the purpose of various oven components.

Chapter 7. Troubleshooting Guide

Troubleshooting Chart

A table correlating problems with possible causes and parts.

Chapter 8. Test Procedures

Procedure A: Magnetron Assembly Test

Step-by-step guide to test the magnetron assembly.

Procedure B: Power Transformer Test

Step-by-step guide to test the power transformer.

Procedure C: High Voltage Rectifier Test

Step-by-step guide to test the high voltage rectifier.

Procedure D: High Voltage Capacitor Test

Step-by-step guide to test the high voltage capacitor.

Procedure E: Temperature Fuse (Magnetron) Test

Step-by-step guide to test the magnetron temperature fuse.

Procedure E: Thermal Cut-Out (Oven) Test

Step-by-step guide to test the oven thermal cut-out.

Procedure F: Secondary Interlock Switch Test

Step-by-step guide to test the secondary interlock switch.

Procedure F: Primary Interlock System Test

Step-by-step guide to test the primary interlock system.

Procedure G: Monitor Switch Test

Step-by-step guide to test the monitor switch.

Procedure H: Blown Monitor Fuse Test

Step-by-step guide to test a blown monitor fuse.

Procedure I: Noise Filter Test

Step-by-step guide to test the noise filter.

Procedure: Touch Control Panel Assembly Test

Guide for testing the touch control panel assembly.

Procedure K: Key Unit Test

Step-by-step guide to test the key unit.

Procedure L: Relay Test

Step-by-step guide to test relays.

Procedure M: Defrost Test

Guide for performing the defrost test.

Procedure N: Foil Pattern on the Printed Wiring Board Test

Guide to test foil patterns on the PWB as a fuse.

Chapter 9. Touch Control Panel Assembly

Outline of Touch Control Panel

Overview of the touch control panel's units and functions.

Description of LSI

Details the Input/Output signals of the LSI.

Servicing for Touch Control Panel

Provides precautions and procedures for servicing the touch panel.

Chapter 10. Precautions for Using Lead-Free Solder

Employing Lead-Free Solder

Information on identifying and using lead-free solder.

Using Lead-Free Wire Solder

Guidelines for using lead-free wire solder.

Soldering Techniques

Precautions and techniques for soldering with lead-free solder.

Chapter 11. Component Replacement and Adjustment Procedure

Warnings for Component Replacement

Critical safety warnings for high voltage and microwave energy exposure.

Outer Case Removal

Step-by-step guide to remove the oven's outer case.

Power Transformer Removal

Step-by-step guide to remove the power transformer.

High Voltage Components Removal

Steps to remove high voltage capacitor and rectifier.

Magnetron Removal

Step-by-step guide to remove the magnetron.

Positive Lock Connector Removal

Steps to remove positive lock connectors.

Control Panel Assembly Removal

Step-by-step guide to remove the control panel assembly.

Graphic Sheet and Membrane Switch Replacement

Procedures for replacing graphic sheets and membrane switches.

Turntable Motor Removal

Step-by-step guide to remove the turntable motor.

Cooling Fan Motor Removal

Step-by-step guide to remove the cooling fan motor.

Power Supply Cord Replacement

Step-by-step guide to replace the power supply cord.

Door Sensing Switch Removal

Steps to remove door sensing and interlock switches.

Switch Adjustment

Procedures for adjusting door sensing and interlock switches.

Door Replacement

Step-by-step guide for replacing the oven door.

Chapter 12. Circuit Diagrams

Pictorial Diagram (Figure S-1)

A visual representation of the oven's wiring and components.

Control Unit Circuit (Figure S-2)

Detailed circuit diagram for the control unit.

Printed Wiring Board of Power Unit (Figure S-3)

Diagram of the power unit's printed wiring board layout.

Sharp Parts Guide

How to Order Replacement Parts

Instructions for correctly ordering replacement parts.

Oven Parts

Lists and illustrates oven components for replacement.

Door and Control Panel Parts

Lists and illustrates door and control panel components.

Related product manuals