6
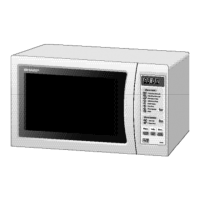
OVEN DIAGRAM
OVEN:
1. LED Display
2. Control panel
3. Door open button
4. Door safety latches
5. Waveguide cover
(
Do not remove
)
6. Coupling
7. See through door
8. Door hinges
9. Door seals and sealing surfaces
10. Oven cavity
11. Oven lamp
12. Power supply cord
13. Ventilation openings
14. Outer cabinet
ACCESSORIES:
15. Turntable
16. Roller stay
• Place the roller stay in the centre of the oven
floor, then place the turntable on to the roller
stay, ensuring it is located firmly into the
coupling.
• To avoid turntable damage, ensure dishes or
containers are lifted clear of the turntable rim
when removing them from the oven.
NOTES:
• The waveguide cover is fragile. Care should be taken when cleaning inside the oven to ensure that it is not
damaged.
• After cooking fatty foods without a cover, always clean the cavity thoroughly, it must be dry and free from
grease. Built-up grease may overheat and begin to smoke or catch fire.
• Always operate the oven with the turntable fitted correctly. This promotes thorough, even cooking. A badly
fitted turntable may rattle, may not rotate properly and could cause damage to the oven.
• The turntable rotates clockwise or anti-clockwise. The rotary direction may change each time you start the
oven. This does not affect cooking performance.
1
2
4
5
6
7
8
4
12
13
15
16
3
R-45SV(ST).indb 8R-45SV(ST).indb 8 2023/05/30 12:31:002023/05/30 12:31:00