AR-D34/AR-D35 5 - 2
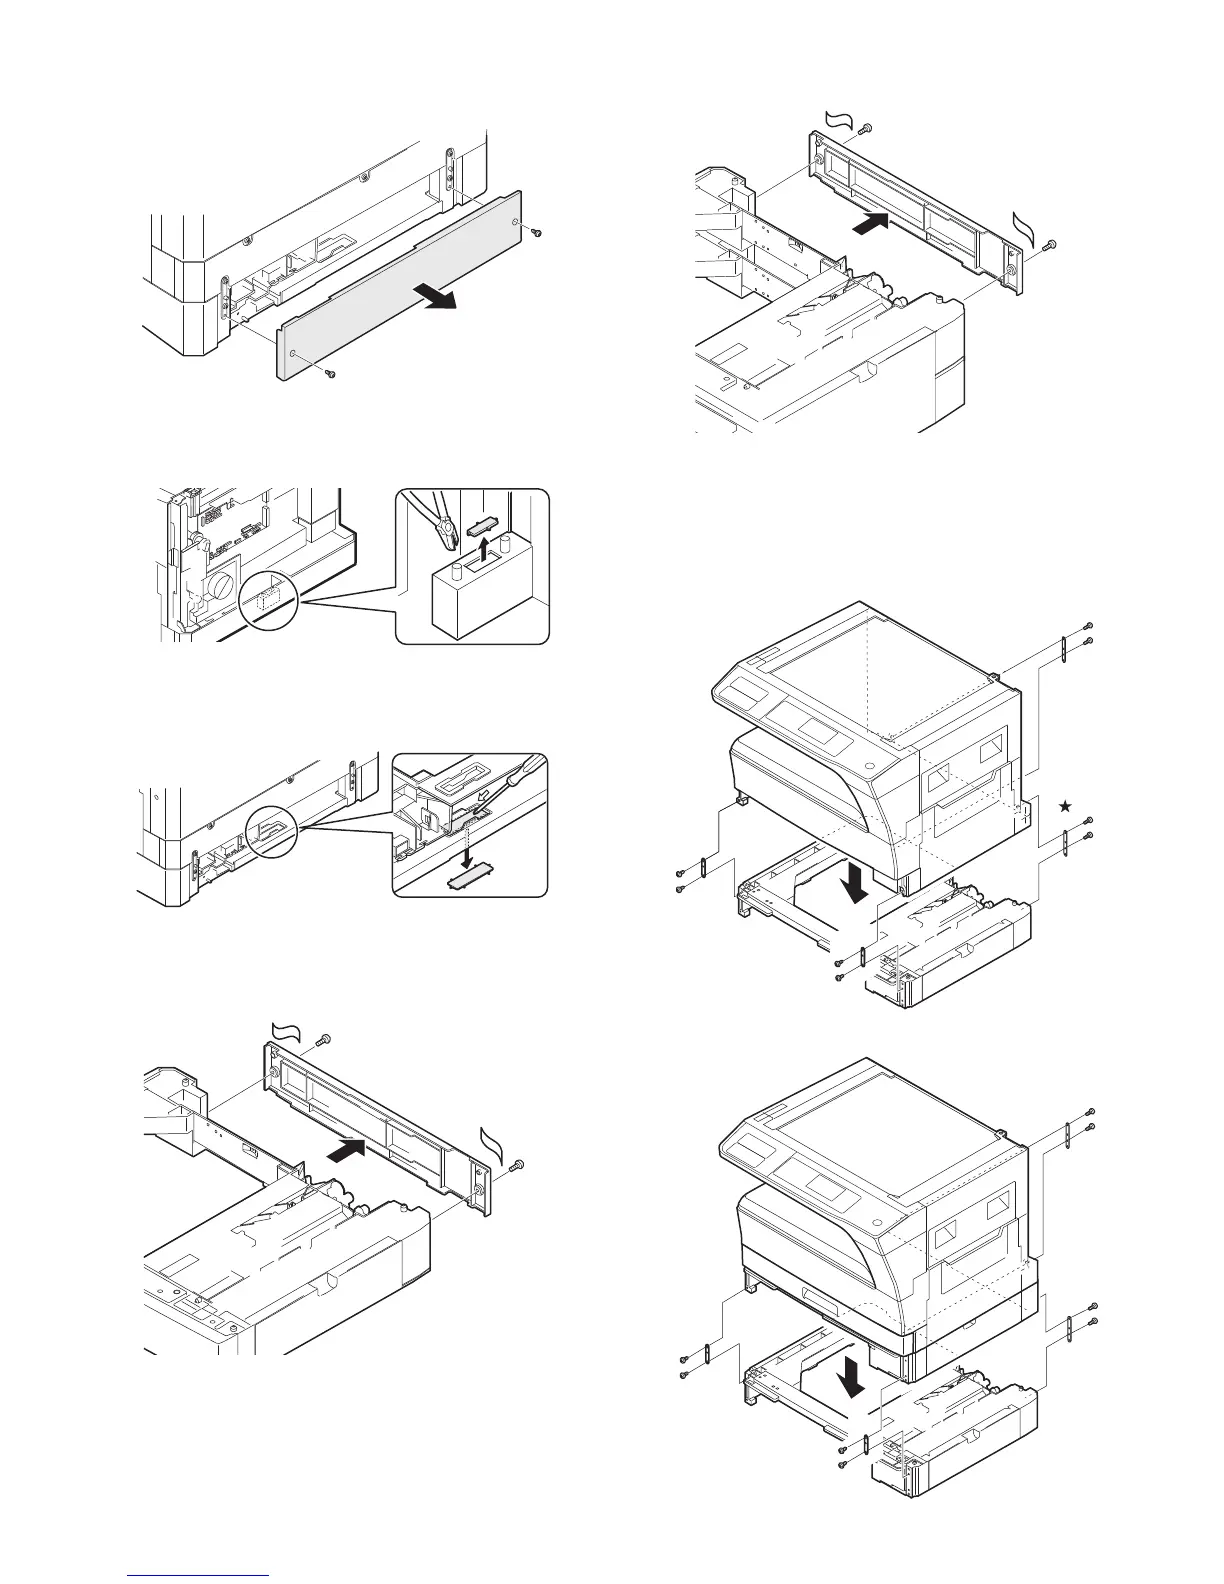
3) Remove the copier rear cover.
Remove the two screws and remove the rear cover.
4) Make a hole for connector.
• Copier (1-tray model)
Cut out the portion shown in the illustration with nippers or the like.
• Copier (2-tray model)
Press the portion shown in the illustration with a screwdriver or the
like to remove it.
5) Remove the second cassette rear cover.
Remove the rear cover which is attached to the 250-sheet paper feed
unit.
Remove the rear cover (upper stage) from the 500-sheet paper feed
unit.
6) Install the copier onto the 250-sheet paper feed unit.
Put the copier on the 250-sheet paper feed unit, and fix with the fixing
plates and the screws.
Use the small fixed plate for front side of the machine.
• Copier (1-tray model) + 250-sheet paper feed unit
• Copier (2-tray model) + 250-sheet paper feed unit
 Loading...