MX-FX10 6 - 2
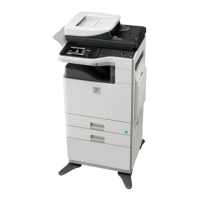
4) Reattach the rear cover.
<1>Insert the claw locks of the rear cover into the copier, and slide it to
left until they are securely locked.
<2>Secure the cover using two screws.
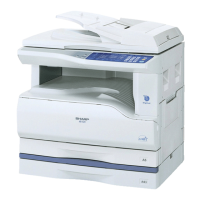
5) Remove keyboard back cover.
<1>Unscrew two screws from the keyboard back cover.
<2>Release the lock as shown, and remove the back cover.
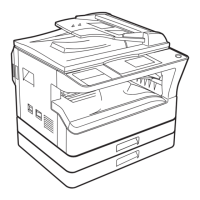
6) Remove dummy panel.
<1>Unscrew from the dummy panel.
<2>Disengage the pawls, and remove it from the copier.
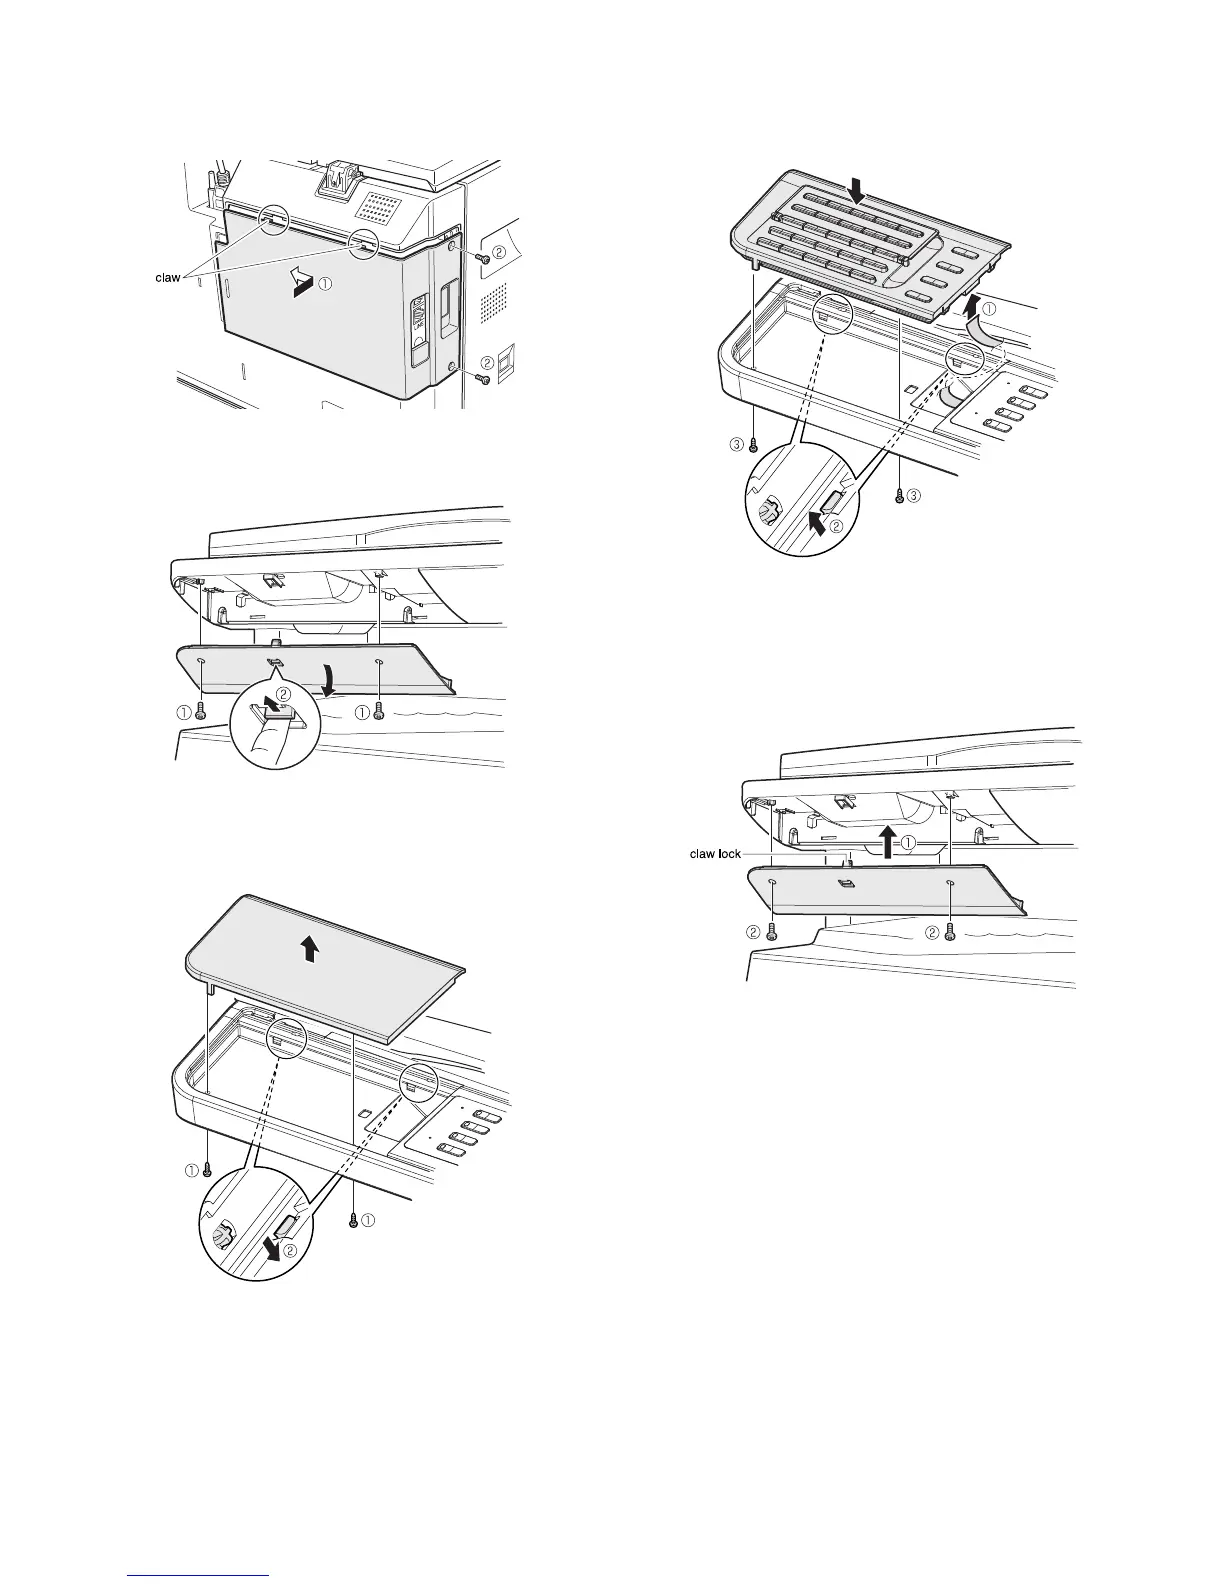
7) Attach FAX keyboard.
<1>Connect the copier flat cable to FAX keyboard.
<2>Place the FAX keyboard onto the copier while engaging the pawls.
<3>Secure the keyboard using a screw.
8) Reattach keyboard back cover.
<1>Insert the claw lock of the keyboard back cover into the copier.
Make sure that the claw lock is securely inserted.
<2>Secure the cover using two screws.
 Loading...