- 2 -
DEFAULT SETTINGS
GETTING STARTED
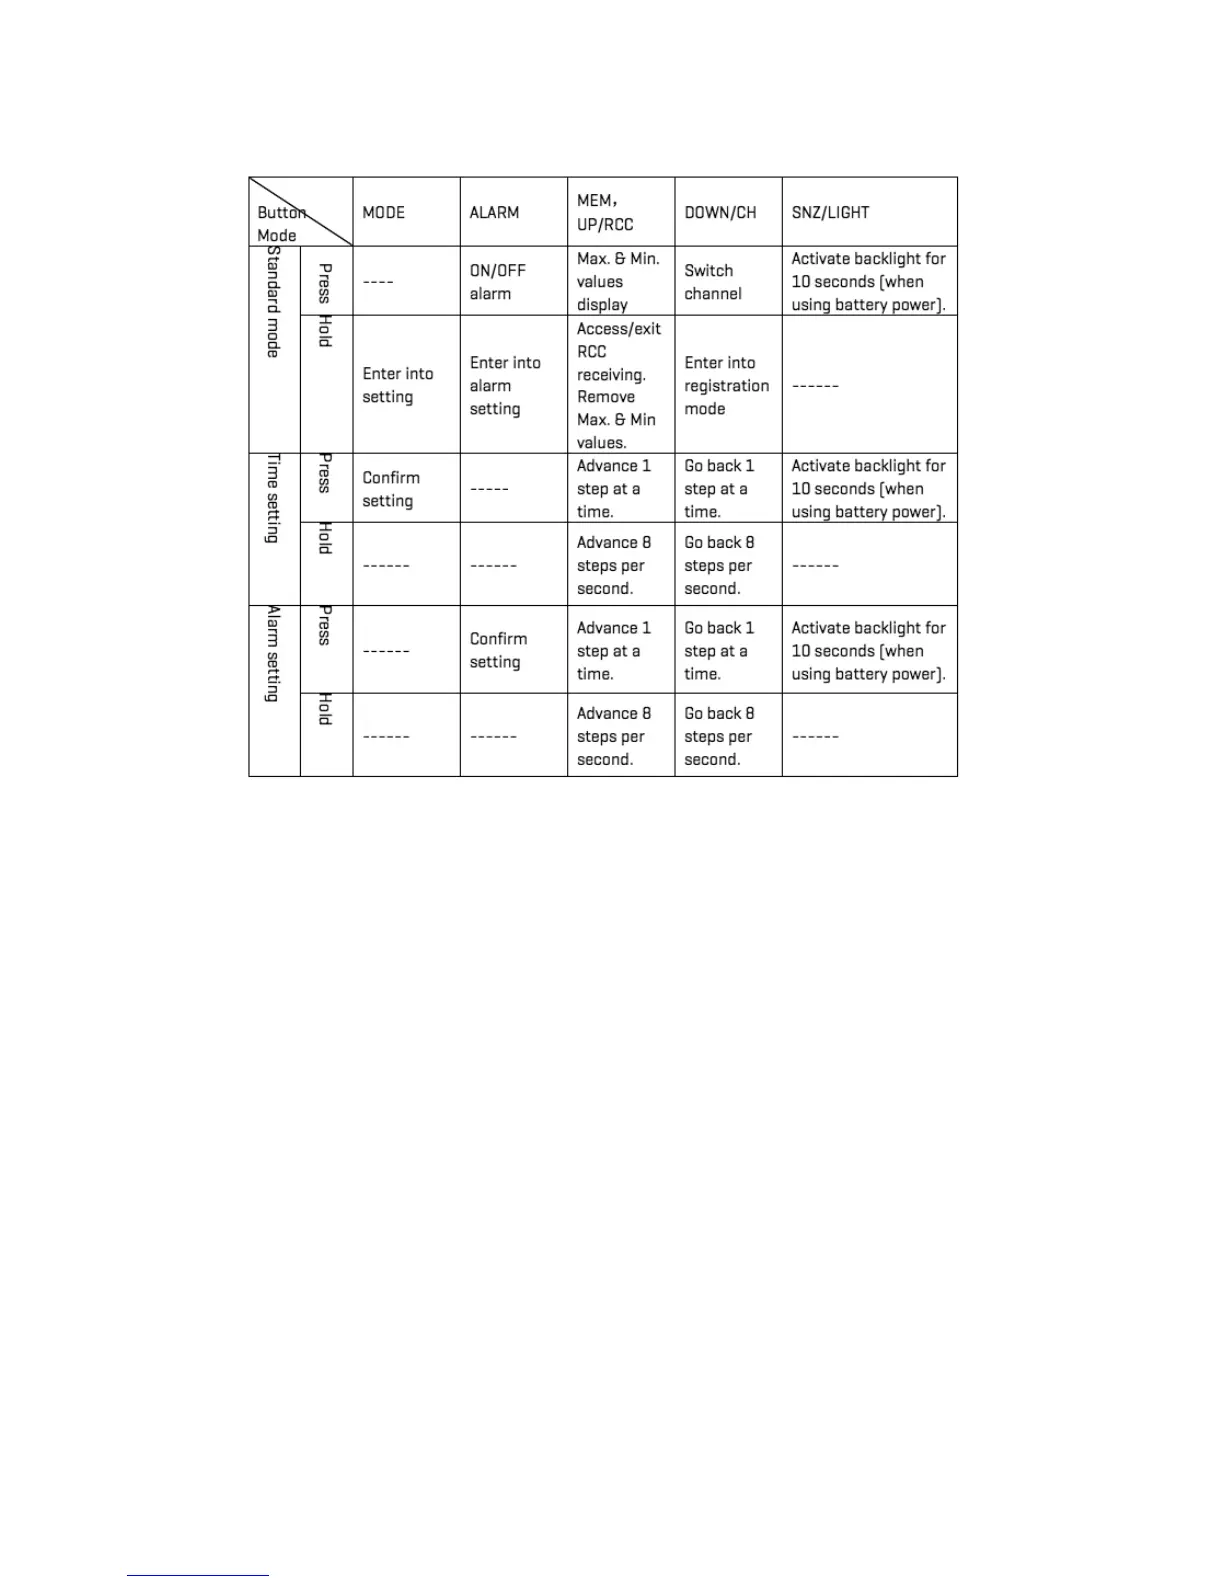
FUNCTION OF BUTTONS
When the device is first plugged in, the default settings are as follows:
Default time: 2015 / 12:00 / Thursday
Default temperature: °F
Barometer unit: hPa
Weather forecast: Partly Sunny
When you first insert batteries or plug in the device, you will hear 1 beep, then the device will go into
a self-test mode, then RF receiving mode (for weather sensor), followed by RCC receiving mode (to
sync with U.S. Atomic clock). This will take about 3 minutes.
• Place 2 AA batteries into the wireless weather sensor.
• Place or hang the sensor outdoors.
• The range is 150 ft. (50m) unobstructed. The wireless range may be reduced by
trees, walls, windows, etc.
• Do not place sensor in direct sunlight as this will give you an inaccurate temperature reading.