14
DISPLACEMENT PUMP
WARNING
To
reduce
the risk of serious bodily injury
, including
fluid
injection; splashing in the eyes or on the skin;
injury from moving parts or electric shock, always
follow the Pressure Relief Procedure Warning
on
page 12 before continuing.
Removing the Pump
Flush
the sprayer if possible.
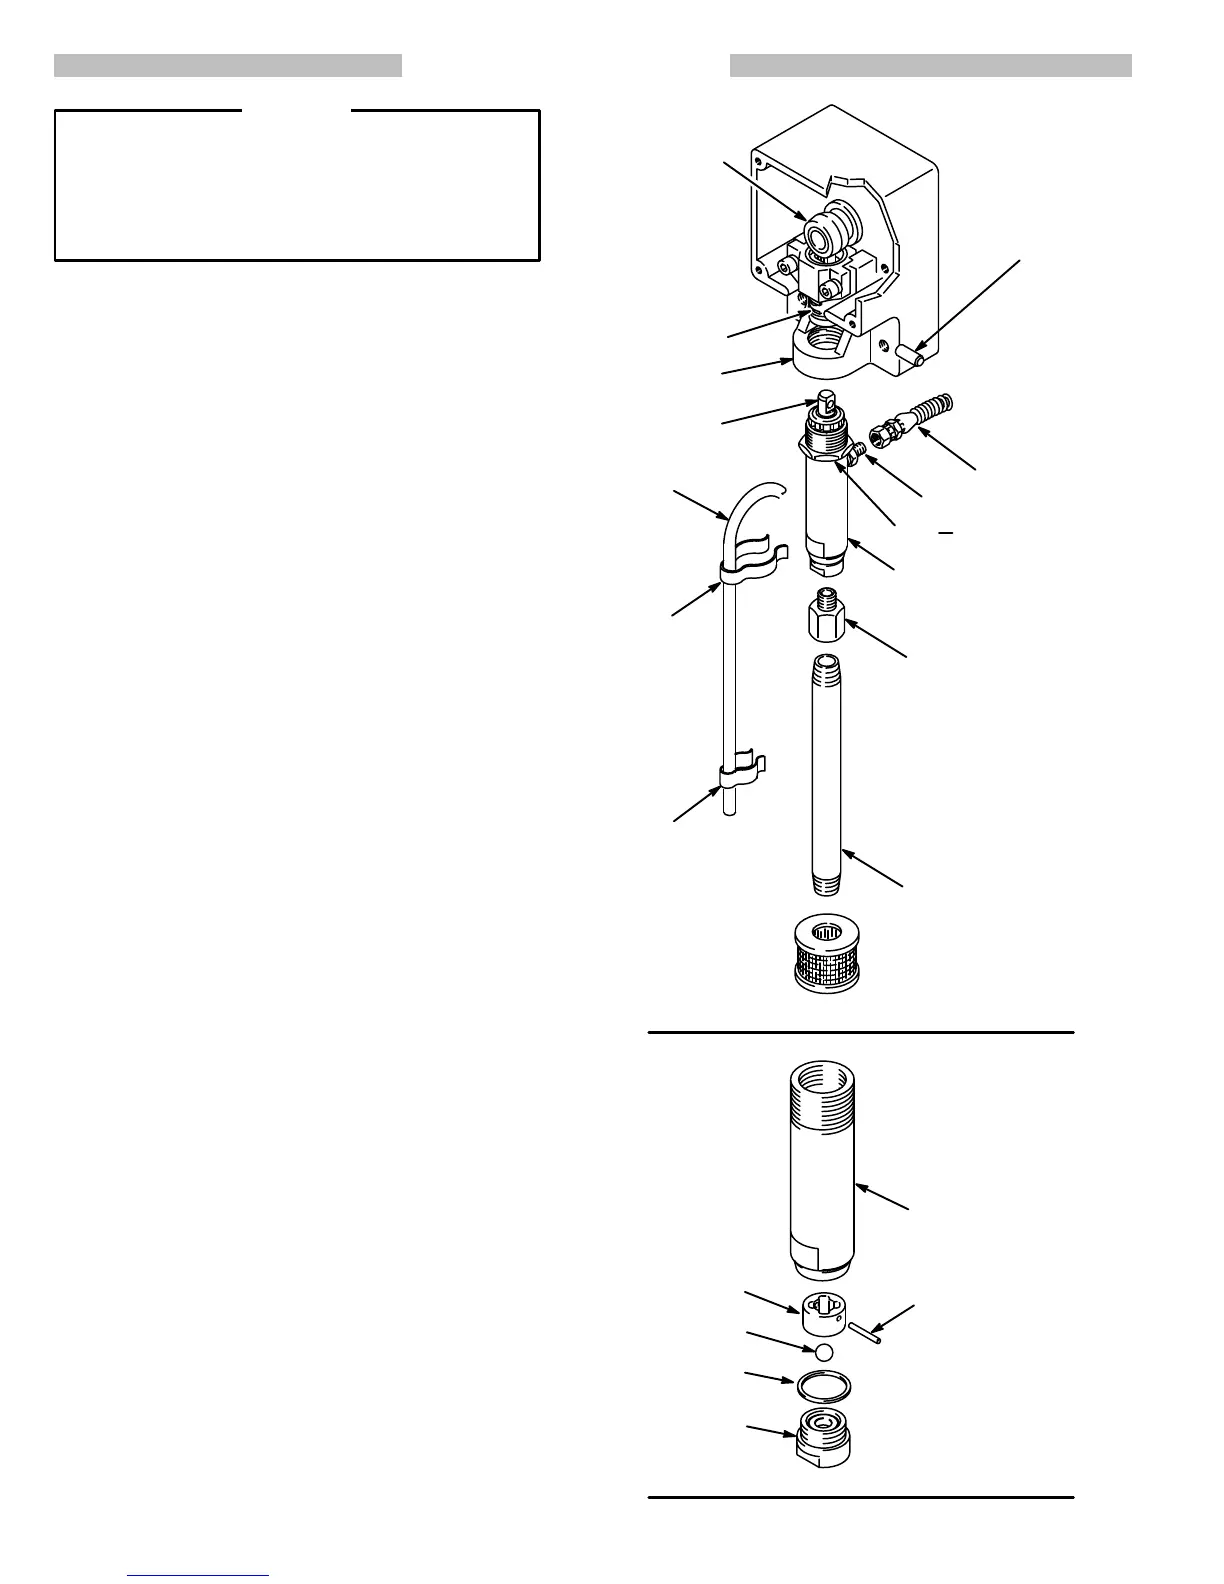
Remove the hose clamps (87, 88) and move the drain
tube
(90) away from the
pump. Unscrew and remove the
suction
tube (52). Remove the adapter (50). See Fig 1.
Disconnect
the hose (20) from the nipple (22).
See Fig 1.
Push
the retaining spring
(55) up. Push out the pin (57).
Loosen
the cylinder locknut (103) and unscrew the pump
(26)
from the drive assembly (65).
See
Disassembling the Pump
, below
.
Installing the Pump
To reinstall the pump, rotate the crankshaft so that the
connecting
rod (64) is in its lowest position. Pull the pump
piston rod (47) about 1–1/2 inches out of the cylinder
(46), and turn the rod so the pin hole is about
90
_ from
the
outlet nipple
(22). Screw the cylinder locknut (103) all
the
way down.
Screw
the pump (26) into the drive assembly (65) until the
holes in the piston rod and the connecting rod are
aligned.
Insert the pin (57) and push the retaining spring
(55)
down over the pin.
Screw the pump cylinder
completely
into the drive as-
sembly;
you will feel some resistance from the packings.
Now turn the cylinder back until the outlet nipple (22)
faces
back. Screw the hose (20) onto the nipple; tighten
it securely. To avoid having the cylinder locknut (103)
loosen
due to vibration, tighten the locknut up against the
drive
housing to 70 ft–lb (95 N.m).
Reassemble
remaining parts reverse from disassembly
.
NOTE: Use
Repair Kit No. 820–549 to repair the
pump.
See
page 23. Use all the parts in the kit, even if
the
old ones look good. Old and new parts do not
seal
together well, and the pump may leak.
Disassembling the Pump
Remove
the pump from
the sprayer as described above.
Unscrew the intake valve (48) from the cylinder (46). If
the valve is seized in the housing, squirt penetrating oil
around the threads and gently tap around the housing
with
a light hammer to loosen. See Fig 2 and 4. Remove
the ball guide (40), the stop pin (39) and the ball (28).
Clean
and inspect the parts for wear or damage.
NOTE: Test
the intake
valve by filling it with solvent and
seeing if any solvent leaks past the ball. It
shouldn’t leak. The valve must be clean for this
test;
any dirt will hold the ball of
f the seat and
let
the
solvent leak past.
Fig 1
Fig 2
88
87
90
65
55
64
57
20
22
26
52
46
28
40
41
48
39
47
50
103
0742
TORQUE
T
O
70 ft–lb
(95 N.m)


 To Next Page