17
Remove the pump, connecting rod and bearing as de-
scribed
on pages 14 and 16.
Remove
the capscrews (25 & 68), lockwashers (24), and
drive housing (A). Remove the screws (66), lockwashers
(67),
and motor housing (B). See Fig 6.
Clean
and inspect the gear (69)
for wear or damage. Re
-
place
it if necessary
. T
o remove the gear
, drive out the
pin
(70), and pull it off the motor shaft. Apply molybdenum
disulfide
spray lubricant to the new gear
, allow to dry
, then
apply
industrial, heavy–duty extreme–pressure,
lithium–
soap
grease.
Install new drive assembly in reverse order of removal.
CAPACITOR
WARNING
To
reduce
the risk of serious bodily injury
, including
fluid
injection; splashing in the eyes or on the skin;
injury from moving parts or electric shock, always
follow the Pressure Relief Procedure Warning
on
page 12 before continuing.
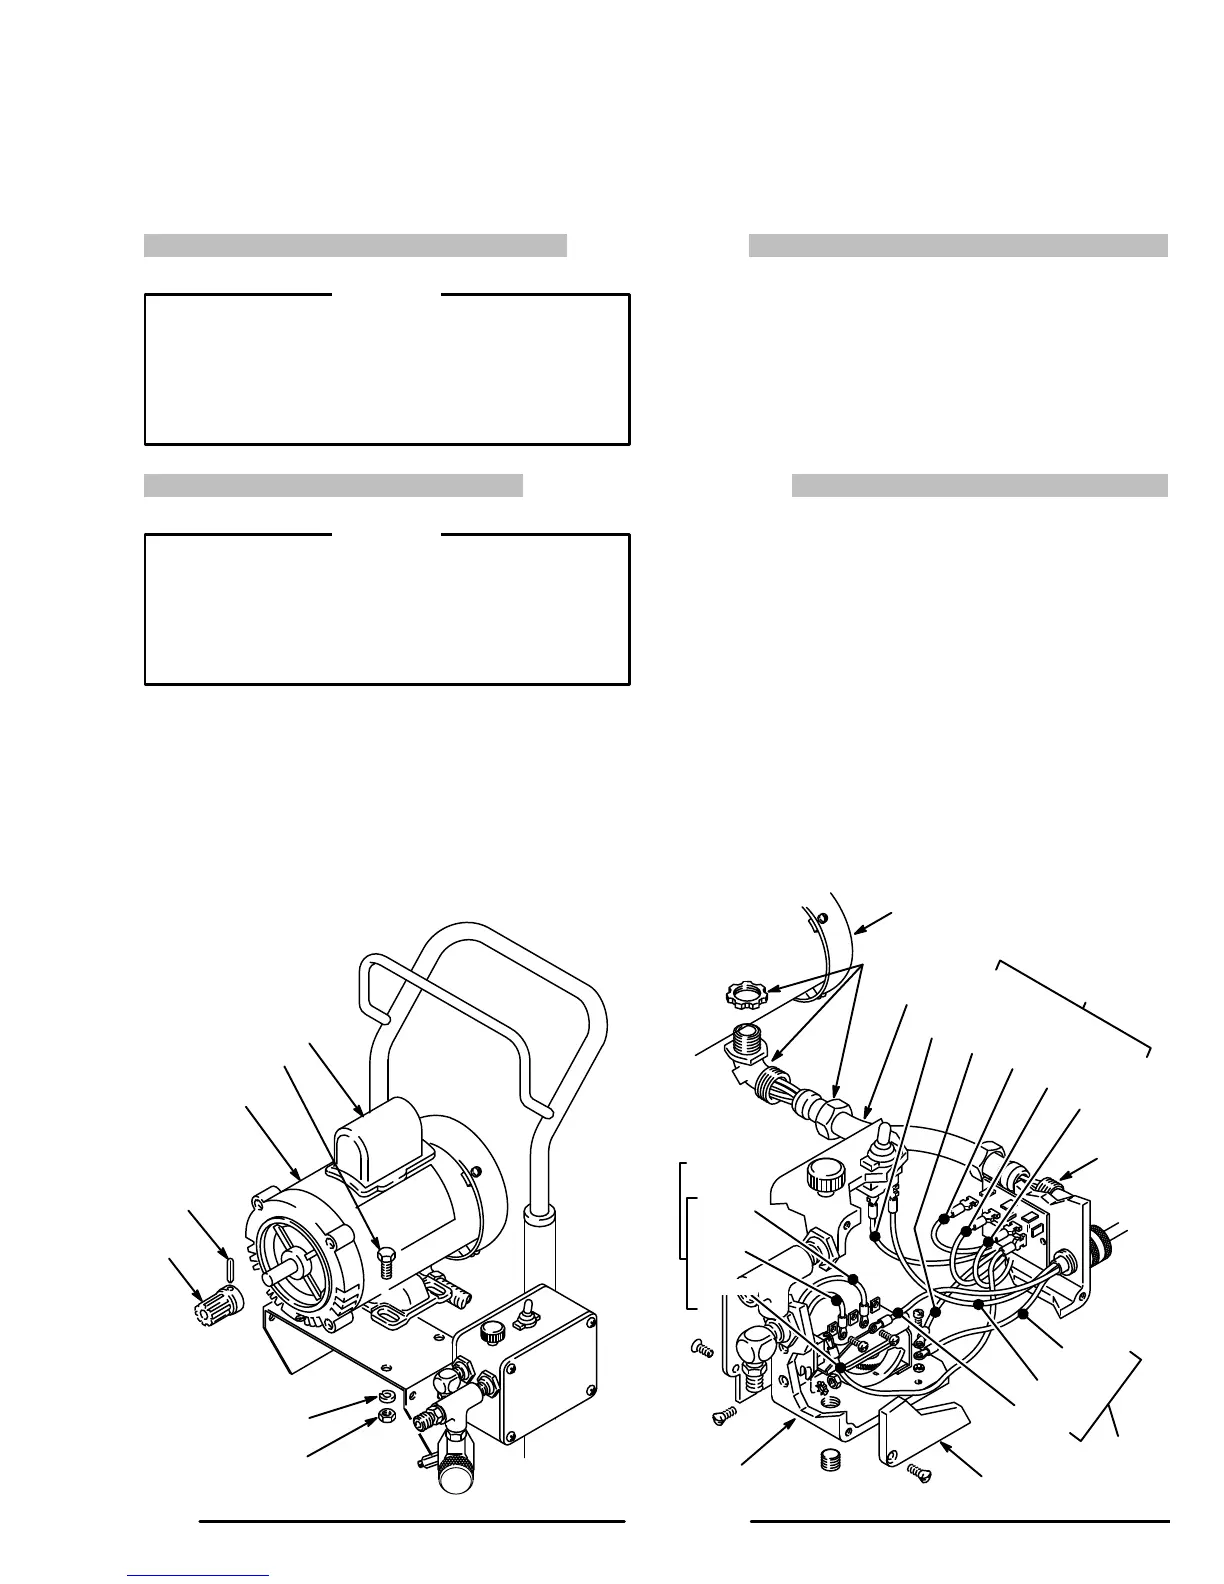
Unplug the sprayer. Remove the cover of the capacitor
(5).
See Fig 7.
Remove the flag connectors from the old
capacitor.
Connect the flag connectors of the new
capac
-
itor
and replace the cover
.
NOTE: The
replacement capacitor includes a new resis
-
tor
already installed.
ELECTRIC MOTOR
WARNING
To
reduce
the risk of serious bodily injury
, including
fluid
injection; splashing in the eyes or on the skin;
injury from moving parts or electric shock, always
follow the Pressure Relief Procedure Warning
on
page 12 before continuing.
Disconnect
the hose (20) from the nipple (22).
See Fig 1.
Remove the drive assembly as described above. You
can leave the pump, connecting rod, and bearing as-
sembled
to the drive assembly
.
Drive
out the pin (70) and remove the gear (69). See Fig
7.
Remove the screws (78) and the cover (79) from the
pressure
control (74). See Fig 8.
Disconnect the five motor leads.
Unscrew the nuts on both ends of the conduit (76) from
the
connector (75). Remove the screws (8), nuts (18) and
lockwashers
(9). See Fig 7. Lift
the motor (1) while care
-
fully
guiding the
wires through the connector in the con
-
trol box. Remove the conduit (76) from the wires.
Loosen
the locknut and unscrew the connector (75) from
the motor
, being careful to avoid twisting the wires.
Install the new motor in the reverse order of removal.
Fig 7 Fig 8
9
18
5
1
70
69
8
RED
BLACK
BROWN
WHITE
GREEN
76
75
75
79
PINK
BLACK
POWER
SUPPLY
LEADS
GREEN
& YELLOW
MOTOR
LEADS
RED
WHITE
TRIAC
LEADS
1
74
WHITE


 To Next Page