16
820-008
CONNECTING
ROD AND BEARING
WARNING
To
reduce
the risk of serious bodily injury
, including
fluid
injection; splashing in the eyes or on the skin;
injury from moving parts or electric shock, always
follow the Pressure Relief Procedure Warning
on
page 12 before continuing.
Remove
the pump as described on page 14. Remove the
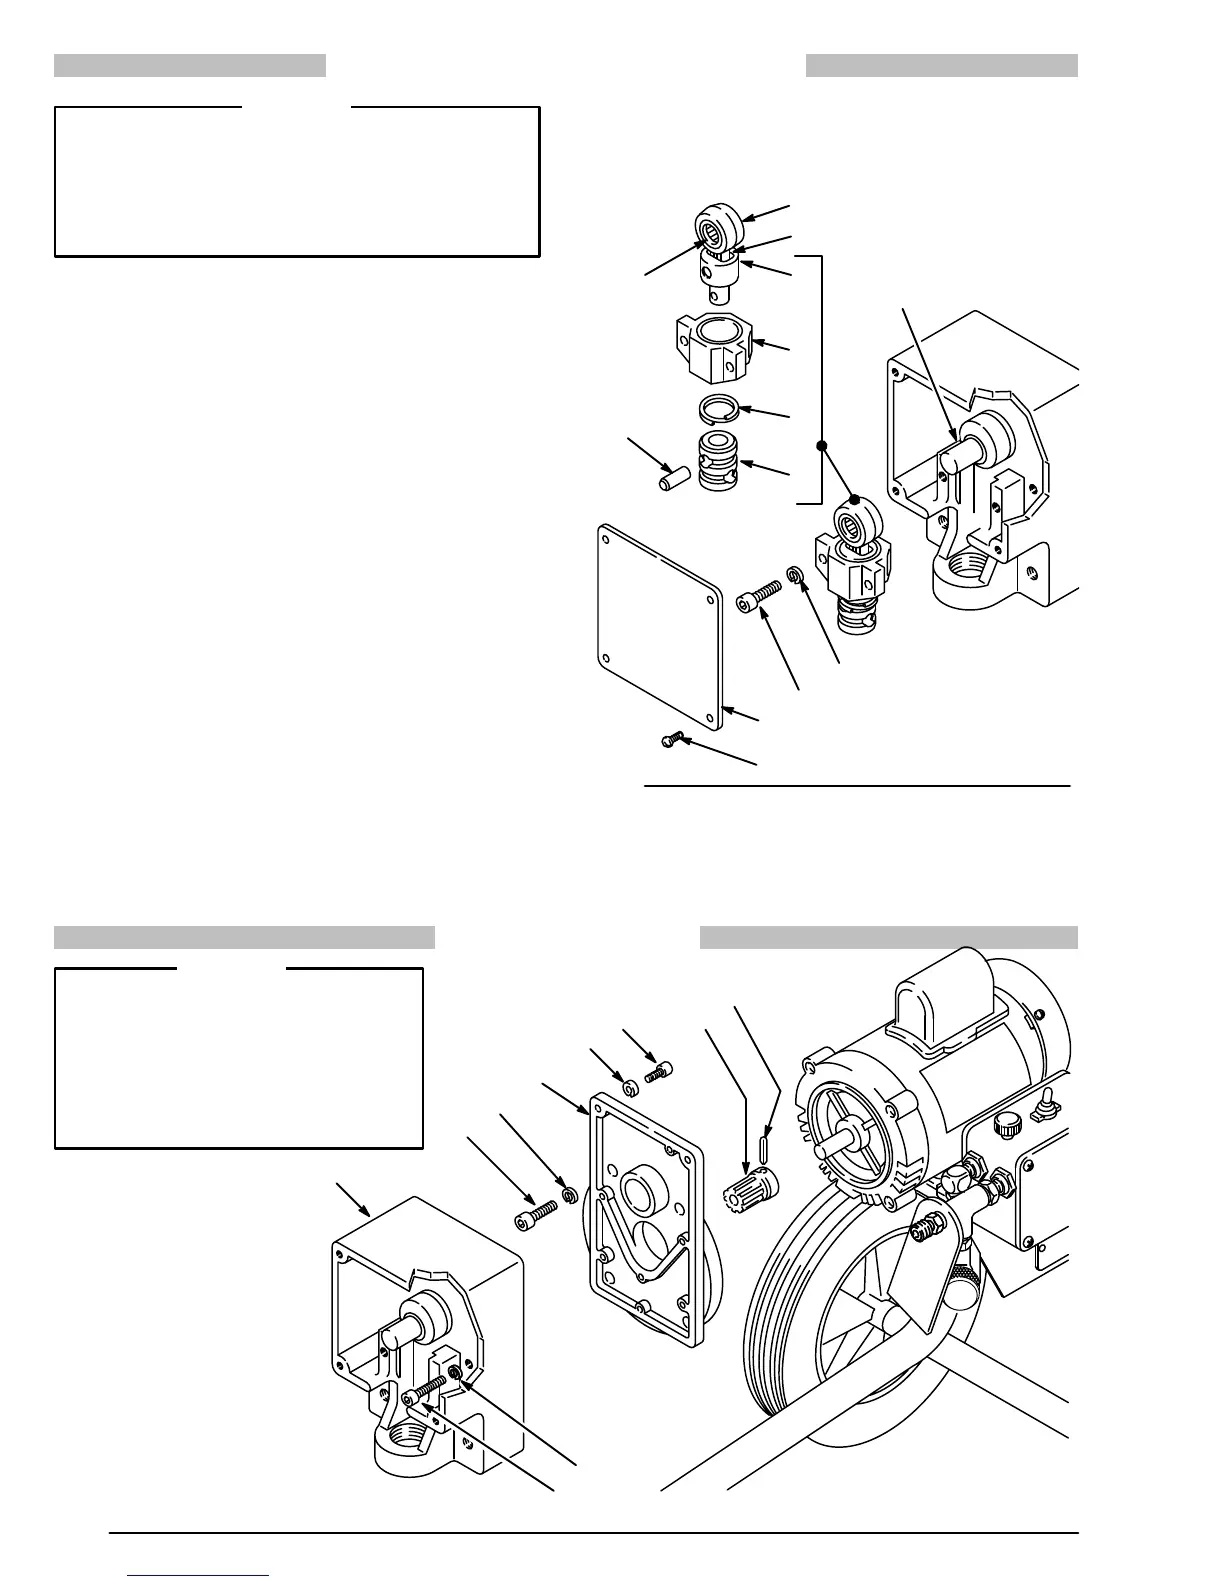
four screws (58) and the cover (59). Remove the two
capscrews
(61) and lockwashers (9). Remove the bear
-
ing
(63) and
the connecting rod (64), sliding the connect
-
ing
rod of
f the crankshaft. (J). See Fig 5.
Use
a screwdriver to push
the retaining spring (55) aside
and
remove the pin (57) from the
coupling (56). Remove
the
coupling from the connecting rod (64).
Pull
the connecting rod (64) out of the
bearing (63). Wipe
it
clean (don’t use solvent) and inspect the surfaces of the
bearing
and the connecting
rod link (K) for wear or dam
-
age. If either needs replacing, replace both of them.
When installing the rod and the bearing, coat the sur-
faces
with SAE 10 non–detergent motor oil.
Clean
and inspect
the crankshaft. (J). Wipe it clean with
a
rag; do not use solvent. If the crankshaft. is badly worn,
replace
the drive assembly
.
Clean
and inspect the connecting rod
needle bearing (L).
Repack bearing with industrial, heavy–duty, extreme–
pressure,
lithium–soap grease.
NOTE: After
every 100
hours of operation, or whenever
servicing the pump (whichever comes first), fill
the cavity in connecting rod (64) with SAE 10
non–detergent
motor oil.
Fig 5
64
63
55
56
57
9
61
59
58
J
K
L
LUBRICATE
– SEE NOTE IN TEXT
0745
Assemble new rod and bearing, being sure to push the
spring
(55) down in place over the pin (57) ends, and in
-
stall
it in reverse order of removal.
DRIVE ASSEMBLY
WARNING
To
reduce the risk of serious bodily in
-
jury, including fluid injection; splash-
ing in the eyes or on the skin; injury
from moving parts or electric shock,
always follow the Pressure Relief
Procedure
W
arning
on
page 12 be
-
fore
continuing.
Fig 6
25
24
70
69
68
24
67
66
A
B


 To Next Page