-9-
1. 若要求布料推送順暢且縫合完美,
押腳壓力應儘量輕些。
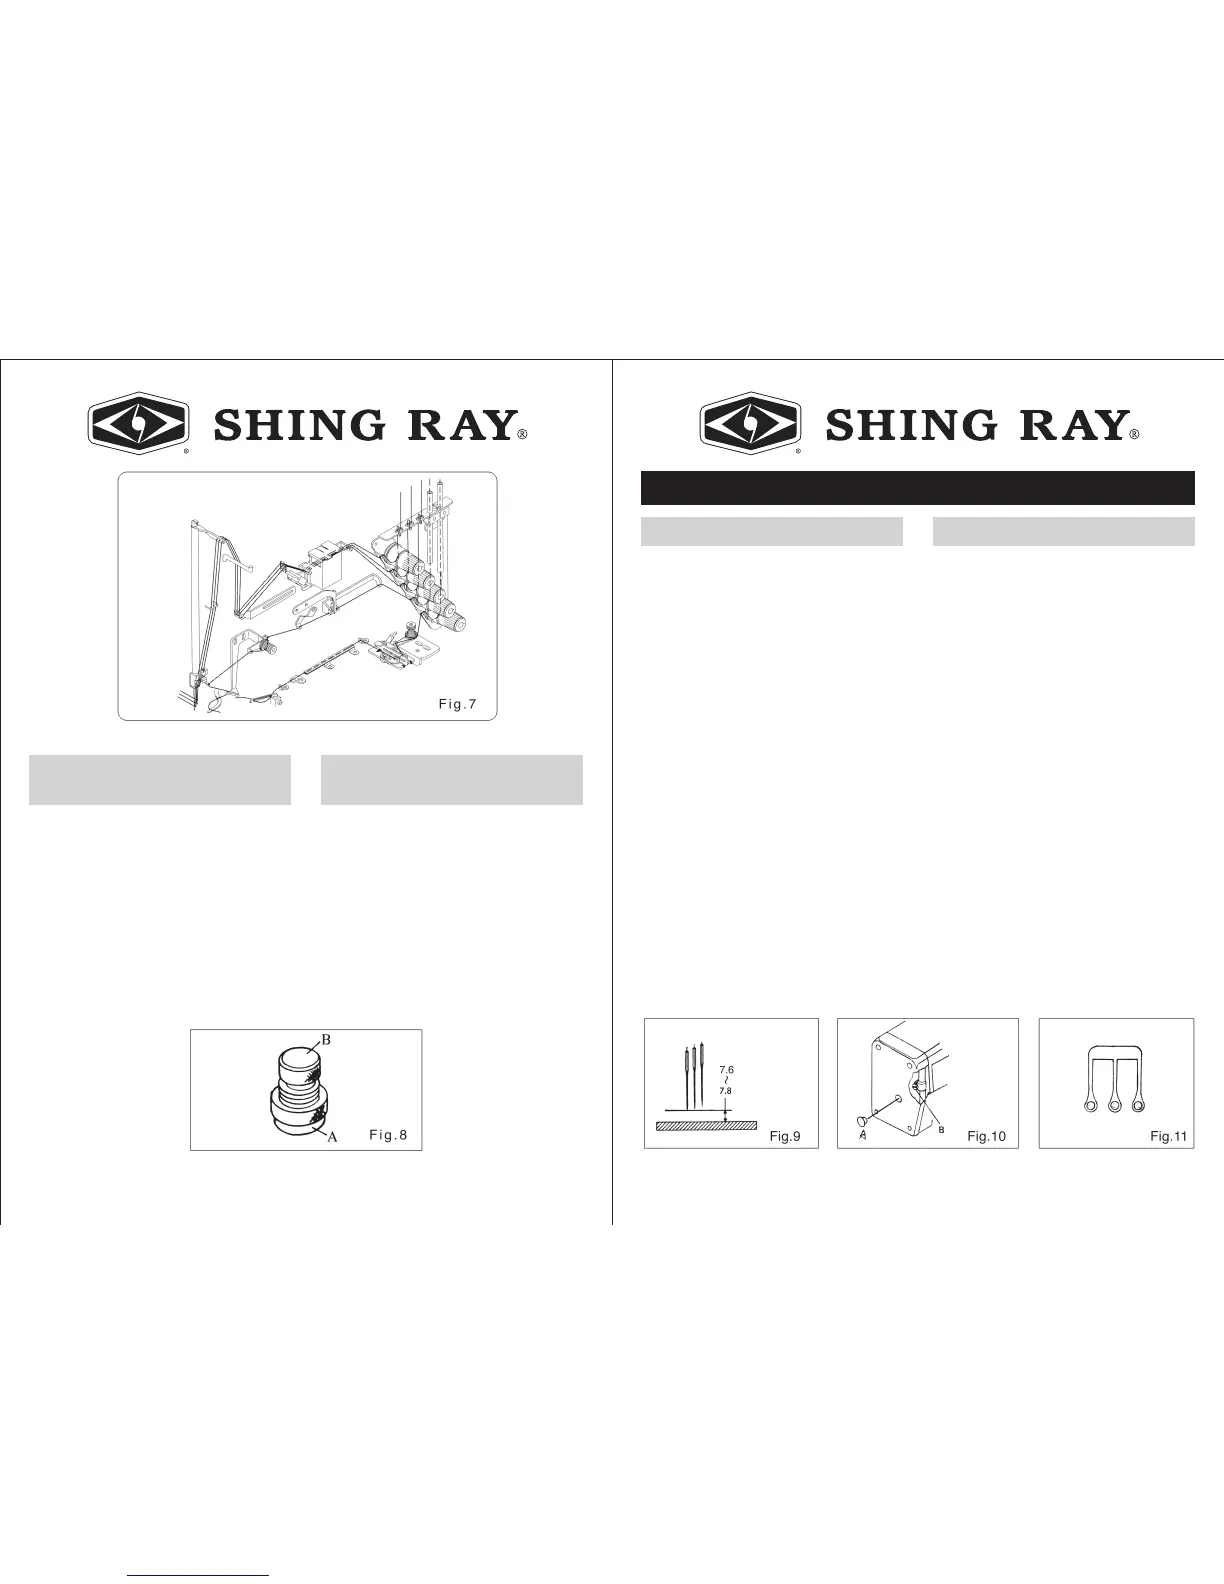
2. 鬆開螺母(A),轉動螺絲(B),調整其
適當壓力後再鎖緊螺母(A)。(圖8)
1. Pressure of Presser Foot should be
as weak as possible, so that cloth
can be sewed and fed smoothly.
2. To increase the pressure of Presser
Foot, to turn Adjusting Screw (B)
clockwise after loosening Lock Nut
(A) and to decrease the pressure
turn Screw (B) counterclockwise. (Fig.8)
G 押腳壓力強度之調整:
G .
ADJUSTING THE PRESSURE
OF PRESSER FOOT :
-10-
1. 先將針棒升到最高處,此時最長針的
針尖與針板的距離為7.6~7.8mm。
(圖9)
2. 若需要調整時,請先打開機頭前蓋之
止油膠蓋(A),放鬆針棒連桿上的螺
絲(B),上下調整針棒的高度後再固
定之。(圖10)
注意:
(1)針必須完全裝入針鎦孔最頂端。
(2)經過針棒高度調整後,必須確定每一根
針皆通過針板的針孔正中央,不可以偏
斜,且三根針需呈平行。(圖11)
A
針棒高度之調整:
1. Please lift the Needle Bar to the
highest position. During this time, the
standard height between the longest
right needle point and Needle Plate
are 7.6˜7.8 mm. (Fig. 9)
2. If you would like to adjust the height
of Needle Bar, please remove the rubber
plug of front cover and loose the screw
(B) on Needle Bar Rod (A). Adjust
the Needle Bar up or down to require
height and fix the screw. (Fig.10)
Remarks :
(1) Be sure insert the needle into the
Needle Holder as far as it can go﹒
(2) After the Needle Bar adjustment,
please make sure that every needle
are passed though the center of the
needle hole on the Needle Plate﹒
Beside, the three needles must be in
parallel and the gap must be even﹒
(Fig﹒11)
A
.
THE HEUGHT OF NEEDLE BAR :
ADJUSTMENT GUIDE
調整說明