Bird Roost Guard has sharp edges.
Suitable safety protection equipment should be worn including
protective gloves during handling of Bird Roost guard.
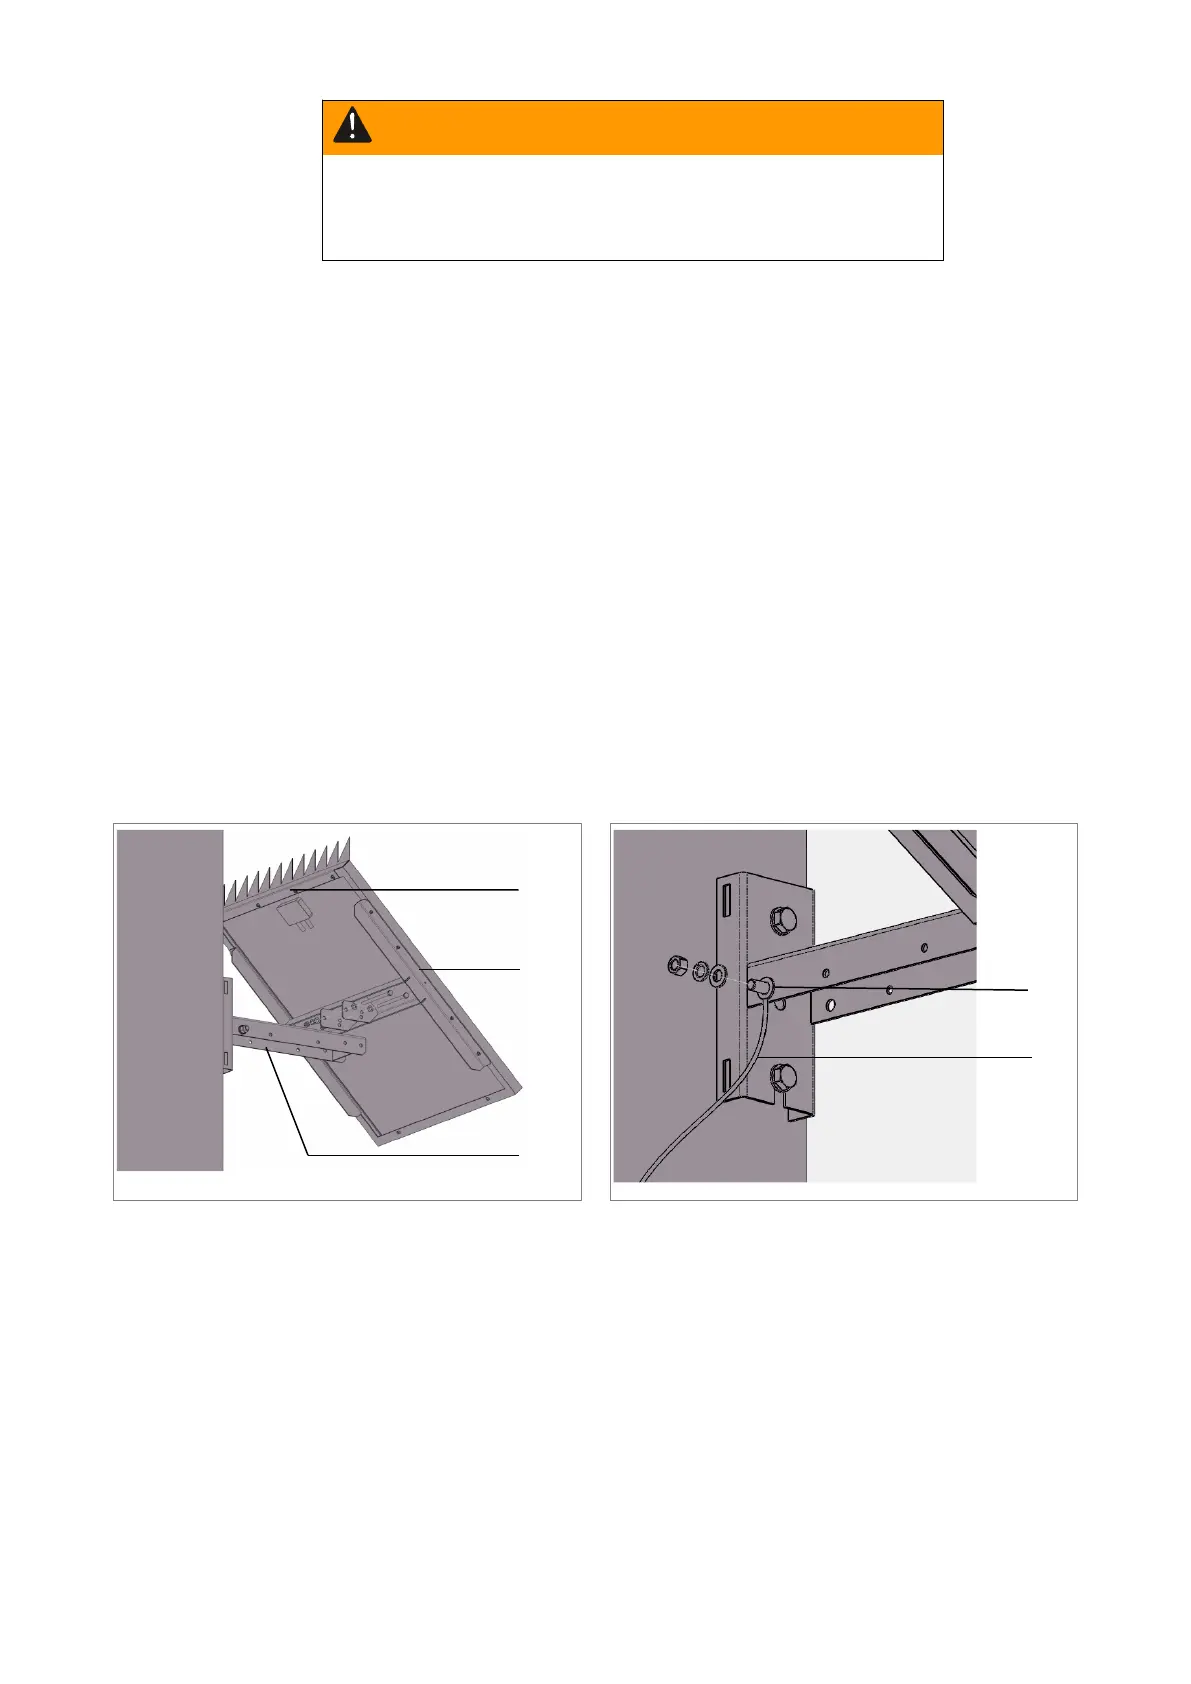
The recommended installation sequence is:
1 Mount the bracket to the pole using either M16 bolts (torque 70 Nm) or straps taking into
account orientation guidelines described in section 5.6.
2 On the ground, assemble the bird roost guard and the U-channel to the bracket using the
10G screws provided leaving the screws loose.
3 Mount the panel on the U-channel and orientate. Fit the M8 bolts and torque to 15 Nm.
The solar panel can be installed at two different angles. The best angle of the panel
depends upon the latitude of the site as follows:
a. For latitudes <30
O
(degree) install solar panel at 30
O
(degree) angle to the
horizontal.
b. For latitudes >30
O
(degree) and <45
O
(degree) install the solar panel at 45
O
(degree) angle to the horizontal.
4 Tighten all bolts and screws.
5 Connect earthing wires as required in section 5.10 below.
6 Connect the panel output leads to the RCU.
Fig. 18 Solar Panel Mounting
1 Bird Roost Guard
2 Solar Panel Frame
3 Pole Mounting Bracket
5.6 RCU Location and Orientation
The following provides the preferred mounting orientation for the RCU and solar panel. For many
real world installations these ideal requirements will be contradictory and impossible to achieve.
Therefore a hierarchy of constraints is provided.
5.6.1 RCU Orientation
 Loading...