13/19
Building Technologies CC1N7461en
21.08.2018
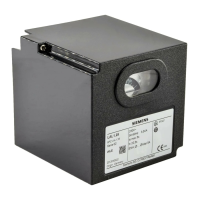
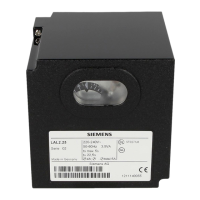
Setting facilities on the burner control
· Prior to making any settings, disconnect the burner control from the mains supply
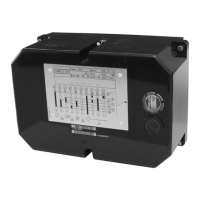
· Loosen all 6 retaining screws and remove the unit cover
· The switching cam numbering starts from the motor
· The camshaft can be manually turned to any position (direction of rotation
clockwise when viewed from the sequence switch motor)
UL1 Operating switch ON / OFF of the sequence switch
motor
N1 Cam 1, fixed
N2, N3 Cams 2 and 3, adjustable (first safety time)
N4 Cam 4, fixed
N5 Cam 5, adjustable (second safety time)
N7 Cam 7, fixed
N8 Cam 8, adjustable (prepurge time)
PA Program indicator disk
· Loosen the securing screw of the red cam N8
· Turn camshaft manually until the required prepurge time appears next to the index
mark (stamped on the sequence switch bracket)
· Hold camshaft firmly and rotate cam N8 until the contact stud actuated by it jumps
out or until the cam runs against the stud
· Tighten the cam securing screw carefully and then check the adjusted time for
accuracy. The adjustable time is also visible through the viewing window when the
burner control is in its start position
Adjustment of the setting mark of the red cam N8 to the time marks on the black cam
N7 produce the prepurge times shown below table.
Cam N8 adjusted to...
I II III N7
N8
7761p04/0698
LFE1... LFE1.1...
... cam N7
mark I t1 = 8 s 4 s
II 18 s 9 s
III 28 s 14 s
Setting at the stop 63 s 31.5 s
Factory setting approx. 30 s
or 60 s
approx. 15 s
or 30 s
General notes
Setting elements
Setting the prepurge
time
 Loading...