EasyManua.ls Logo

Siemens QMX3.P70 User Manual

Siemens QMX3.P70
16 pages
To Next Page IconTo Next Page
Page #1 background imageLoading...
Page #1 background image
CM2N1602en_07
2017
-05-22
Building Technologies
s
1
602
QMX3.P37 QMX3.P34 / P74 QMX3.P02 QMX3.P70 QMX3.P30 / P40
Desigo™ TRA
QMX3.P30
Q
MX3.P40
QMX3.P70
QMX3.P02
QMX3.P34
QMX3.P74
QMX3.P37
Wall-mounted sensors and room
operator units for KNX
PL-Link,
KNX S
-mode and KNX LTE-Mode
Communicative sensors, switches and room operator units with KNX (S-mode,
LTE-Mode) or KNX PL-Link (for Desigo™ Total Room Automation)
Functions (depending on type):
Energy efficiency function ("Green Leaf
")
Room temperature, CO
2
, and humidity measurement
Control of light, blinds, and scenes
PID controller for room temperature or ventilation (KNX S-mode)
LCD Display for room temperature, operating mode, etc.
Label for light, blinds and scenes (exchangeable, created with Word
template)
Operation via 8 or 16 touchkeys
Interface KNX (S-mode, LTE-Mode) and KNX PL-Link(for TRA, with plug &
play functionality)
Powered over KNX PL-Link / KNX bus
LEDs to indicate the switch state or the position of the device in dark rooms

Other manuals for Siemens QMX3.P70

Question and Answer IconNeed help?

Do you have a question about the Siemens QMX3.P70 and is the answer not in the manual?

Siemens QMX3.P70 Specifications

General IconGeneral
BrandSiemens
ModelQMX3.P70
CategoryAccessories
LanguageEnglish

Summary

Mechanical Design

Wall-Mounting Design

Devices for wall mounting with conduit box or base plate. Cable conduits require specific spacing.

Optional Reinforced Base Plate

QMX3.MP1 base plate offers rigidity and compensates for cavity wall boxes with a foam plate.

Engineering Notes

KNX PL-Link Engineering

Offers plug & play, receives power via interface. Wiring details in Desigo installation guide.

Mounting and Installation

Location and Mounting Height

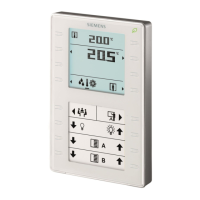
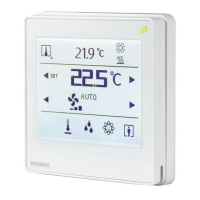
Suitable for wall mounting at 1.50m. Avoid heat sources, drafts, and direct solar radiation.

Mounting Over Conduit Box

Details for mounting over a conduit box, including cable management and sealing.

Mounting Over Cavity Wall Box

Instructions for mounting using a reinforced base plate for cavity wall boxes.

Wall Mounting and Cable Management

Housing Breakout and Cable Insertion

Remove housing breakout before inserting cable into gaining channel. Remove cable coating.

Labeling and Installation Procedures

KNX PL-Link and S-Mode Installation

Follow wiring guides for PL-Link and KNX regulations for S-mode. Caution for AC 230V.

Commissioning (KNX PL-Link)

Manual Commissioning Steps

Connect SSA-DNT/ABT, load identification page, press buttons to assign device.

Commissioning (KNX PL-Link without Display)

Reset to Factory Setting

Long press programming pin to reset. Operation is irreversible.

Plug & Play Commissioning (KNX PL-Link)

Automatic Communication Establishment

Unit establishes comms with automation station; functions are downloaded.

Commissioning and Operation (KNX)

Reset to Factory Settings

Long press programming pin to reset. Operation is irreversible.

Specifications and Compliance

FCC Rules Notice

Device complies with FCC Part 15. Operation subject to conditions; avoid harmful interference.

Connection Details

KNX / PL-Link Plug Wiring

Red wire for PL-Link positive, gray for negative. Wires are not interchangeable.

Connecting the Tool

Connect ABT to automation station or room unit via tool cable for application loading/service.

Related product manuals