EasyManua.ls Logo

Siemens RAJA+ 3TE7421 - User Manual

Siemens RAJA+ 3TE7421
8 pages
Print Icon
To Next Page IconTo Next Page
Loading...
1
RAJA
+
Fully Automatic Star
Delta Starter 3TE7421
For dependable service, it is of utmost
importance that instructions given below are
followed for selection, inspection, installation,
commissioning, operation and maintenance.
Installation, Operation & Maintenance
Instructions
s
RAJA
+
Fully Automatic Star Delta Starter
Selection of Starter
• ReferTable1forrecommendedselectionof3TE7FASD
starters.
• FASDStartersareavailablein3framesizes–FASD1:upto
30HP,FASD2:40HP&50HPandFASD3:75HPsubmersible
pumpratings.
12
11
4
14
7
13
3
8
1
5
2
6
9
10
1. ‘ON’pushbutton(green)
2. ‘OFF/RESET’pushbutton(red)
3. Doorknob
4. MetalEnclosure
5. Door
6. MechanicalLatch(OFFpushbutton)tobeusedforpreventing
undesiredONoperationofStarter
7. Nameplate
8. LED(amber)toindicatehealthinessofincomingpowersupply
9. GreenLEDtoindicateMotorONstatus
10. Rockerswitch(ControlON/OFF)
11. DualVAmeter(Forindication)
12. PhaseSelectorswitch
13. Earthingscrew
14. StarterMountingbracket
Fig. 1: FASD Starter
Fig. 2: FASD Starter inside view
Pleasereadandunderstandtheseinstructionsbefore
installing,operatingormaintainingtheequipment.Keepfor
futurereference.
Danger
Hazardousvoltagecancausedeathorseriousinjury.Disconnect
powerbeforeworkingonequipment.
Warning
Automatic Motor Restart
LMRAhas“Auto”modeselection.Usethisfunctionwith
caution,Motorwillrestartautomaticallywhenhealthy
powerisrestoredback.
Reliablefunctioningoftheequipmentisonlyensuredwith
certiedcomponents.Commissioningandmaintenanceby
qualiedpersonnelonly.
NOTICE
ThisproducthasbeendesignedforenvironmentA.Useofthisproduct
inenvironmentBmaycauseunwantedelectromagneticdisturbancesin
whichcasetheusermayrequiretotakeadequatemitigationmeasures.
Complies to standard : IS/IEC 60947-4-1
Question and Answer IconNeed help?

Do you have a question about the Siemens RAJA+ 3TE7421 and is the answer not in the manual?

Summary

Installation Procedures

Mounting and Cable Connections

Details on mounting the starter, removing grommets, using cable glands, and connecting incoming/outgoing cables.

Commissioning Procedures

Timer and Overload Relay Setting

Procedures for setting the Star-Delta timer and overload relay to match motor specifications for optimal performance.

Operation Procedures

Starting, Stopping, and Reset Operation

Steps for operating the starter, including checking LEDs, using selector switches, and manual overload relay reset.

Maintenance Procedures

General Maintenance and Component Replacement

Guidelines on general upkeep, cleaning, terminal re-tightening, and replacing contactors or overload relays.

Wiring Diagrams

FASD1 and FASD2 Wiring Diagrams

Schematic diagrams illustrating electrical connections for FASD1 and FASD2 starter models.

FASD3 Wiring Diagram

Schematic diagram detailing electrical connections for the FASD3 starter model.

Technical Data and Selection

Table 1: Starter Selection

Comprehensive table listing motor ratings, starter types, contactor MLFBs, overload relays, and cable sizes.

Table 2: Terminal Torque Values

Specifications for tightening torque values for various terminal blocks and components.

Table 3: Spares List

List of spare parts, including contactors, coils, LEDs, and timers, with their respective order numbers.

Selection of Contactor Coil and LMRA

Guide for selecting appropriate contactor coil voltages and Line Monitoring Relays (LMRA).

Dimensional Drawings and Disposal

Dimensional Drawings

Technical drawings showing the physical dimensions of FASD1, FASD2, and FASD3 starter enclosures.

Disposal Information

Guidelines for environmentally friendly disposal and segregation of product materials.

Overview

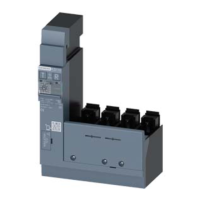
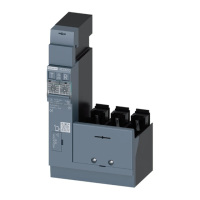
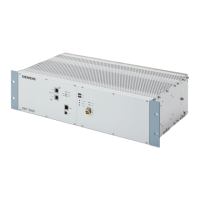
The Siemens RAJA+ Fully Automatic Star Delta Starter, model 3TE7421, is designed for dependable motor operation, emphasizing ease of selection, inspection, installation, commissioning, operation, and maintenance. This product is designed for environment A, though use in environment B may necessitate mitigation measures for electromagnetic disturbances. It complies with IS/IEC 60947-4-1 standards.

Function Description:

The RAJA+ starter facilitates the smooth starting of motors by reducing inrush current, thereby minimizing stress on the motor and power supply. It operates in a star-delta configuration, transitioning the motor from a star connection (reduced voltage) to a delta connection (full voltage) once it reaches a certain speed. The device incorporates a Line Monitoring Relay (K3) and a Star Delta Timer (K2) to manage this transition. It also features an overload relay (K1) for motor protection against excessive current. The starter includes a phase selector switch (12) and dual VA meters (11) for monitoring incoming power supply voltage. An 'ON' push button (1) initiates motor operation, while an 'OFF/RESET' push button (2) stops the motor and resets the overload relay. An amber LED (8) indicates the healthiness of the incoming power supply, and a green LED (9) signifies that the motor is running. A mechanical latch (6) on the 'OFF' push button prevents unintended motor starts.

Important Technical Specifications:

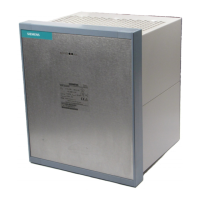
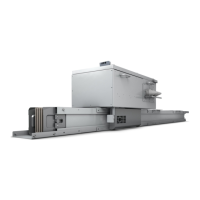
The RAJA+ FASD Starters are available in three frame sizes:

  • FASD1: Up to 30 HP
  • FASD2: 40 HP & 50 HP
  • FASD3: 75 HP (for submersible pump ratings)

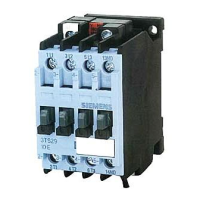
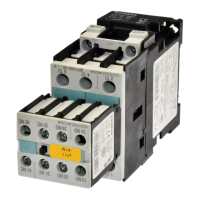
The starter's components, such as contactors, thermal overload relays, and timers, are selected based on motor rating. For instance, a 10/7.5 HP motor (FASD1) uses a 3TS3110-0A##-08K line/delta contactor, a 3TS3010-0A##-08K star contactor, and a 3UW5102-1J thermal overload relay with a range of 6.3-10A. The corresponding HRC fuse rating is 25A, with recommended incoming supply cable size of 2.5 mm² and motor cable size of 1.5 mm². For a 75/55 HP submersible pump (FASD3), a 3TS5122-0A$$-08K line/delta contactor, a 3TS4822-0A$$-08K star contactor, and a 3US5800-5C8K thermal overload relay (85-105A range) are used, requiring a 200A HRC fuse, 70 mm² incoming cable, and 35 mm² motor cable.

The contactor coil voltage codes vary, with options like Z6 (200-400 VAC), Z8 (260-460 VAC), RO (332-457 VAC), and QO (304-418 VAC). The Line Monitoring Relay (LMR) and Timer also have specific order numbers corresponding to these voltage codes. Terminal torque values are specified for various components, ranging from 0.8-1.4 Nm for M4 terminal blocks to 5.0 Nm for M8 dual VA meter current terminals.

Usage Features:

  • Installation: Mount the starter on a vertical wall, free from vibrations. Ensure proper cable glands are used for dust proofing. Connect incoming and outgoing cables according to the wiring diagram, ensuring earthing conductor is properly torqued (1.2 to 1.6 Nm).
  • Commissioning:
    • Initially set the overload relay to 0.58 times the rated motor current.
    • Set the timer dial to the nearest starting time on the motor nameplate (approximately 6-8 seconds if not available).
    • For precise timer setting, start the motor, measure the time to reach steady state current, then stop the motor and adjust the timer dial to this measured value.
    • For precise overload relay setting, run the motor for 30 minutes, then gradually reduce relay settings until it trips. Set the relay slightly higher than this tripping value. Allow approximately 4 minutes for reset.
  • Operation:
    • Ensure the door is locked and the mechanical latch is away from the 'OFF' push button.
    • Switch ON the rocker switch (10). Wait for the amber LED (8) to be continuously ON.
    • Select the desired phase using the phase selector switch (12) to view incoming power supply voltage on the dual VA meter (11).
    • Press the green 'ON' push button (1) to start the motor. The green LED (9) will illuminate, and the line current of the R phase will be indicated on the dual VA meter.
    • Press the red 'OFF' push button (2) to stop the motor.
    • If the overload relay trips, manually reset it after approximately 4 minutes.
  • Safety: The device includes an "Automatic Motor Restart" warning, indicating that the motor will restart automatically when healthy power is restored if LMRA is in "Auto" mode. It is crucial to disconnect power before any work on the equipment. Commissioning and maintenance should only be performed by qualified personnel using certified components.

Maintenance Features:

  • Regular Checks:
    • Keep the interior dust-free.
    • Re-tighten terminal screws periodically as per specified torque values (Table 2).
    • No maintenance is required for the overload relay; do not open it.
  • Contact Replacement: Replace contactor contacts if they are severely pitted or if less than 40% of the original contact tips remain.
  • Contactor/Overload Relay Replacement:
    • Switch off the starter, engage the latch on the 'OFF' push button, and disconnect the main supply.
    • Loosen outgoing terminal screws of the relay and line contactor/adaptor plate.
    • Disconnect wires from relay terminals.
    • Follow instructions in Fig. 4, 5, or 6 for removal.
    • Select a proper replacement relay.
    • Connect relay terminals (L1, L2, L3) to Q1 line contactor (T1, T2, T3) or adaptor, ensuring correct positioning.
    • Connect relay terminals to Terminal block TB2.
    • Ensure the relay hook is engaged in the slot on the contactor or adaptor.
    • Tighten contactor/adaptor terminal screws.
    • Reconnect disconnected wires and verify connections against the wiring diagram.
  • Spares: A comprehensive spares list (Table 3) is provided, including various contactors, thermal overload relays, coils, contact blocks, LEDs, LMRA modules, timers, and add-on blocks, ensuring availability of replacement parts.
  • Disposal: Siemens products are environmentally friendly and consist of recyclable materials. Disassembly and separation into ferrous metals and plastics are recommended for recycling through authorized dealers. Disposal guidelines may be updated by national regulations.

Siemens RAJA+ 3TE7421 Specifications

General IconGeneral
BrandSiemens
ModelRAJA+ 3TE7421
CategoryIndustrial Electrical
LanguageEnglish

Related product manuals