Electronically commutated geared motors
10 A5E31837904/001, 05/2013
Risk of injury and damage to property as a result of incorrect installation
Improper and incorrect installation can lead to serious injuries.
Note and follow the installation instructions for safe installation.
Installation of the geared motor
Tensioning device /
mounting bracket
Note
Optional components
The components: rubber
-metal anti-
vibration mount, mounting bracket, tensioning device / mounting bracket, deflector pulley
and door clutch holder are optional and can
be obtained from Siemens. Additional information can be found on the internet
http://support.automation.siemens.com/WW/view/en/61054609/133200).
The mechanical installation of the geared motor is performed in the following steps:
1. Install the geared motor
④ onto the motor mount ② (rubber-metal anti-vibration mount). Then, if necessary, mount the
geared motor on the mounting bracket
①.
2. Install the deflector pulley
⑦, if necessary with a mounting bracket ⑧. Ensure that the drive pinion ③ and deflector
pulley ⑦ are aligned. They should be aligned as precisely as possible with one another (flush).
3. Feed the toothed belt
⑤ over the deflector pulley ⑦ and the drive pinion ③, and lay both open ends of the toothed belt
in the door clutch holder
⑥. Screw the door clutch holder together.
4. Tension the toothed belt with the aid of the tensioning device ⑧. The correct tension has been reached when the
midpoint of the toothed belt can be pushed in by approximately 3 cm for every meter of distance between the drive pinion
and the deflector pulley.
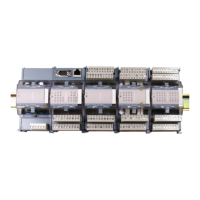
Insert the motor connector into the corresponding controller slots:
● Slot X4201 for the motor windings and X7000 for the sensor signals (for ATE250S)
If the geared motor is connected to the control unit, it is detected automatically during the commissioning of the door control.
 Loading...