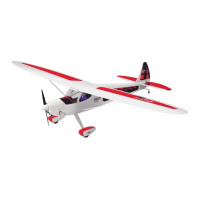
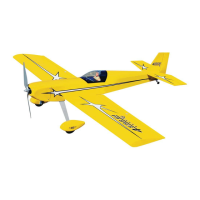
Aluminum Landing Gear, Fiberglass Wheel Pants, 2-3/4” Diameter
Main Wheels and the following hardware:
2 each M4 x 40mm (1-9/16”)
Phillips/Washer Head Axle Bolts
4 each M4 Lock Nuts For Axle Bolts
2 each M4 x 20mm (3/4”) Phillips/Washer Head Bolts -
Landing Gear Attachment
2 each M4 Split Ring Washers - Landing Gear Attachment
4 each M3 x 10mm (3/8”) Phillips/Washer Head Bolts -
Wheel Pant Attachment
4 each M3 Split Ring Washers - Wheel Pant Attachment
We also suggest using thread-locking compound when
assembling the wheel pants to the landing gear and the landing
gear to the fuselage.
a.) Slip a M4 x 4mm axle bolt through the center of the wheel.
Thread a M4 lock nut onto the threaded end of the axle bolt up to
the hub, leaving just a little “play” to allow the wheel to rotate freely.
Slip the threaded end of the axle bolt through the bottom hole in
the aluminum landing gear and thread another M4 lock nut onto
the axle threads. Tighten the lock nut up to the landing gear.
Repeat the procedure with the remaining wheel. The wheels are
now mounted to the landing gear and ready for the attachment of
the wheel pants. (Note that we cut off the excess bolt material
outside of the lock nut, using a carbide cut-off wheel.)
b.)
Note that there is a front and rear edge to the aluminum
landing gear. Facing toward the front of the airplane, the landing
gear legs are canted slightly forward. Be sure to mount the landing
gear and the self-aligning wheel pants in the correct direction!
Slip the wheel pant over the top of the wheel and slide it down in
place over the wheel and onto the inner M4 lock nut. Doing this
should line-up the holes in the aluminum landing gear with the
holes in the wheel pant. If you encounter difficulty in sliding the
pant into place, check the alignment of the inner lock nut and shift
its position as needed to accept the slot in the pant. With the pant
in place, use two M3 x 10mm (3/8”) bolts with M3 split ring
washers to secure the pant to the landing gear leg. Check the
wheel for free rotation. Repeat this procedure with the remaining
wheel pant.
c.) The completed landing gear is now mounted to the
fuselage using two M4 x 20mm bolts (3/4”) and split ring washers.
Be sure to use a little thread-locking compound on the threads and
snug the bolts in place firmly.
RADIO INSTALLATION:
Because the aileron servos are already installed and ready to use,
the rest of the radio installation consists of simply mounting the
elevator, rudder, and throttle servos in place and locating the
receiver, battery pack and switch. The pushrod connections to the
servos will be made shortly. Install the rubber grommets and
eyelets supplied with your radio system onto each servo. Install
each servo into its appropriate opening in the servo tray, routing
the leads out from beneath the tray into the main cabin area. It can
be handy to label the servo leads to identify them.
Looking down on the fuselage, as if you were seated in the cabin,
with the servos behind you, the elevator servo fits in the r
ight rear
14