Fans with run-on time T - The fan starts after actuation of the external switch, e.g. light switch.
The signal from the switch applies the control voltage to the input terminals LT (ST, SL). After disconnecting the control voltage,
the fan carries on operating for the time set (adjustable from 2 to 30 minutes) and then switches off.
The VT model is activated and deactivated via the pull-switch.
Fans with start-up delay and run-on time T1 - After the external switch, e.g. the light switch, is switched on, the fan starts up
after the delay time has passed (adjustable from 0 to 2 minutes). After the switch switches off, the fan carries on operating for
the run-on time set (adjustable from 2 to 30 minutes) and then switches off.
Fans with timer and humidity sensor TH - The fan starts after actuation of the external switch, e.g. light switch. The signal from
the switch applies the control voltage to the input terminals LT (ST, SL).
The fan also starts up if the room humidity rises above the preset value (adjustable from 60% to 90%).
After disconnecting the control voltage or after the room humidity has dropped below the preset value, the fan carries
on operating for the run-on time set (adjustable from 2 to 30 minutes) and then switches off.
Fans with run-on time and movement sensor TP - The fans starts when there is movement within the range of 1 to 4 m and
in a horizontal viewing angle of 100°. If no more movement is detected, the fan carries on operating for the run-on time set
(adjustable from 2 to 30 minutes) and then switches off.
Warning! The PCB of the timer is at mains voltage! Disconnect the fan from the electrical power supply before all adjustment
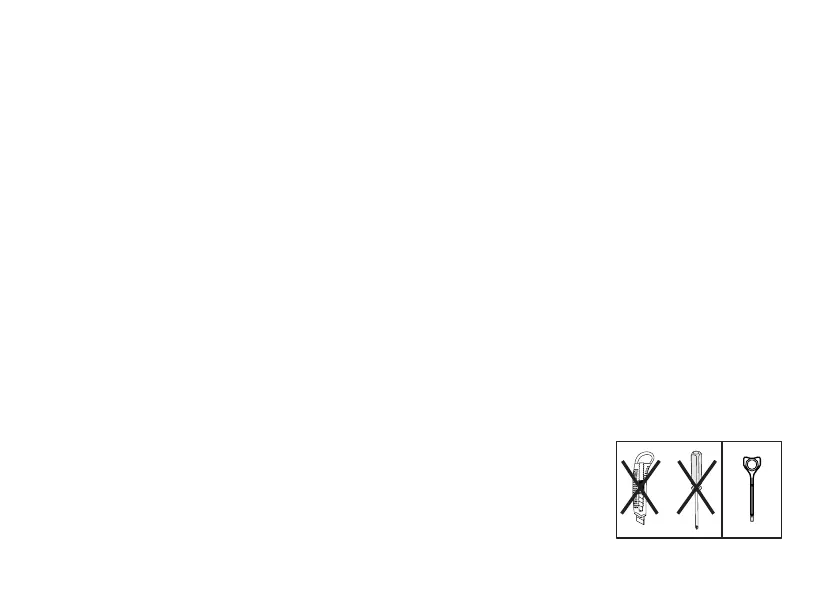
work! A plastic screwdriver for changing the settings is included with the fan.
Use the plastic screwdriver for adjusting the run-on time and
the target value for the humidity sensor.
Do not use metal screwdrivers, knives, etc., as these could damage the PCB.
Read through the operating instructions carefully and please note that the various fan models
have a different PCB arrangement.
ELECTRONIC CONTROL LOGIC