This document is an instruction manual for a Silonn Ice Maker, specifically models SLIM21T, SLIM21B, SLIM21W, and SLIM21G1. It provides comprehensive information on the device's function, usage, and maintenance.
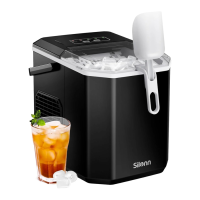
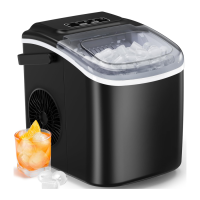
The Silonn Ice Maker is designed for indoor household use to produce ice. Its primary function is to convert water into ice cubes, offering both small and large ice modes to suit user preferences. The device is equipped with a control panel that includes indicator lights for various statuses, such as "ADD WATER" (red when water reservoir lacks water), "ICE FULL" (red when the ice basket is full), "S" (green when small ice mode is selected), and "L" (green when large ice mode is selected). A "POWER" indicator light turns green when the ice maker is on and flashes green when turned off. The "ON/OFF/CLEAN" button serves multiple purposes: a short press turns the unit on or off, and a long press (5 seconds in standby mode) activates the self-cleaning function. A "SELECT" button allows users to confirm their choice of large or small ice mode.
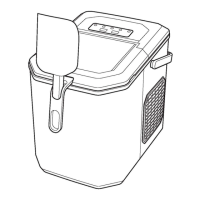
Before the first use, it is crucial to stand the ice maker upright for 24 hours to allow the refrigerant to settle. Users should also check for all accessories, including the handle, drain plug, ice basket handle, ice basket, and ice scoop. If any parts are missing, customer service should be contacted. For initial operation, it is recommended to discard the first four cycles of ice to ensure cleanliness and optimal ice quality. The ice maker should be used in locations where the ambient temperature is between 10°C and 32°C (50°F and 89.6°F) to ensure perfect ice shape and efficient operation. Installing the handle involves positioning it over the insert hole, fitting it into the insert notch, and then lifting it back to lock it into place.
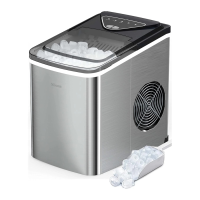
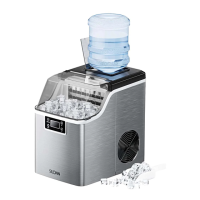
When using the ice maker, it is important to place it on a stable base and only use drinking water; no other liquids should be added. The device should not be operated in temperatures lower than 41°F/5°C or in excessively high temperatures. To make ice, the user first opens the cover and removes the ice basket. Water is then poured into the reservoir, ensuring it does not exceed the "MAX" water mark. After closing the cover, the "ON/OFF" button is pressed to start the ice-making process. The "SELECT" button is used to choose between small or large ice cube sizes. The ice maker typically takes 6 to 13 minutes to produce ice, depending on the room temperature and the selected ice size. The "ICE FULL" indicator light will turn on when the ice basket is full, signaling that the ice is ready. If the "ADD WATER" indicator light turns red, it means the water reservoir is low, and more water needs to be added before pressing "ON/OFF" again to resume ice production.
Maintenance is key to ensuring fresh-ttasting ice and the longevity of the unit. The manual recommends cleaning the ice maker once per week. There are two cleaning methods: manual cleaning and self-cleaning. For manual cleaning, the ice basket is removed, and the interior is cleaned with a soft cloth, warm water, and vinegar, then rinsed with clean water. Excess water is drained over a sink using the drain plug. The exterior can be cleaned with a cloth and mild dishwashing soap. The self-cleaning process is a 30-minute automated cycle. To initiate it, the ice basket is removed, and water is added to the reservoir. While the ice maker is in standby mode, the "ON/OFF/CLEAN" button is long-pressed for 5 seconds. The "S" and "L" indicator lights will flash green consecutively, indicating that the self-cleaning mode has started. After the cycle, excess water is drained, and the exterior is cleaned as in manual cleaning.
Important "DO'S & DON'Ts" for cleaning and maintaining the ice maker include:
- DO NOT use organic solvents, boiled water, detergents, strong acids, or strong alkalis for cleaning, as these can damage the unit.
- If the unit will not be used for a long duration, it is essential to drain the water completely and dry the interior.
- The ice maker should be stored in a well-ventilated area.
Safety precautions are emphasized throughout the manual. The voltage power from the outlet must match the specifications on the appliance nameplate, and the appliance must be grounded. Using an extension cord is generally discouraged due to the risk of overheating and fire; if one must be used, it should have a grounding plug and a rating equal to or greater than that of the appliance. The unit should not be operated if any component, including the cord or plug, is damaged. It must be unplugged before manual cleaning. Only responsible and capable adults should operate the ice maker, and the power cord should be placed to avoid tripping hazards or being pulled by children. Children should not be left unattended near the ice maker during operation. Water that is microbiologically unsafe or of unknown quality should not be used. Safety, warning, or product information labels should not be removed from the unit. Users should not touch the evaporator with their hands while the ice maker is operating, nor should they plug in or unplug the unit with wet hands.
The unit must be placed and set up according to the installation instructions and is intended for indoor household use only. Flammable vapors or liquids should not be stored or used near the unit, and no part of the unit should be immersed in water. Disassembly, repair, modification, or replacement of any part without permission from Silonn or its affiliates is prohibited. The ice maker uses isobutane refrigerant (R600a), a combustible natural gas. Therefore, care must be taken to avoid damage to the refrigerant tubing during handling, installation, and operation. Disposal of the unit must comply with Federal and Local Regulations. Ventilation openings around the unit's enclosure must be kept clear of obstruction. The unit should not be placed near heat sources such as an oven or in direct sunlight. A minimum of three inches of clearance around the side and back walls of the unit is required for proper air circulation.