8
GB
7. Operation
DANGER!
~ The sole plate|20 becomes very hot
during operation. During operation
touch only the handle|6 and the control
elements of the steam iron.
~ Even during short interruptions, always
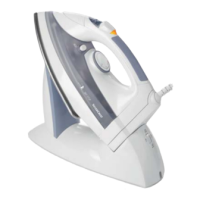
place the steam iron in the stand|7 and
never on its sole plate|20. There is a
fire hazard!
NOTE:
• You may notice an odour when using
for the first time. This is a result of the
manufacturing process and is not a de-
fect with the device. Ensure adequate
ventilation.
The sole plate|20 cools down slightly during
ironing. In order to reach the set temperature
again, the device heats the sole plate|20 up
again, during which the temperature control
lamp|14 is lit. The temperature control
lamp|14 goes out again when the set tem-
perature is reached. This process repeats it-
self during ironing.
Ironing with cable: simply continue iron-
ing during the heating phase.
If you wish to shorten the power cable some-
what, press it into the cable clamp|22 at the
desired point.
Cable-free ironing: the steam iron stands
on the stand|7.
Wait until the temperature control lamp|14
goes out. For purposes of heating up, regu-
larly place the steam iron on the stand|7.
7.1 Filling the water tank
DANGER!
~ Pull the mains plug out of the socket be-
fore you fill up the water tank|15.
• Use clean tap water without any addi-
tives (e.g. vinegar, limescale remover,
starch, perfume, softener).
• The integrated anti-limescale protection
reduces limescale deposits for average
water hardness, and thus extends the
service life of the device. If your tap wa-
ter is hard, use distilled water. Where
the water is moderately hard, mix dis-
tilled water and tap water at a ratio of
1:1.
1. Disconnect the mains plug from the wall
socket.
2. Set the steam flow rate controller|3 to
.
3. The switch|11 is in the position . Re-
move the steam iron from the stand|7.
4. Open the lid|2 (of the water tank) and
tilt the iron forwards slightly to fill it.
5. Use the measuring beaker|21 to pour in
water up to the mark|19 max, but at
least up to one quarter. Hold the steam
iron upright to check.
6. Close the lid|2 (of the water tank).
7. Place the steam iron on the stand|7 and
set the steam flow rate controller|3 to
the desired position.
7.2 Set iron temperature
NOTE:
• The steam iron must be connected to the
stand|7 in order to heat up.
1. Figure C: Set the desired temperature
using the temperature controller|17:
BB1$6B%XHJHOHLVHQB%ERRN6HLWH0RQWDJ$XJXVW
 Loading...
