7
GB
4. Items supplied
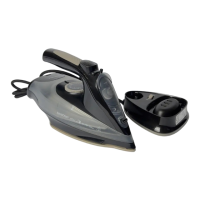
1 steam iron
1 stand|7
1 measuring beaker|21
1 set of operating instructions
5. Normal or cable-free
ironing
The steam iron can be operated cable-free.
This makes the steam iron a little lighter, and
the cable is no longer in the way during iron-
ing.
As soon as the steam iron is replaced on the
stand|7, the sole plate is heated up again.
The temperature control lamp|14 lights up
until the set temperature is reached.
Settings on the stand
The switch|11 on the stand|7 allows you to
choose between 2 options:
= cable-free ironing
= ironing with cable and
Storage
Cable-free ironing
Figure A: lift the steam iron out upwards.
The stand|7 will remain standing without the
steam iron.
Ironing with cable
Figure B: raise the steam iron. The stand|7
will stay on the steam iron.
NOTE:
• If you want to work with a great many
bursts of steam in quick succession, ironing
with the cable is recommended. This is bet-
ter because the sole plate|
20
may fall be-
low the set temperature faster than normal
as a result of the many steam bursts.
Storage
Figure B: the steam iron is locked in place
on the stand|7.
6. Before using for the
first time
1. Ensure that you have pulled out the
mains plug.
2. The switch|11 is in the position . Re-
move the steam iron from the stand|7.
3. Open the lid|2 (of the water tank).
4. Pour water into the measuring beaker |21
and half-fill the water tank|15.
5. Place the steam iron in the stand|7.
6. To lock the iron, set the switch|11 to the
position .
7. Insert the mains plug into a wall socket
corresponding to the technical data.
8. Set the temperature controller|17 to
MAX.
The temperature control lamp|14 lights
up.
9. When the device has reached the de-
sired temperature (temperature control
lamp|14 goes out), iron an old cotton
cloth in steam mode until the water
tank|15 is empty.
BB1$6B%XHJHOHLVHQB%ERRN6HLWH0RQWDJ$XJXVW