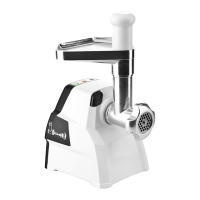
SFW 350 C2
GB
│
IE
│
NI
│
CY
│
9 ■
5) Pull the pattern strips away from the front of the biscuit attachment .
6) First place the plastic disc and then the metal disc of the biscuit attachment
into the meat grinder casing (see fold-out side). Insert the biscuit at-
tachment . so that the fixings on the biscuit attachment . are located in
the openings in the meat grinder casing .
7) After everything has been correctly assembled, screw the ring clamp .
back on hand-tight.
8) Replace the pattern strips back in to the front of the biscuit attachment .
Ensure that the grip on the pattern strips points away from the appliance.
If it does not, you will not be able to adjust the pattern, which is located
directly on the grip.
9) Assemble the meat grinder casing as described under “Assembling the
meat grinder”.
10) To dismantle it, you must first remove the pattern strips before you can
screw the ring clamp .open and take the biscuit attachment back out.
Fitting the strainer attachment
Unfold the fold-out page – it contains the step-by-step illustrations for assembling
the appliance. The figure displayed under point 8) will help you assemble the
appliance.
1) Remove the meat grinder casing as described in “Assembling the meat
grinder”.
2) Remove any attachments that might be fitted and clean the meat grinder
casing .
NOTICE
► The transport screw and the cross blade 3 with the spring - are not
required for the strainer attachment! Remove these from the meat grinder
casing if necessary.
3) Push the plastic screw into the meat grinder casing .
4) Push the strainer sieve over the plastic screw so that the tabs on the
strainer sieve fit into the recesses in the meat grinder casing . The holes
of the strainer sieve should be facing downwards.
5) Once everything has been correctly attached, roll the ring clamp .over the
strainer sieve and screw it on hand-tight.
6) Fit the meat grinder casing as described in “Assembling the meat
grinder”.
7) Undo the locking clamp on the tomato outlet .
8) Place the tomato outlet under the strainer sieve by pushing the tip of the
strainer sieve through the small hole in the tomato outlet :

 Loading...