8
GB
7 Preparation
7.1 Charging the battery
NOTE: The device is only designed for bat-
tery operation, not for mains operation. The
device cannot be switched on when the
charging cable is connected to the device.
• Charge the battery before the initial use.
• Charge the battery at regular intervals
afterwards, in order to be able to use
the device when required.
• When the plug symbol on the LED dis-
play(12) flashes red, the battery level
is low. Charge the device as soon as
possible in this case.
• The charging time is approx. 90 min-
utes when using a 5V / 1000 mA
power supply unit. The charging time is
not reduced if power supply units with a
higher power output are used.
• The operating time without load is
approx. 60minutes when fully charged.
1. Insert the USB-C connector of the charg-
ing cable (see “Scope of supply“) in the
charging connection(13) on the device.
2. Connect the power supply as follows:
Insert the USB-A connector of the charg-
ing cable in the USB-A socket of a suit-
able power supply unit and connect the
power supply unit to the power supply.
or
Insert the USB-A connector of the charg-
ing cable directly in the USB-A socket of
a suitable power supply device.
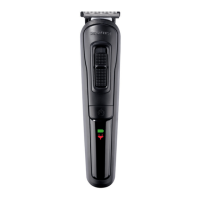
NOTE: The LED display(12) shows the current
charging status:
• The plug symbol is red during charging.
• The plug symbol is red and the battery
symbol flashes green when the battery
is fully charged.
3. Disconnect the device from the power sup-
ply if you wish to interrupt the charging
process or if the battery is fully charged.
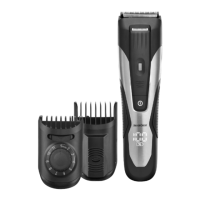
7.2 Attaching / removing cutting
attachments
CAUTION!
Risk of injury!
You may injure yourself if you
accidentally switch on the device
while handling it.
• Switch the device off before you
attach or remove the cutting
attachments.
Attaching
1. Insert the lower flap on the attach-
ment(4) / (5) / (6) / (7) / (8) in the rail in
the motor unit(9) (see Fig.B).
2. Then press down the upper part of the
cutting attachment until it audibly locks
into place and sits securely in position
on the motor unit.
Removing
• Push the attached cutting attach-
ment(4) / (5) / (6) / (7) / (8) off the motor
unit(9) towards the rear with your thumb
(see Fig.C).
7.3 Attaching / removing comb
attachments
NOTE:
• Use the adjustable comb attachment(1)
for the beard trimmer attachment(4).
• Use one of the comb attachments(2) or
(3) for the hair trimmer attachment (5)
(see Fig.A).
Attaching
1. Push the required comb attach-
ment (1) / (2) / (3) carefully over the
respective cutting attachment(4) / (5).
2. For comb attachments (2) / (3), firmly
press the bottom end until it locks into
place in the hair trimmer attachment(5).
You do not have to press down the comb
attachment (1) for the beard trimmer
attachment(4).
 Loading...