SilverCrest SMS 5.0 A1
English - 15
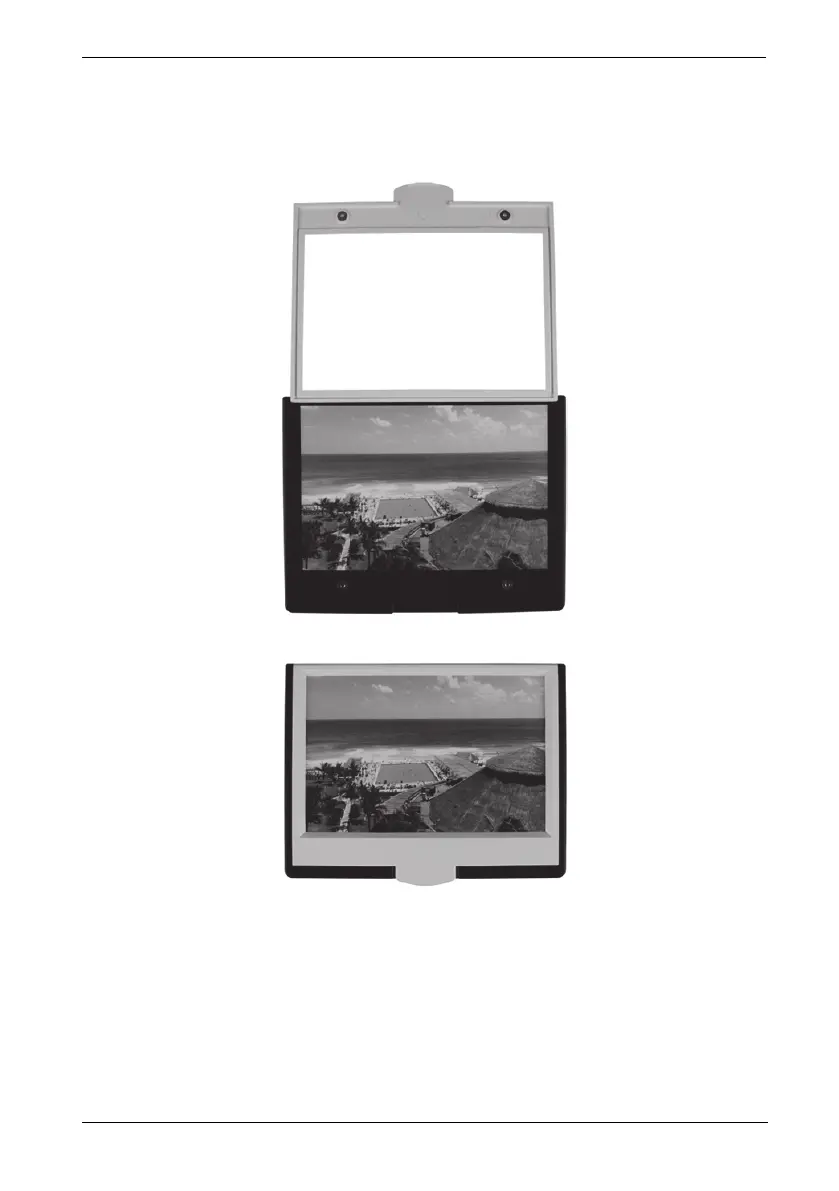
Inserting photos
Open the photo/business card holder at the point marked "OPEN". Then place a 10 x 15 photo
in the device as shown in the following image.
Close the photo/business card holder.
Remove the backlight rail, if it is still inserted, by pressing it down lightly on the protruding point
and pulling it out.
Insert the photo/business card holder, with the photo upwards, in the photo/business card slot
[9]. Insert the photo/business card holder as far as possible.
To scan the photos, please read the section "Recording" from page 17.
Remove the photo/business card holder after you have scanned your photos.
 Loading...