K
Katherine PattersonSep 8, 2025
How to remove 'sweat layer' from nails after using Silvercrest Personal Care Products?
- MMarcia WellsSep 9, 2025
The 'sweat layer' occurs due to polymerization. Remove the 'sweat layer' with the finishing solution z.
How to remove 'sweat layer' from nails after using Silvercrest Personal Care Products?
The 'sweat layer' occurs due to polymerization. Remove the 'sweat layer' with the finishing solution z.
Why does UV gel not harden sufficiently with Silvercrest Personal Care Products?
If the UV gel does not harden sufficiently when using Silvercrest Personal Care Products, it could be due to a couple of reasons. First, the selected treatment time may be too short, so try selecting a longer treatment time. Alternatively, one or more of the UV lamps might be defective. In that case, replace any defective UV lamps.
What to do if Silvercrest SNS 45 B4 Personal Care Products appliance does not switch on?
First, ensure the plug is fully inserted into the mains power socket. If it still doesn't switch on, check the fuses to make sure the mains power socket is supplying voltage.
Why UV gel % does not harden sufficiently with Silvercrest Personal Care Products?
Insufficient hardening of UV gel may occur due to several reasons. You might need to select a longer treatment time. Also, check if any of the UV lamps are defective and replace them. Applying too much UV gel % can also prevent proper hardening, so apply less. Ensure that nails were directly under the UV lamps.
What to do if a UV lamp does not glow in Silvercrest SNS 45 B4?
If a UV lamp does not glow, it is likely defective and needs to be replaced.
What to do if artificial nails are soft/loosened after using Silvercrest SNS 45 B4?
If the artificial nails become soft or loosened, it may be caused by products with a high acetone concentration. Avoid applying products with a high acetone concentration.
How to remove sweat layer after hardening with Silvercrest Personal Care Products?
If a 'sweat layer' remains on the nails after hardening, this is a result of polymerization. Remove the 'sweat layer' with the finishing solution.
Why do my artificial fingernails show unevenness when using Silvercrest SNS 45 B4 Personal Care Products?
Unevenness in artificial fingernails can occur if you're applying too much pressure on the brush when applying the UV gel. Try not to press too hard. Alternatively, the UV gel may have been applied unevenly. In this case, apply a further, thinner layer of UV gel and then harden it.
Why do artificial nails feel soft or loosened after using Silvercrest SNS 45 B4?
The artificial nails may be soft or loosened due to products with a high acetone concentration. Avoid applying products with a high acetone concentration.
What to do if a UV lamp of Silvercrest SNS 45 B4 Personal Care Products does not glow?
If a UV lamp does not glow, the UV lamp is likely defective. Replace the defective UV lamp.
Defines the appliance's intended use and critical safety warnings for operation.
Outlines copyright protection and the manufacturer's limitation of liability.
Explains the meaning of DANGER, WARNING, IMPORTANT, and NOTICE symbols used in the manual.
Details critical safety measures to prevent potentially fatal electrical shocks.
Warns about potential eye injuries and vision impairment from UV light exposure.
Covers pre-use checks, child supervision, substance handling, and repair safety.
Highlights health risks from inhaling solvent vapors and handling chemical substances.
Provides guidance on safely handling chemical substances and preventing property damage.
Lists specific medical conditions and characteristics that preclude using the UV appliance.
Details safe irradiation dosage limits and potential skin reactions like erythema.
Advises on protecting eyes, sensitive skin areas, and consulting doctors for sensitivities.
Explains the meaning of various symbols found on the product and its packaging.
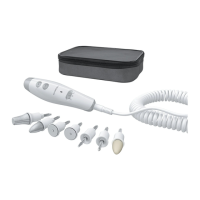
Identifies the main parts of the UV appliance and its controls.
Lists and describes all the accessories supplied with the nail studio set.
Guides on checking the contents and initial inspection of the appliance.
Provides safety instructions for the initial setup and commissioning of the appliance.
Instructions for unpacking the appliance and environmentally friendly disposal of packaging.
Specifies the necessary conditions for the safe and proper installation location.
Details critical safety measures for connecting the appliance to the power supply.
Explains the procedure for switching the UV appliance on and off using the power switch.
Describes how to select treatment times and use the appliance's timer functions.
Guides on selecting the correct nail tips and preparing natural nails for application.
Alerts users to potential property damage risks associated with nail glue and UV gel.
Covers cuticle pushing, nail surface preparation, and dust removal before nail attachment.
Details the correct method for applying nail glue to ensure secure adhesion of nail tips.
Explains how to trim artificial nail tips to desired length and shape with clippers and files.
Guides on selecting and filing nail tips to match the natural nail contour.
Describes the process of applying thin, even layers of UV gel to the nails.
Details the recommended settings and procedure for the first UV gel hardening.
Explains how multiple thin gel coats enhance nail stability and durability.
Guides on removing the sticky 'sweat layer' after UV gel hardening using finishing solution.
Explains how to maintain artificial nails as natural nails grow, requiring topping up.
Details the technique for applying French tips using UV gel and spot swirl.
Provides safe methods for removing artificial nails and caring for natural nails afterwards.
Offers tips for regular nail care, including filing, oiling, and varnish application.
Describes how to clean the UV appliance using appropriate cloths and solutions.
Emphasizes disconnecting power before cleaning to prevent electrical shock hazards.
Instructions for cleaning brushes, spot swirls, and closing product containers.
Details the procedure and safety precautions for replacing UV lamps in the appliance.
Step-by-step guide for safely removing and installing UV lamps in the appliance.
Provides guidance on identifying and fixing common problems with the UV appliance.
Presents a table detailing common defects, their possible causes, and solutions.
Highlights safety considerations and risks associated with repairs by non-specialists.
Advises on storing chemical substances and the appliance safely to prevent health risks.
Explains the proper methods for disposing of the appliance and its chemical substances.
Summarizes the appliance's compliance with relevant European directives and standards.
Provides comprehensive technical specifications including voltage, power, dimensions, and lamp type.
Outlines the terms, conditions, and duration of the product's warranty coverage.
Defines what is covered by the warranty, including exclusions for wear and misuse.
Details the steps required for a quick and efficient processing of warranty claims.
Provides contact information for customer service and the product importer.
| Power source | Battery |
|---|---|
| Number of attachments | 1 |
| Blade Material | Stainless steel |
| Handle Material | Plastic |
| Battery type | 1 x AA |
| Color | Black |
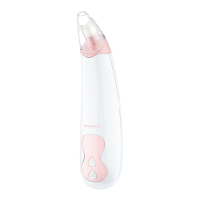
| Product type | Electric nose hair trimmer |