14
GB
3. Insert the plug-in power unit|21 into an easily accessible
wall socket, the voltage of which corresponds to the rating
plate of the plug-in power unit.
4. Figure A: push the protective cap|17 downwards off the
shaving attachment|6.
5. Switch on the device with the on/off switch|10.
6.2 Transport lock
If the transport lock is activated, the lock symbol|13 flashes.
• Press and hold the on/off switch|10 for approx. 4 seconds,
in order to switch the transport lock on/off.
• Connecting the plug-in power unit|
21 deactivates the trans-
port lock, which cannot be activated during mains opera-
tion.
6.3 Changing the attachments
WARNING! Risk of injury!
~ Switch off the shaver|9, before you attach or remove the at-
tachments.
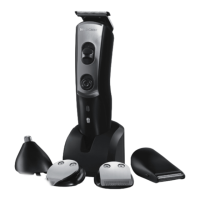
1. Figure A: slide the protective cap|17 onto the shaving at-
tachment|6 from below, with the opening first.
2. Figure B: remove the attachment|3,|4 or|6 from the shav-
er|9.
3. Figure B: insert the guide (see dotted line) of the attach-
ments|3,|4 or|6 into the recess of the motor unit for attach-
ments|8, and press the attachment onto the shaver|9 until it
audibly clicks firmly into place.
BBB5RWDWLRQVUDVLHUHUB3UHPLXPB%ERRN6HLWH)UHLWDJ1RYHPEHU

 Loading...


