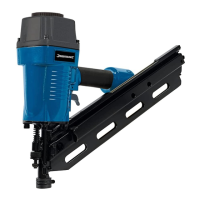
Air Framing Nailer 90mm 282400
11
silverlinetools.com
Operation
WARNING: ALWAYSwearappropriatepersonalprotectiveequipment,includingeyeprotection
when working with this tool.
Adjusting the depth of penetration
• TheDepthAdjuster(10)enablesyoutoadjustthedepthofnailpenetration
• Rotate the Depth Adjuster a small amount at a time (clockwise to increase depth, anticlockwise
todecreasedepth)(Fig.VII)andtestbyringanailintoawastepieceofmaterial,untilthenail
headpenetratesbytheamountrequired
Firing nails/staples
IMPORTANT. Beforeringanailintotheworkpiece,alwaystestthedepthofpenetrationonapiece
of scrap material. See ‘Adjusting the depth of penetration’ below.
SeeFig.VIII
1. Connectthetooltotheairsupply
2. RotatetheAirExhaust(12)sothatairescapesinasafedirection(awayfromtheoperator)
3. HoldthetoolrmlyagainstthematerialsothattheSafetyCatch(9)isdepressed
4. GentlysqueezetheTrigger(11)untilthefastenerisred
5. Release the Trigger and remove from the workpiece
6. Checkthatthefastenerhaspenetratedthematerialcorrectly
Accessories
• AfullrangeofaccessoriesincludingnailsandstaplesisavailablefromyourSilverlinestockist
• Spare parts can be obtained from toolsparesonline.com
Maintenance
WARNING:ALWAYSdisconnectthetoolfromthepowersupplybeforecarryingoutany
inspection, maintenance or cleaning.
General inspection
• Regularlycheckthatallthexingscrewsaretight.Theymayvibratelooseovertime
Lubrication
• Lubricateallmovingpartswithasuitablelubricantspray,atregularintervals
Cleaning
WARNING: ALWAYSwearprotectiveequipmentincludingeyeprotectionandgloveswhen
cleaning this tool.
• Keepyourtoolcleanatalltimes.Dirtanddustwillcauseinternalpartstowearquickly,and
shorten the device’s service life
• Cleanthebodyofyourtoolwithasoftbrush,ordrycloth
• Neverusecausticagentstocleanplasticparts.Ifdrycleaningisnotsufcient,amilddetergent
on a damp cloth is recommended
• Water must never come into contact with the tool
• Ensurethetoolisthoroughlydrybeforeusingit
• Ifavailable,useclean,dry,compressedairtoblowthroughtheventilationholes(where
applicable)
Keep the tool oiled
IMPORTANT: Ensureairtoolsarekeptcleanandlubricated.Lubricationisessentialtoprevent
corrosion of internal parts, which could lead to tool failure.
• Contactyourretailerforsuitableairtooloil.DONOTUNDERANYCIRCUMSTANCESUSENORMAL
ENGINEOIL
Every day, before use:
• Withthetooldisconnectedfromtheairsupply,pourthe1-2dropsofoilintotheQuickConnector
(or air intake)
• Operatethetoolbriey(e.g.2-4seconds)atlowspeedtolubricateallinternalworkings
Once a week:
• Wipethebodyofthetoolwithadampcloth.Youcanuseamilddetergentornon-ammable
solvent
• Once clean, lubricate all moving parts with a light oil
Note: Ifthetoolisinconstantuseorusedforlongperiodsatatimeacombinedlter/lubricator
mustbetted.Theremustbeanairlterttedatalltimes.
• Failuretocomplywiththeoperatingandmaintenanceinstructionsmayinvalidatetheguarantee
Clearing jams
• UsingtheHexKeyssuppliedanda10mmspanner(notsupplied),themagazineandring
mechanism can be disassembled to clear blockages or jams
• Todisassemblethemagazineandringmechanism
1. Unscrewthetwo3mmmagazineHexScrews(8)usingthe3mmHexKey(15)
2. Remove the two Screws and screw plate
3. UnscrewandremoveMagazineHexScrew5mm(10)usingthe5mmHexKey(14)(Fig.IX)
4. UnscrewandremoveMagazineHexScrew5mm(11)usingthe5mmHexKey(14)a10mm
spanner (not supplied) (Fig. X)
5. Takingcarenottolosethemagazineslidingcollet(Fig.XI),CAREFULLYslidemagazineoutof
nailer(Fig.XII)
Note: WhenthemagazineisremovedtheSafetyCatchmechanismisnolongerxedtothetool.
EnsurethatthetoolispositionedsothattheSafetyCatchmechanismwillnotslideoffthetool.
6. Slidethespringloadingmechanismoutofmagazine(Fig.XIII)andcheckbothmagazineand
nailer for obstructions
7. Afterclearinganyobstruction,ensurespringloadingmechanismisinsertedcorrectlywith
springbrackethookedontotheendofthemagazine(Fig.XIV)
8. Reassemble all parts, in reverse order to removal and ensure all screws/nuts are tightened
correctly
Contact
For technical or repair service advice, please contact the helpline on (+44) 1935 382 222
Web: silverlinetools.com/en-GB/Support
Address:
Toolstream Ltd
BoundaryWay
LuftonTradingEstate
Yeovil, Somerset
BA228HZ,UnitedKingdom
Storage
• Storethistoolcarefullyinasecure,dryplaceoutofthereachofchildren
Disposal
• Air tools should not be disposed of with household waste
• Spraygunsmaycontaintracesofsolventsandpaintresidue,andmustberecycledaccordingly
• Surplus paints, solvents and cleaning solutions must be disposed of according to the
manufacturer’s instructions
• Contactyourlocalwastedisposalauthorityforinformationonthecorrectwaytodisposeof
air tools
282400_Manual.indd 11 30/08/2019 09:52


 To Next Page