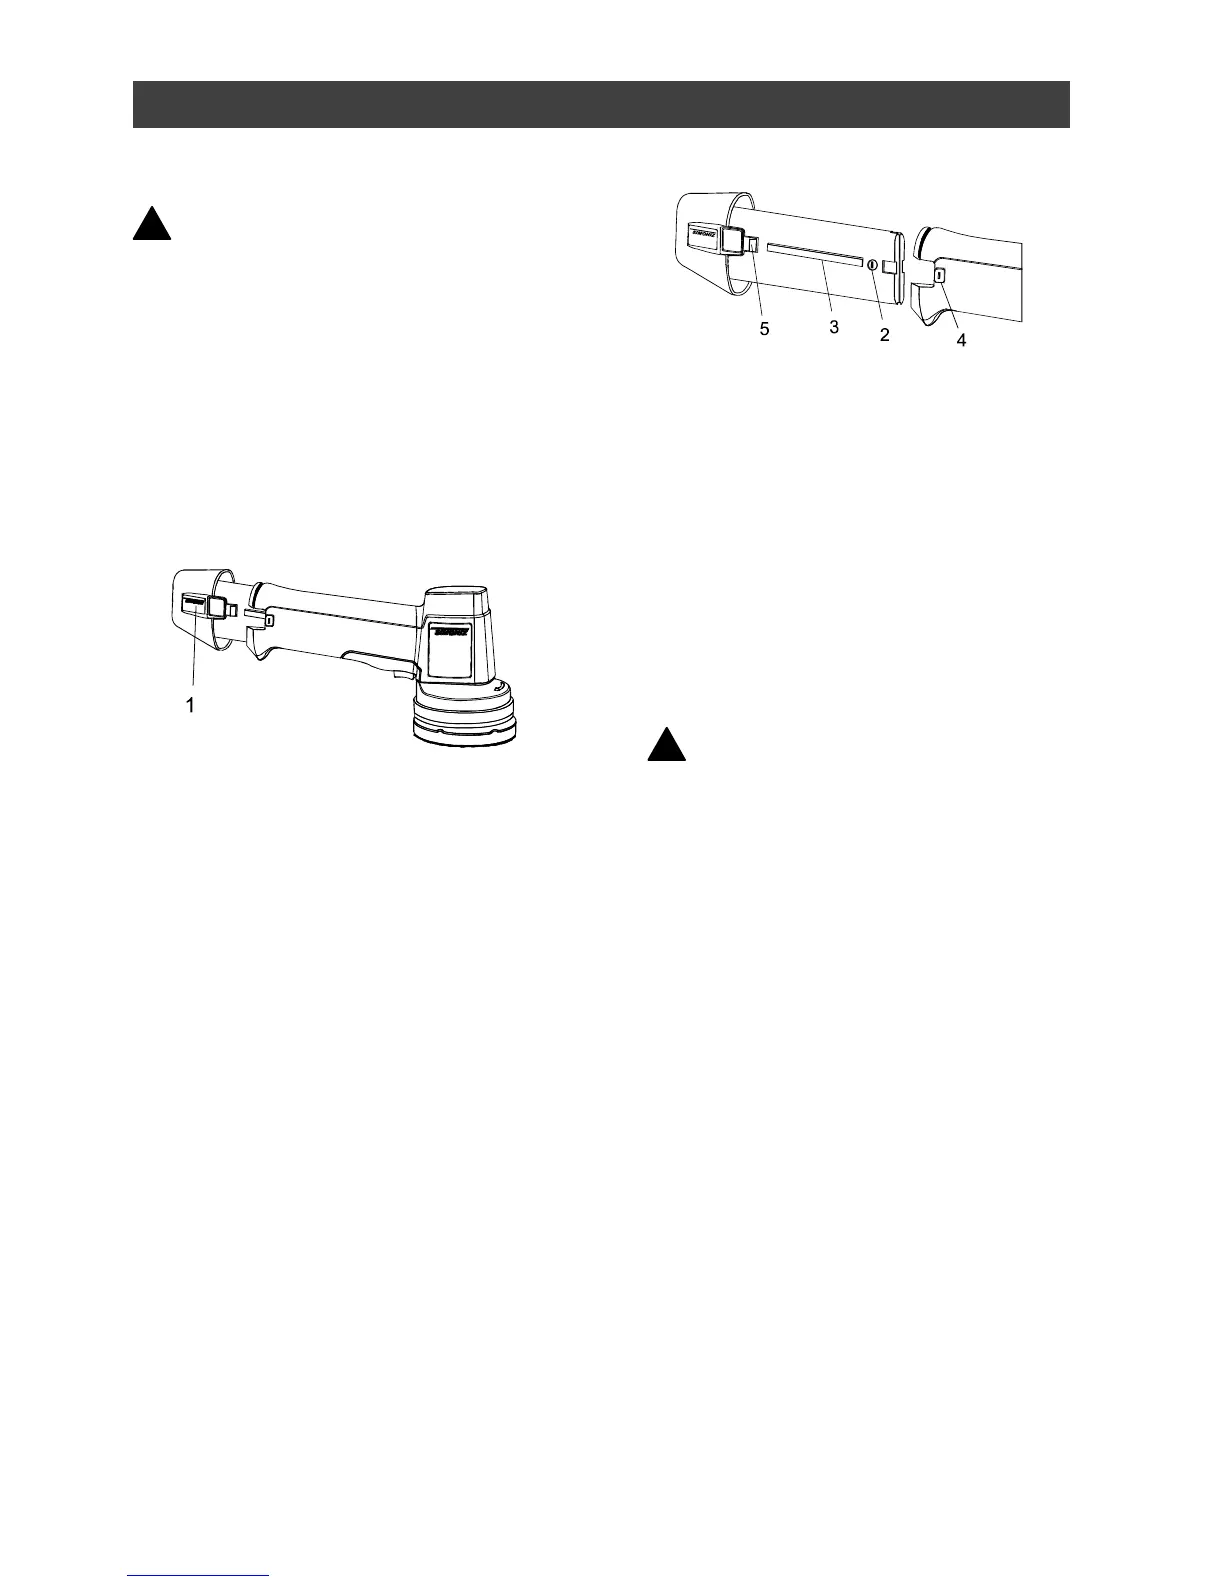
REMOVING & INSTALLING BATTERY
WARNING: Always make sure
your fingers are away from the ON/OFF
switch when removing or installing a
battery.
1. To remove the battery from the tool,
squeeze the locking buttons (1) on
each side of the battery (see Fig. 1).
2. Slide the battery completely out of
the tool.
3. To install a battery, align the
negative polarity symbol (2) and the
raised key (3) on the battery with the
negative polarity symbol (4) on the
tool handle (see Fig. 2).
4. Slide the battery fully into the tool
handle until you hear the locking
latches (5) “click” into place.
NOTE: The battery will not fit into the
tool if the negative polarity symbols
are not aligned. If you encounter
difficulty inserting the battery into the
tool, check to make sure the
negative polarity symbols are
aligned.
5. Gently pull on the battery to ensure it
is securely latched into the tool.
CHARGING THE BATTERIES
Before beginning any polishing or
sanding project, it is important that you
fully charge BOTH batteries. As it takes
up to 5 hours to fully charge a run down
battery, it is recommended that the
batteries be charged the day before being
used.
WARNING: Use ONLY the 4.8 V
charger supplied with this tool to
charge the batteries. Do not charge
any other batteries with the charger
supplied with this tool. Mixing
incompatible batteries and charger
may cause the battery to leak or burst
causing personal injury.
1. Plug the small plug (1) of the charger
(2) into the receptacle (3) on the side
of the charging stand (4) (see Fig 3).
2. Plug the charger into a 115 V AC
Power source.