Assembly instructions for kit #6
All rights reserved. 2001 Simple Motors, LLC ♦ www.simplemotor.com ♦
2
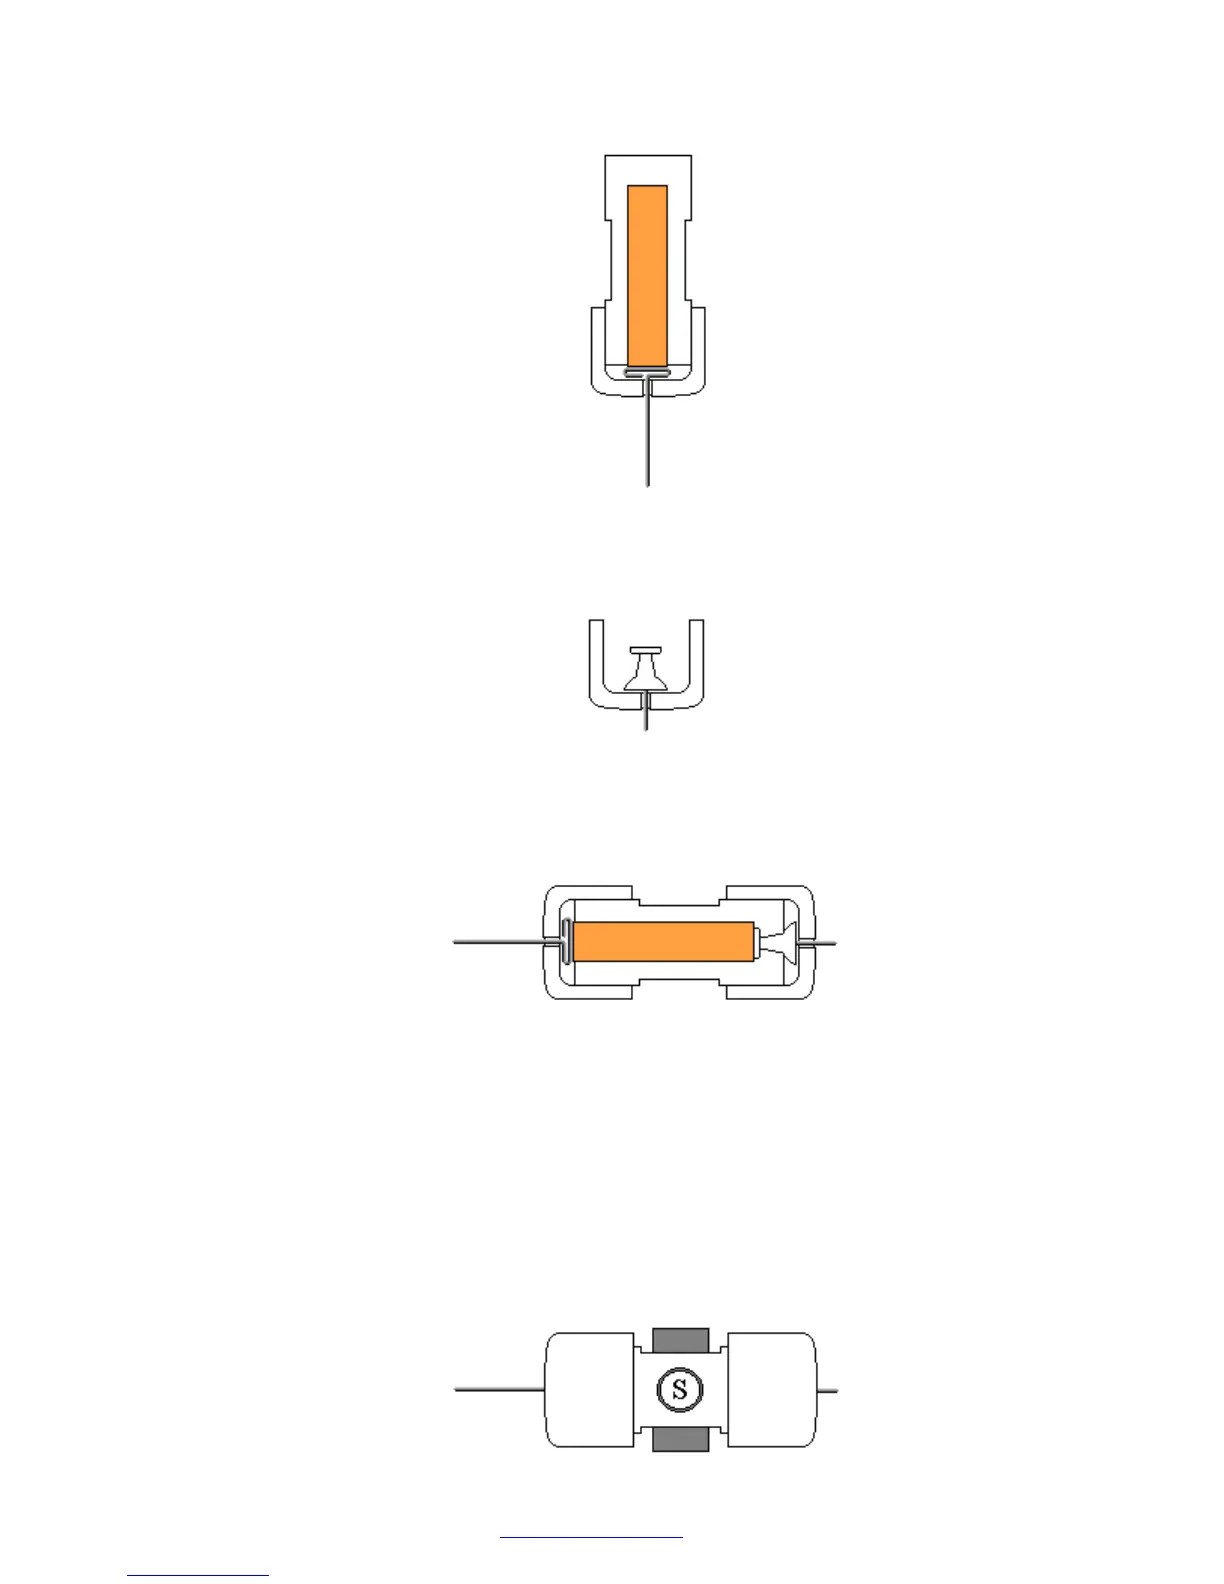
3. Put in the wooden insert.
4. Insert the pushpin into the other cap until it is fully seated and the end of the pushpin sticks
out approximately 1/4" (6-7 mm). You may need to push it hard.
5. Put everything together as shown below. Push the caps towards each other until they
cannot move any more. The T-pin must be secured firmly. This process may require some
strength. Be careful not to bend the T-pin or poke yourself.
6. Glue the magnets to the flat surfaces of the rotor core with the letter ‘S’ facing outside (or a
dimple facing inside). Your kit includes 4 magnets. If you want to try 2 magnets first, glue
them to the opposite sides. Straighten the T-pin if necessary. You can check it by spinning
the rotor between your thumb and index finger. Again, be very careful.
All kits have magnets with one of the poles marked with either a letter ‘S’ on the South pole
or a dimple on the North pole. If you want South side to look better, you may cut out the
white glossy round labels that are provided and paste them. You may do it before attaching
the magnets to the rotor. It is recommended to use regular white glue or a glue stick on the
labels for better results.