Assembly instructions for kit #6
All rights reserved. 2001 Simple Motors, LLC ♦ www.simplemotor.com ♦
3
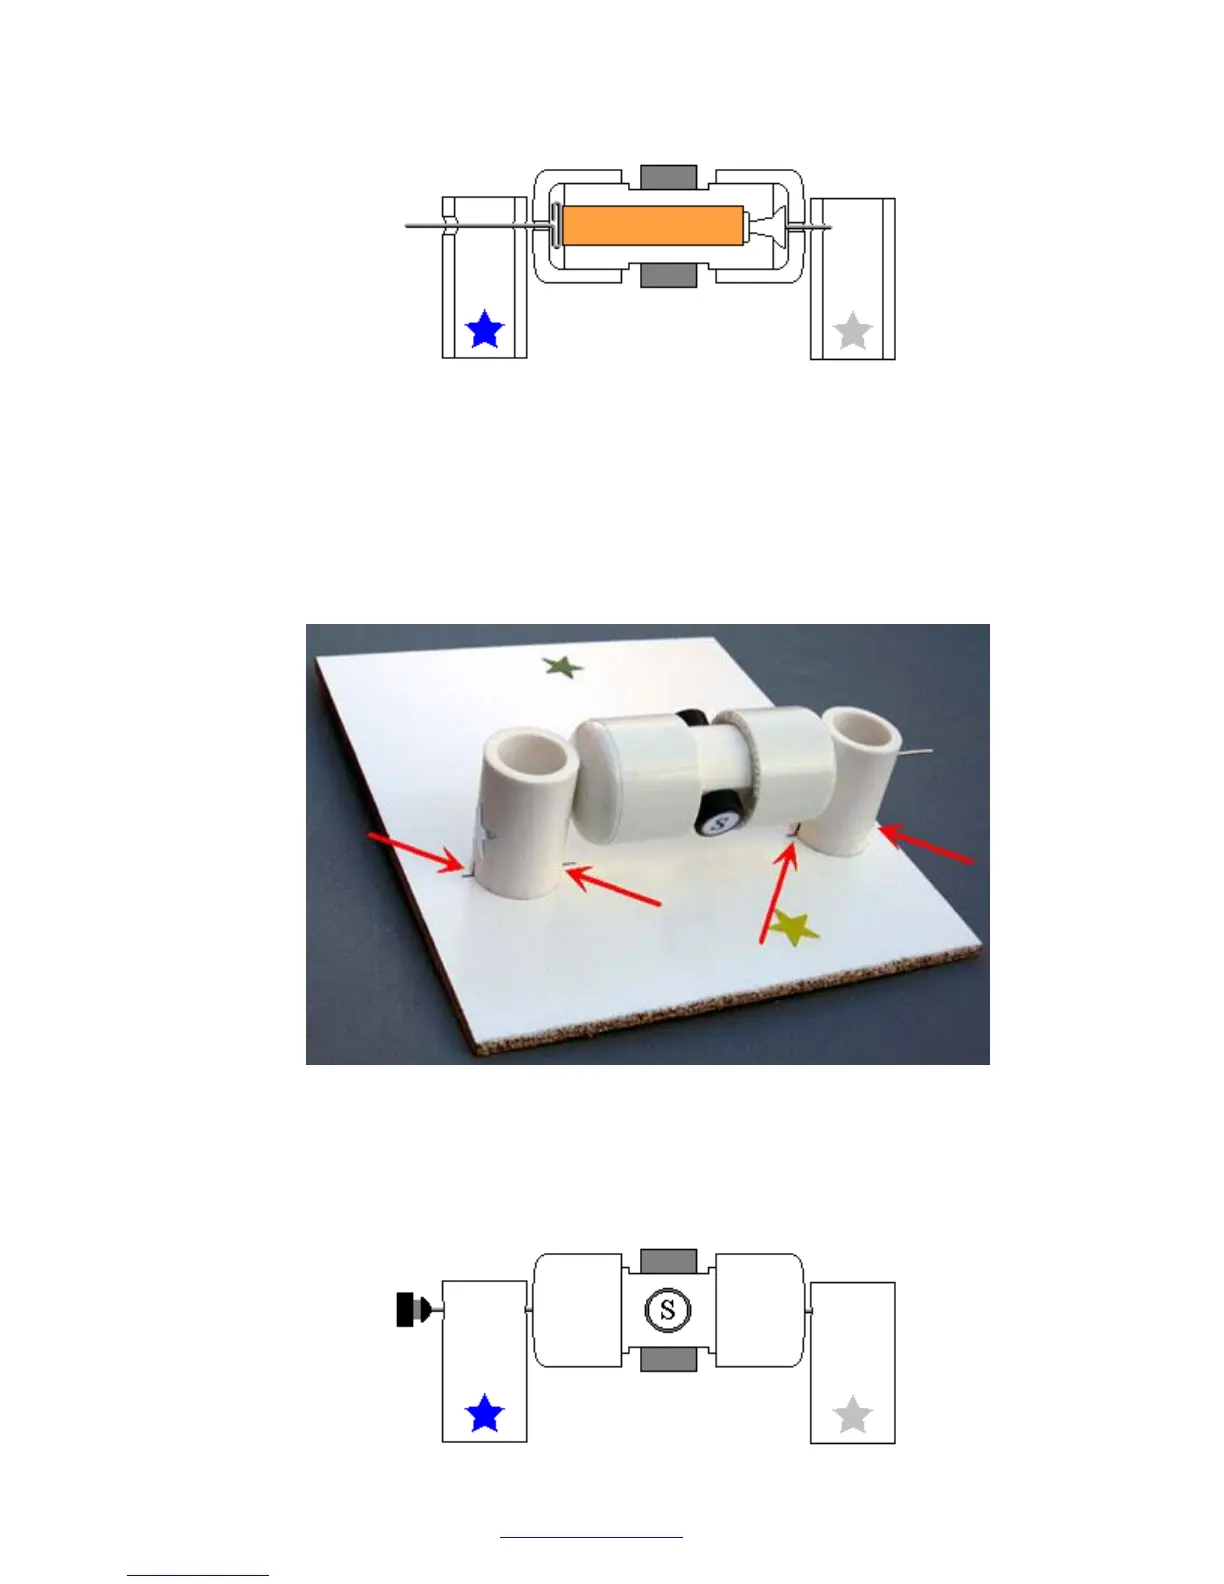
7. Insert the rotor into the stands marked with blue and silver stars as shown below. Hold the
stands and test to see if rotor spins freely. Make final adjustments to the T-pin if necessary.
8. IMPORTANT: If you plan to attach propeller to your motor try to glue the stand with the
blue star as close to the edge as possible. You may need to shift the whole rotor assembly.
Glue the stand with the silver star to the board. Try to cover the corresponding star
completely. Align the marks on the stand with the line on the board as shown below. Note
that the star's position and the marks are approximate, sometimes you need to move the
stands slightly to achieve the lowest friction. Keep in mind that super glue bonds instantly,
so try to be as accurate as possible in these procedures.
9. Insert the rotor into the stand marked with the blue star. Glue it to the board the same way
as the first stand. Leave a gap of about 1/16" (1/32", or 0.8 mm on each side) between the
rotor and the stands. Test again to see if the rotor spins freely. At this time, or later, you
may take the rubber plug and fix it as shown below. You can glue different things to the
outer flat surface of the plug. Try to be accurate, redo this step if necessary.


 To Next Page