Assembly instructions for kit #6
All rights reserved. 2001 Simple Motors, LLC ♦ www.simplemotor.com ♦
4
10.If you purchased the wire comparison kit, instead of steps 10-12 for this kit, follow
instructions for wire comparison kit. After that, please, continue the assembly instructions
from step 13.
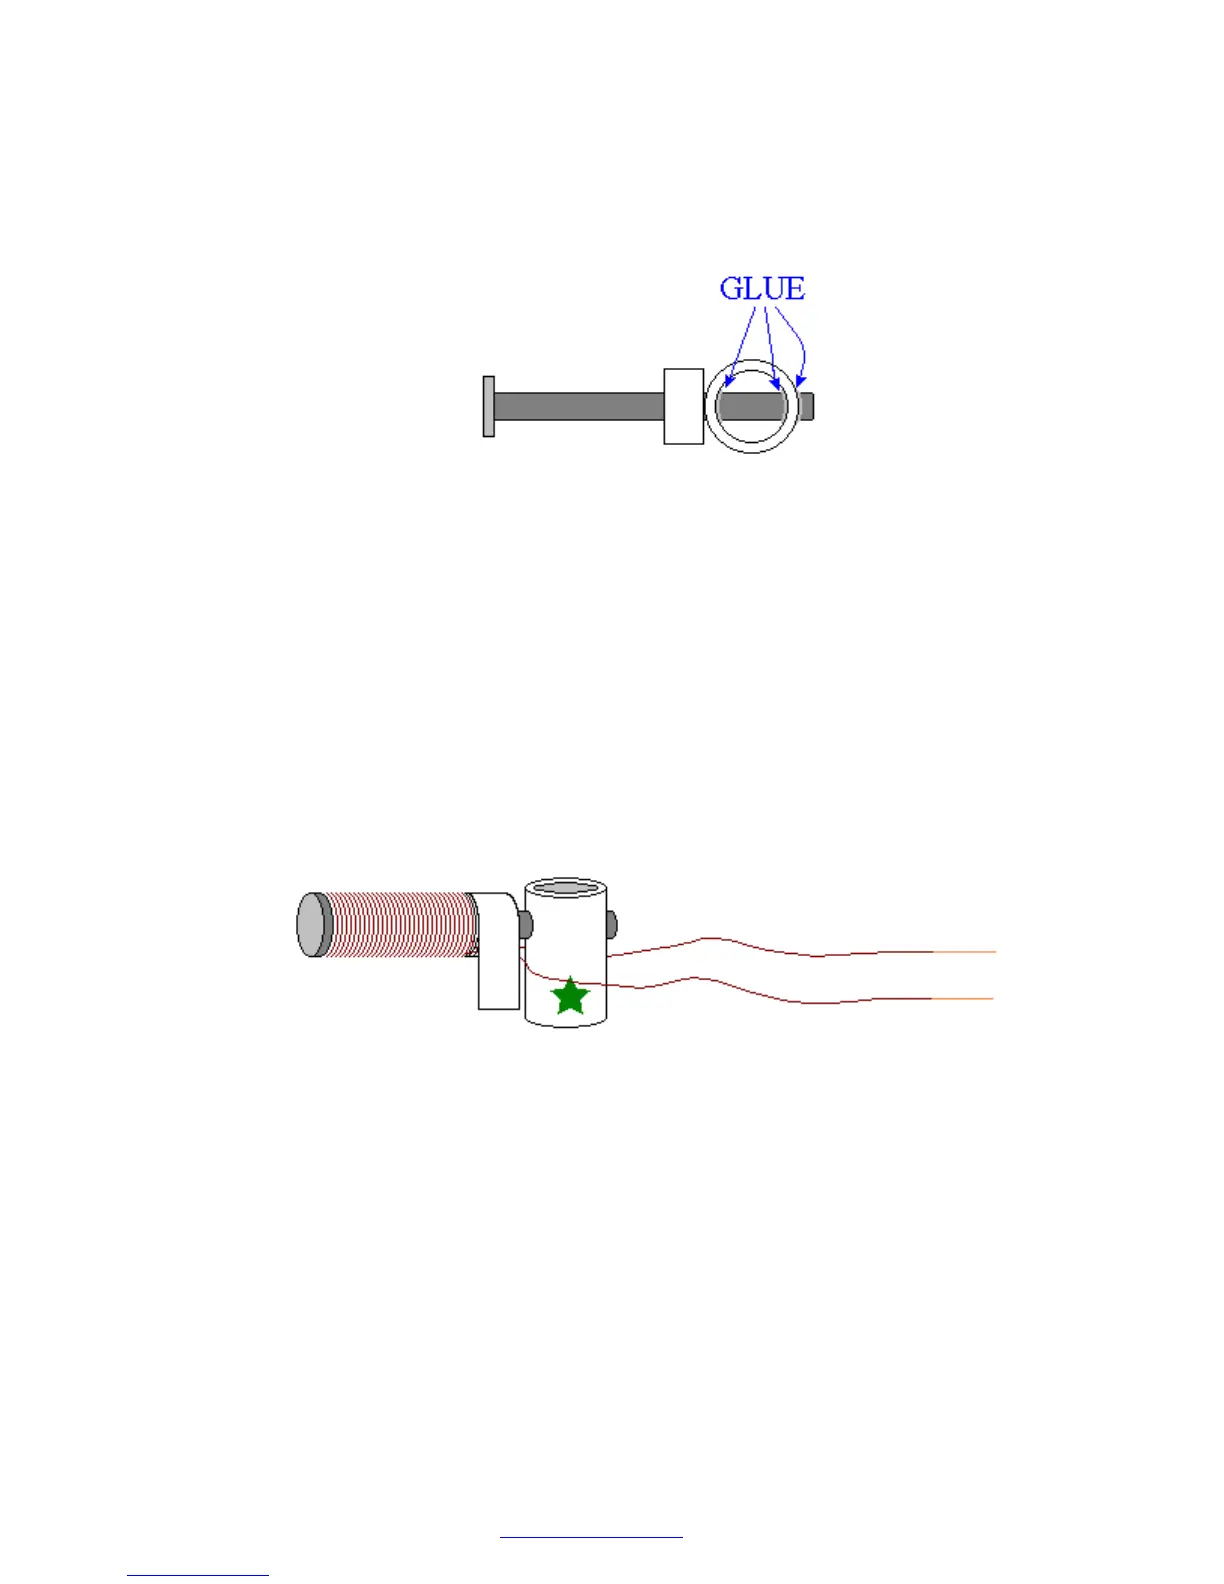
Otherwise, insert the nail into the stand with the green star. If it is loose you may apply
glue as shown below.
11.All wire on the spool should be used to wrap around the area between the tape and the
head of the nail.
o Tape one end of wire leaving about 6" (15 cm) open. You may use the tape that is
already on the nail.
o Wind all the wire in one rotational direction (either clockwise or counterclockwise)
moving back and forth along the nail. Try to be as accurate as possible. Do not let
the wire slide off the end of the electromagnet.
o Tape the second end of the wire using the same tape. Both open ends of wire should
be about 6" (15 cm) long.
o Clean about 3/8" (10 mm) of the wire tips with fine sandpaper (included) or a sharp
knife to remove the insulation.
Test the electromagnet! Connect one wire to "+" and another wire to "-" of the battery. If
electromagnet is assembled correctly the head of the nail should attract metal objects such
as paper clips, small nails, knife blade, etc.


 To Next Page