3
Mounting the TrueAlert Ceiling-Mount A/V
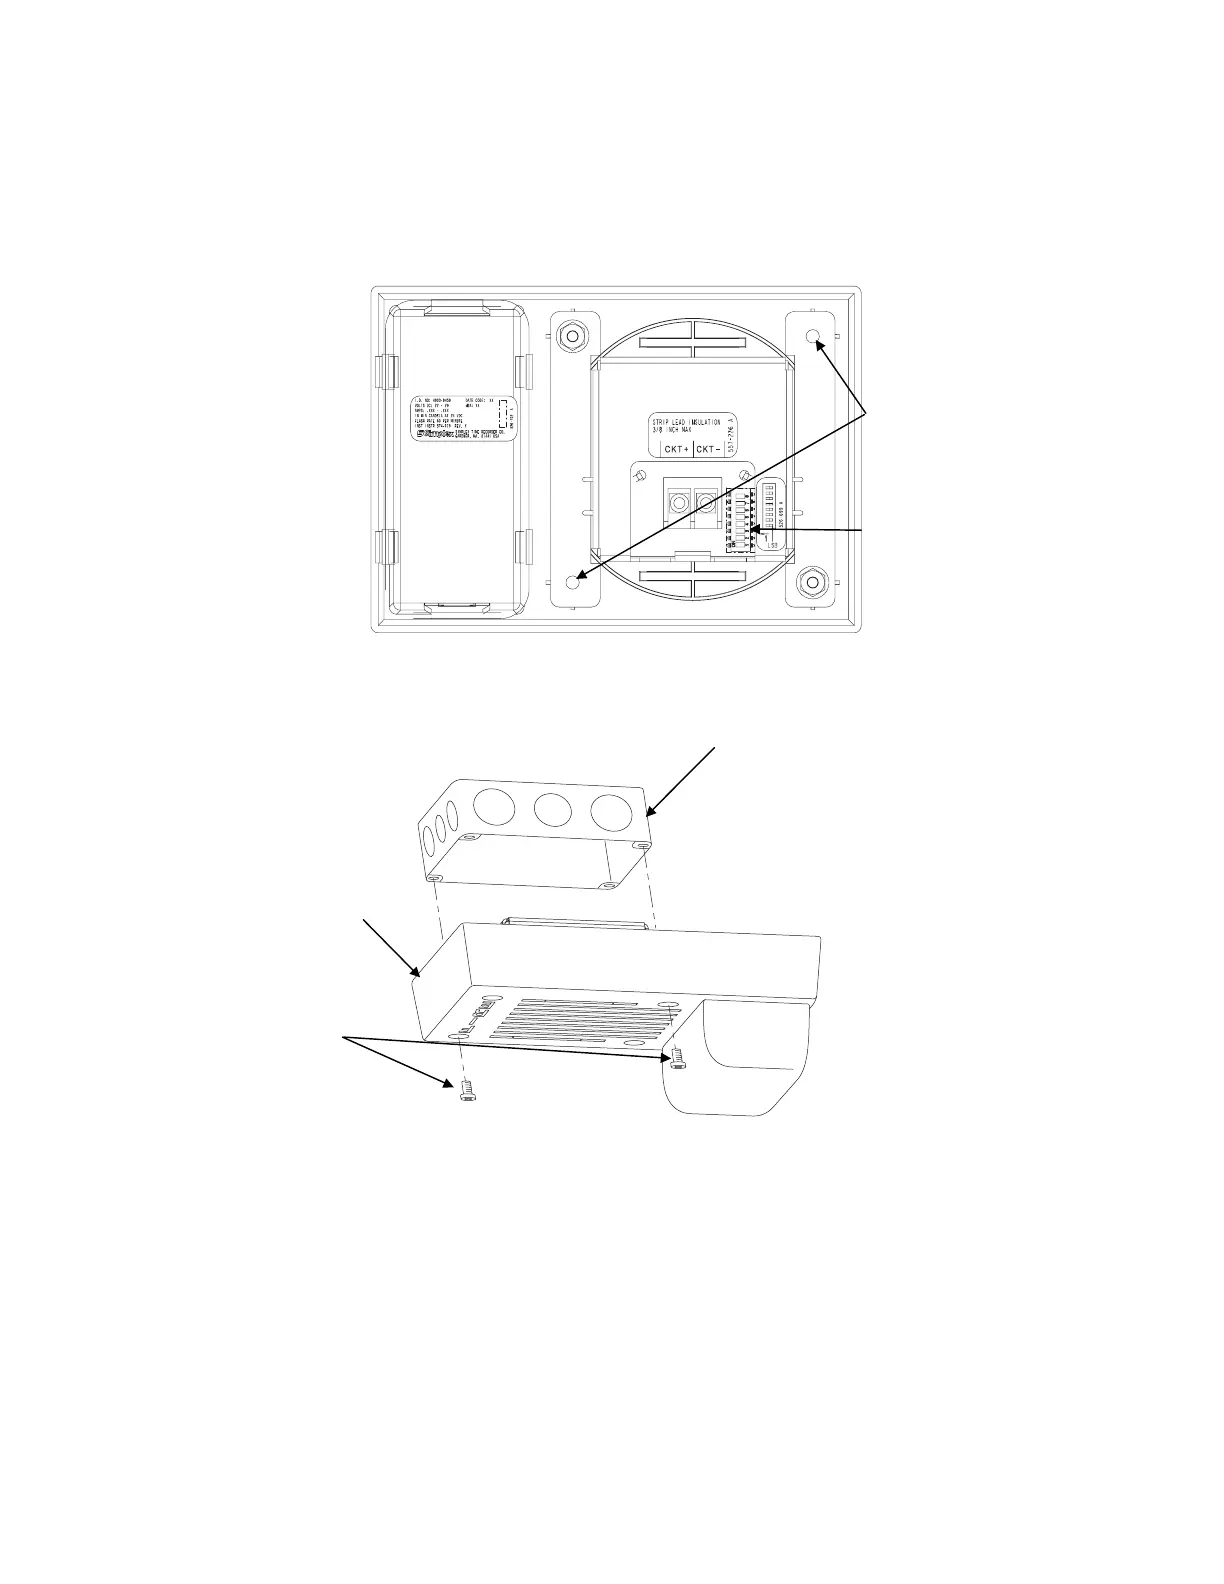
See Figure 3 for mounting the TrueAlert ceiling-mount A/V to the enclosure box.
Caution: Do not bring conduit through the rear of the electrical box.
1. Tighten mounting screws snugly (do not overtighten). Torque mounting screws 5-7 in/lbs.
2. For flush mounting, install the box either flush with the ceiling or with a maximum ¼-inch recess.
Notes:
1. The TrueAlert Ceiling-Mount A/V attaches directly to a 4-inch square electrical box (not supplied), semi-flush or surface mounted. Ensure
correct orientation of the box in relation to the location of the mounting screws and the A/V’s position.
2. For installation in a concrete or plaster ceiling, flush-mount the box (with a ¼-inch recess, maximum).
3. For installation in a suspended ceiling, use a suitable tile bridge that rests on tile to support the box.
4. Address Switch SW1 is accessible with the Ceiling-Mount A/V removed.
Figure 3. TrueAlert Ceiling-Mount A/V Mounting
2 SCREW HOLES FOR
4-INCH SQUARE MOUNTING
(SEE NOTES)
4-INCH SQUARE
ELECTRICAL BOX
NOT SUPPLIED
(3” DEEP REQUIRED)
(SEE NOTES)
SCREWS FROM 748-472
SHIP GROUP QTY: 2
(MOUNT SCREWS
CROSS-CORNER)
TrueAlert CEILING-
MOUNT A/V
COVER
DIP SWITCH SW1
(SEE NOTE 4)