Coronet / 2400 / RE 200 Series
7
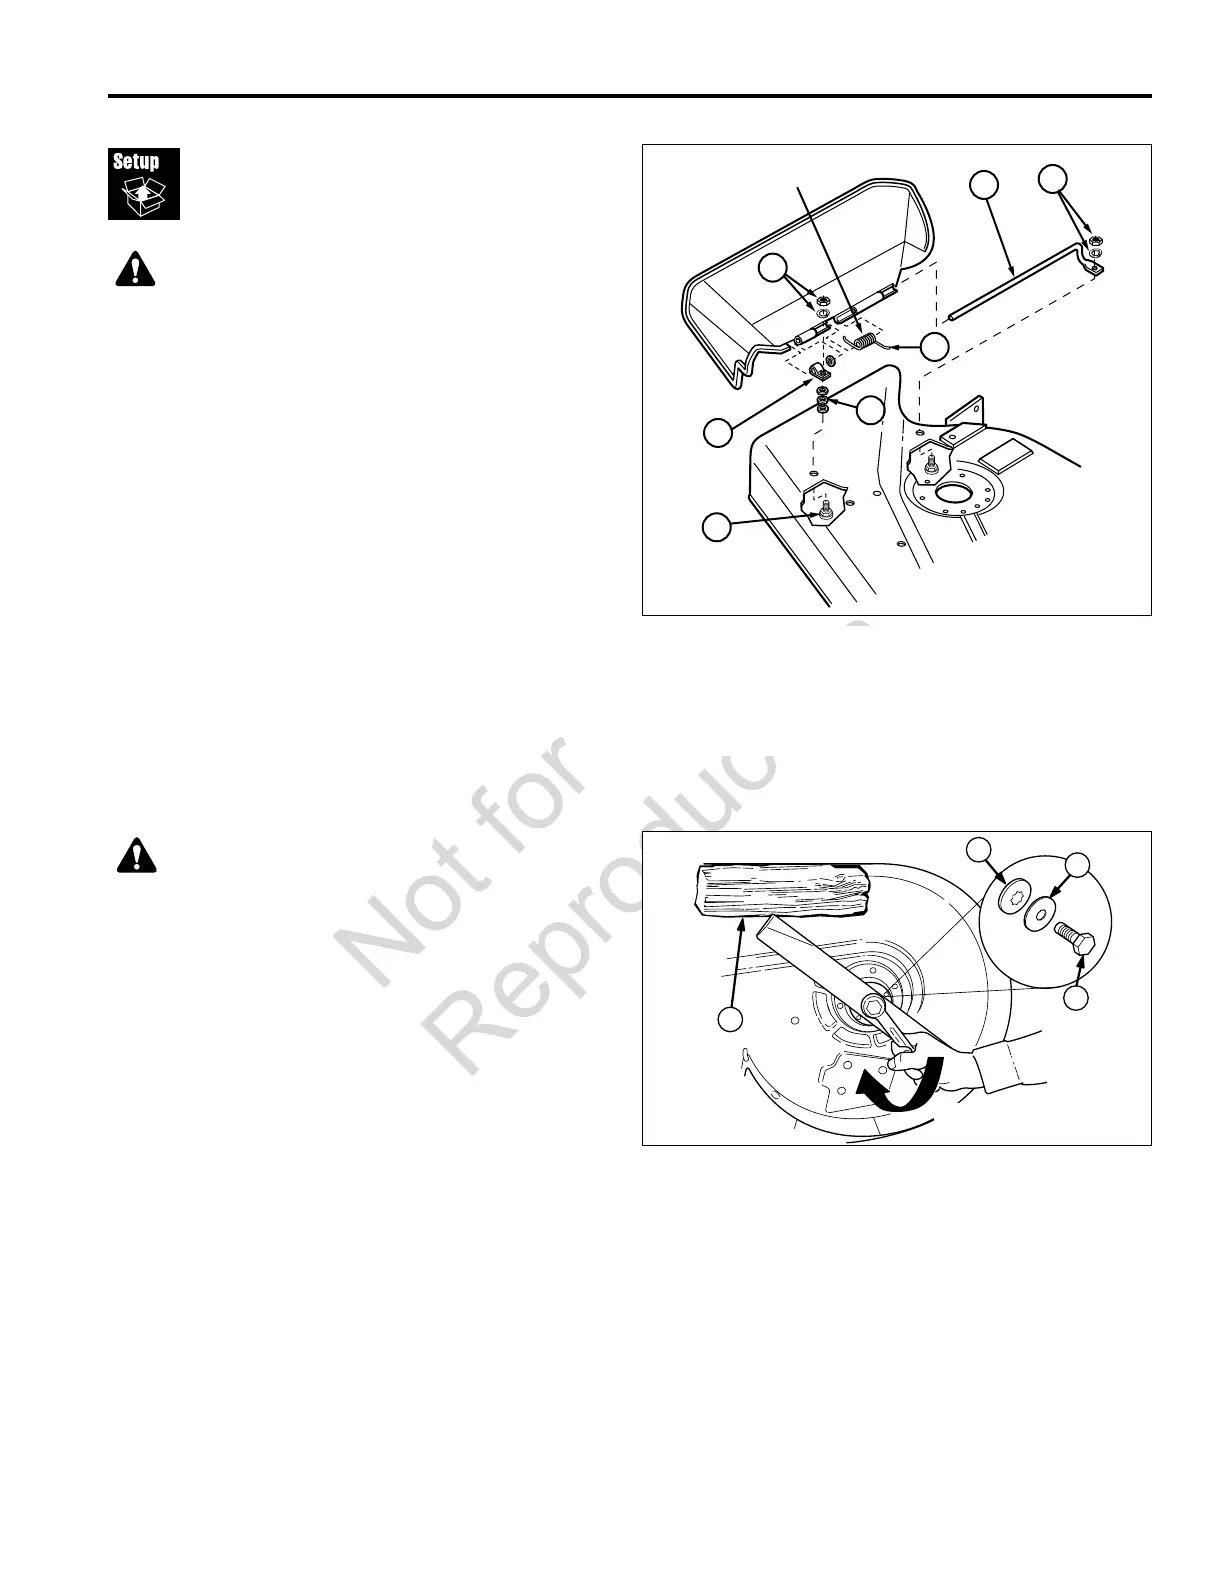
Figure 7. Install Deflector
A. Spring E. Clip
B. Front Hardware F. Front Carriage Bolt
C. Rear Hardware G. Washer
D. Retaining Rod
Mower
Assembly
Install Deflector (Where Required)
1. Remove front lockwasher and nut (B, Figure 7) and
loosen rear hardware (C).
2. Slide deflector forward and remove washer (G), clip
(E), and spring (A). Reinstall deflector on rod, replac-
ing hardware as shown in Figure 7.
3. Make sure spring legs are in tension position (180°
apart).
4. Replace front lockwasher and nut (B) and tighten
both front and rear hardware.
WARNING
Mower blades are sharp. For your personal
safety, do not handle mower blades with bare
hands. Careless or improper handling of blades
may result in serious injury.
Figure 8. torquing The Blade
A. 4x4 Wood Block C. Spring Washer
B. Spline/Hex Washer D. Capscrew
Torque Mower Blades
1. Check that blades are installed with the tabs pointing
up toward deck as shown in Figure 8. Secure with a
capscrew (D), spring washer (C) and spline/hex
washer (B) (be certain the spline/hex washer is
aligned with the shaft). Use a wooden block (A) to
prevent blade rotation and tighten capscrews to 45-55
ft-lbs (61-75 Nm).
WARNING
For your personal safety, blade mounting
capscrews must each be installed with a hex
washer and spring washer, then securely
tightened. Torque blade mounting capscrew to
45 - 55 ft. lbs. (61 - 75 N.m.)