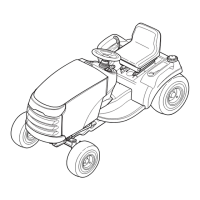
This document provides setup, adjustment, and service instructions for Simplicity Prestige, Conquest, and Broadmoor Series Tractors and Mowers, including models 1800, 2800, GT, 1700, 2700, YT, 1600, and 2600. It covers various aspects of preparing the equipment for use, ensuring safe operation, and performing routine maintenance.
Function Description
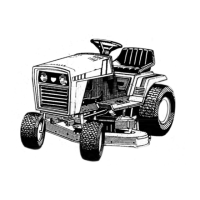
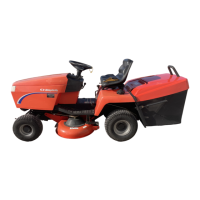
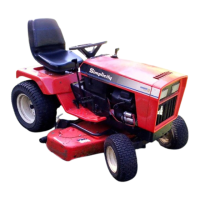
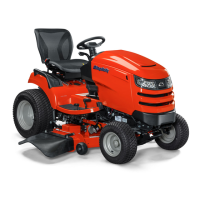
The Simplicity Prestige, Conquest, and Broadmoor Series Tractors and Mowers are designed for outdoor power equipment tasks, primarily mowing. The manual details procedures for assembling the tractor and mower deck, checking fluid levels, and performing safety checks to ensure the unit operates correctly and safely. It also covers adjustments for optimal performance and service procedures to maintain the equipment over time.
Important Technical Specifications
Paper Manuals (Print Vendor Instructions):
- Paper Size: 8-1/2 x 11 inches
- Body Paper: 50 lbs brilliant white offset or equivalent
- Press: 1-color, 2-sided
- Bindery: 3-Hole Drill (always for Dealer Setup Guides) or UL Corner Stitch (if part of a "complete" set of Guides with Tabs)
- Covers: Self-covered piece, with individual document number (e.g., TP 300-XXXX-XX-XX-SMA) on the front cover.
- Body Page Layout: ODD number pages are ALWAYS right-hand pages, and EVEN number pages are ALWAYS left-hand pages.
- Instruction Page: This instruction page is NOT part of the manual and must NOT be printed.
- Blank Pages: Pages labeled "THIS PAGE INTENTIONALLY BLANK" are placement pages ONLY and should NOT be printed.
Tractor and Mower Models Covered:
- Tractors: Broadmoor (16HP), Conquest (16HP, 18HP, 20HP), Prestige (20HP, 20HP PS, 23HP PS), 1606 (16HP), 1616 (16HP), 1716H (16HP), 1718H (18HP), 1720H (20HP), 1820H (20HP), 1820H PS (20HP), 1823H PS (23HP), 2606 (16HP), 2616 (16HP), 2716H (16HP), 2718H (18HP), 2720H (20HP), 2820H (20HP), 2820H PS (20HP), 2823H PS (23HP), 1626 (16HP), 2626 (16HP), YT1644 (16HP), YT1850 (18HP), GT2354 (23HP PS).
- Mower Decks: 38", 40", 44", 50", 54" Mower Decks.
Tire Pressure (Reduce & Check Tire Pressures):
- 23 x 10.5-12: 6-8 PSI (,41-,55 bar)
- 20 x 10.0-8: 6-8 PSI (,41-,55 bar)
- 16 x 6.50-8: 15 PSI (1,0 bar)
- 15 x 6.00-6: 12-15 PSI (,68-,82 bar)
Transmission Oil Specifications:
- K71, K66, K62 Models: SAE 10W-30 with a minimum API rating of SG/CD.
- K71 Capacity: Approx. 4-1/2 qt (4.25L).
- K66, K62 Capacity: Approx. 2.6 qt (2.5L).
- K57 Models: Sealed unit, no regular maintenance required.
- Internal Oil Filter Part Number (K71): 1719832
- Hydraulic System Oil Filter Part Number (K71): 1719168
Torque Specifications:
- Mower Blade Bolts: 45-55 ft. lbs. (61-75 N.m.)
- Steering Gear Adjustment Nuts: 36-44 ft. lbs. (49-59 Nm)
- Crankshaft Bolt (PTO Clutch Installation): 45-50 ft lbs (61-67Nm)
- Steering Arm Capscrew (Transmission Drive Belt Replacement): 17-23 ft. lbs (23-31Nm)
Mower Deck Leveling:
- Side-to-Side: Max 1/8" (3mm) difference between blade tips and ground.
- Front-to-Back: Front tip of center blade should be 1/4" (6mm) higher than rear tips of left-hand and right-hand blades.
- 44" & 50" Mowers (Turbo Collection System): Raise discharge side approx. 1/4" (6mm) to compensate for turbo assembly weight.
Electric PTO Clutch Adjustment:
- Feeler Gauge: 0.012"
- Blade Stopping Time: Must stop within 5 seconds.
Brake Spring Adjustment:
- Compressed Spring Length: 2-1/2" (6.4 cm) when parking brake is engaged.
Usage Features
Quick Setup List:
- Uncrating: Remove crate and banding, place transmission release lever in PUSH position, and roll tractor off skid.
- Battery Activation & Installation: Charge, test, install, and secure the battery.
- Tractor Assembly: Assemble steering wheel (thick spoke faces seat), assemble seat, and check seat switch connection.
- Fluid Levels: Fill and check engine oil, check transmission fluid, and reduce/check tire pressures.
- Mower Assembly: Install deflector, torque mower blades, attach hitch and leveling rod, set gauge wheels, install mower deck, and level mower deck.
- Lubrication: Lubricate all grease and oil points.
- Safety Checks: Check for loose hardware, operator controls, dash safety lights, parking brake, mower blade stopping time, and safety interlock system.
- Burnish Electric Clutch: Run for 15 seconds, repeat 10 times, then re-check mower blade stopping time.
Dashboard Display Functions:
- Fuel Level: Indicates fuel in the tank.
- Hour Meter / Clock / Service Indicator: Displays total running hours for 10 seconds, then changes to a clock. Service alert ("OilLube") after 5 hours, then every 50 hours.
- Special Functions: Display total running hours, display PTO engaged hours, and run a demonstration of all dashboard functions.
Slope Operation:
- Warning: Never operate on slopes greater than 17.6% (10°). Use front counterweights and rear wheel weights for slopes greater than 15% (8.5°) but less than 30%. Mow UP and DOWN slopes, never across.
- DOs: See dealer for wheel weights/counterweights, mow up/down slopes, remove obstacles, watch for holes/ruts/bumps, use slow ground speed, use extra care with attachments, keep movement slow/gradual, avoid starting/stopping on slopes.
- DON'Ts: Turn on slopes unless necessary (then slowly/gradually downhill), mow near drop-offs/ditches/embankments, mow on wet grass, try to stabilize with foot, use grass catcher on steep slopes.
Maintenance Features
Lubrication:
- Grease Points: Steering linkage, foot pedal, mower linkage, transmission idler assembly pivot, rear axle shafts (remove wheel hubs). Use automotive lithium grease.
- Oil Points: Control linkage, seat adjustment assembly, brake linkage, mower deck height adjustment linkage, manual lift lever.
- General: Oil all moving metal parts where contact is made. Keep oil and grease off belts and pulleys. Wipe surfaces clean before and after lubrication.
Transmission Maintenance:
- K71 Models: Perform maintenance after initial 50 hours, then every 250 hours.
- Service Interval: Every 5 hours for oil level check.
- Oil Change: After 50 hours, then every 250 hours, or if discolored.
- Procedure: Drain oil, remove filter access cap, replace hydraulic system filter, replace internal transmission filter, reinstall caps and plugs, add 2 quarts to differential fill, add 2 quarts to expansion chamber, test run, recheck oil level.
- K62 & K66 Models: Sealed units, no regular maintenance required for the unit itself. Oil level can be checked at access hole/reservoir.
- K57 Models: Sealed unit, no regular maintenance.
Belt Replacement:
- Transmission Drive Belt: Remove old belt (from engine pulley, idler pulleys, transmission input pulley), install new belt, reinstall PTO clutch, tighten hardware.
- Mower Belt (44" & 50" PTO): Relieve belt tension, drop belt from PTO pulley, loosen idler pulley belt guide, remove arbor cover, replace belt, position idler pulley belt stop (1/8" gap), reinstall arbor cover, run mower for 5 minutes.
- Mower Belt (54" PTO): Relieve belt tension, drop belt from PTO pulley, replace belt, install drive belt on PTO pulley, install belt on idler pulley, run mower for 5 minutes.
- Mower Arbor Drive Belt (44", 50", & 54"): Remove mower, remove belt covers, loosen idler assembly capscrew, relieve tension with ratchet, remove old belt, install new belt (V-side in arbor pulley grooves, flat side against idler pulley), tighten capscrew, reinstall spring, reinstall arbor covers (check alignment notches for 54" models), install mower on tractor.
- Mower PTO Belt (40"): Relieve belt tension, drop belt from PTO pulley, loosen belt stop brackets and idler pulley belt guide, remove old belt, install new belt, position belt stop brackets (1/8" clearance), position idler pulley belt guide (1/8" gap), install mower on tractor, run mower for 5 minutes.
Adjustments:
- Seat Adjustment: Adjust pitch (carriage bolts), slide (lever), and spring tension (for softer/firmer ride).
- Manual Lift Assist Adjustment: Adjust tension bolt (clockwise to increase assist, counter-clockwise to decrease assist).
- Cruise Control Resistance Adjustment: Adjust tension screw (clockwise to increase tension).
- Steering Gear Adjustment: Loosen nuts, push bracket to mesh gears, tighten nuts.
- Electric PTO Clutch Adjustment: Check after initial 20 hours, then every 250 hours, or if slipping/not engaging. Use 0.012" feeler gauge to adjust nuts.
- Brake Spring Adjustment: Measure compressed spring length with parking brake engaged; adjust nut to achieve 2-1/2" (6.4 cm).
- Internal Neutral Adjustment: For Tuff Torq K71, K66, K62, K57 transmissions if tractor creeps. Block front tires, elevate rear, loosen jam nut, start engine, release brake pedal, adjust eccentric until wheels don't creep, secure jam nut, check pedal return.
Safety Interlock System Tests:
- Test 1 (Engine NOT crank): PTO switch ON, OR brake pedal NOT fully depressed (parking brake OFF), OR cruise control lever NOT in NEUTRAL.
- Test 2 (Engine SHOULD crank): PTO switch OFF, AND brake pedal fully depressed (parking brake ON), AND cruise control lever in NEUTRAL.
- Test 3 (Engine SHUT OFF): Operator rises off seat with PTO engaged, OR operator rises off seat with brake pedal NOT fully depressed (parking brake OFF).
- Test 4 (Blade Brake Check): Mower blades must stop within 5 seconds after electric PTO switch is turned OFF (or operator rises off seat).
Lift Variations When Using Attachments:
- Hydraulic Lift Models: Install downward pressure lock plate and additional pin for snowthrower/dozer blade. Remove for mower.
- Manual Lift Models: Lift link installed differently depending on attachment (refer to Figure 55).