ZT4000 - 44” & 48” Mower Deck
www.simplicitymfg.com6
Roll Bar Assembly
Install the Roll Bar
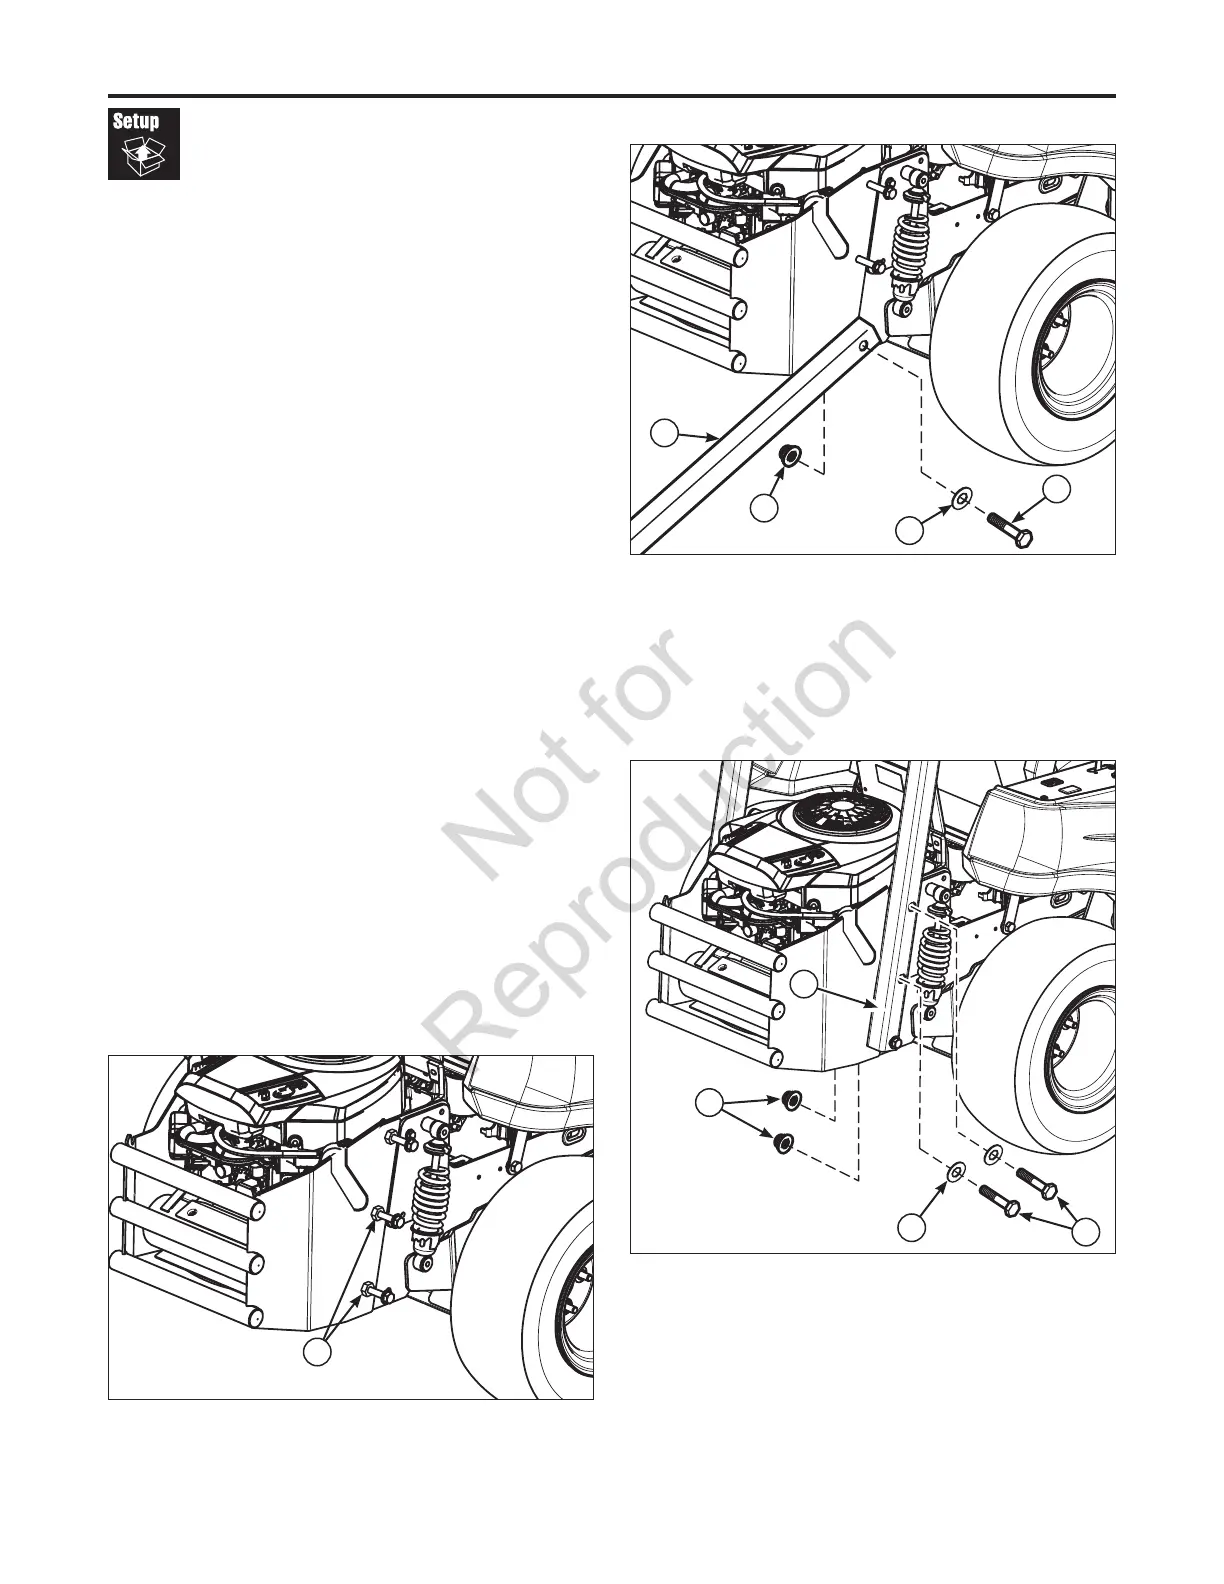
1. See Figure 6. Remove and save the (2) bottom 1/2-13
X 3-1/4” bolt (A, Figure 7), 1/2” SAE washer, and 1/2-
13 hex nylock flange nut (A, Figure 7) that secures the
bumper to the frame of the machine. Discard the 1/2-13
hex jam nuts that are tightened on the threads of the 1/2-
13 X 3-1/4” bolts.
2. Lay a piece of cardboard on the ground behind the
machine, and then lay the roll bar on the cardboard with
the roll bar decals facing upward. The cardboard will
prevent damage to the paint on the roll bar.
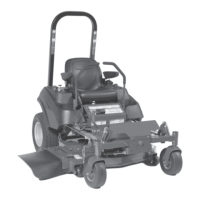
3. From the outside loosely install the 1/2-13 X 3-1/4” bolt
(A, Figure 8) and 1/2 SAE washer (B) through the rollbar
(C), then through the bumper, and the frame of the
machine, and then loosely install the 1/2-13 hex nylock
flange nut (D).
4. Remove and save the (4) upper 1/2-13 X 3-1/4” bolts (A,
Figure 9), 1/2 SAE washers (B) and 1/2-13 hex nylock
flange nuts (D) that secure the bumper to the frame of
the machine. Discard the 1/2-13 hex jam nuts that are
tightened on the threads of the 1/2-13 X 3-1/4”bolts.
5. Position the roll bar (C, Figure 9) into the upright
position and from the outside loosely install 1/2-13 X
3-1/4” bolts, 1/2 SAE washers through the roll bar, then
through the bumper, and the frame of the machine, and
then loosely install the 1/2-13 hex nylock flange nuts.
NOTE: With the roll bar in the upright position the safety
decals should be facing towards the front of the
machine.
6. Tighten the (6) 1/2-13 X 3-1/4” bolts (A) that secure the
roll bar to the machine to 75 ft lbs (102 Nm).
Figure 7. Remove the Bottom Bolts
A. Lower Roll Bar Mounting Hardware (RH side shown.)
Figure 8. Installing the Roll Bar in the Bottom Hole (RH side
shown)
A. 1/2-13 X 3-1/4” Bolt
B. 1/2 SAE Washer
C. Roll Bar
D. 1/2-13 Hex Nylock Flange Nut
B
A
C
D
Figure 9. Installing the Roll Bar in the Upright Position (RH
side shown)
A. 1/2-13 X 3-1/4” Bolt
B. 1/2 SAE Washer
C. Roll Bar
D. 1/2-13 Hex Nylock Flange Nut
B
A
D
A
C
 Loading...