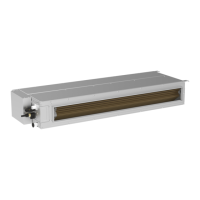
DC Inverter Duct Type Air Conditioner Installation and Operation Manual
42
2. Gap Leakage Check
Check if it leaks or not by applying soapsuds on every joint and then
inspect carefully. After the check, wipe them off completely.
Cover the indoor unit joint with pipe insulation and four plastic bands to
prevent condensing at joints.
8.2.11 Liquid Pipe and Drain Pipe
If the outdoor unit is installed lower than the indoor unit (See Fig.47)
A drain pipe should be above ground and the end ofthe pipe does not dip
into water. All pipes must be restrained to the wall by saddles.
Taping pipes must be done from bottom to top.
All pipes are bound together by tape and restrainedto wall by saddles.
If the outdoor unit is installed higher than the indoor unit (See
Fig.48)
Taping should be done from lower to the upper part.
All pipes are bound and taped together and also should be trapped to
prevent water from returning to the room (See Fig.49)
Restraint all pipes to the wall with saddles.
8.2.12 Installation of Protective Layer of Connecting Pipe
1. To avoid generation of condensate on the connecting pipe and avoid leakage, the big pipe and the small
pipe of the connecting pipe must be covered by thermal insulation materials, be bundled by adhesive tape, and
be isolated from air.
2. The joint connecting to the indoor unit must be wrapped by thermal insulation material. There shall be no
gap between the connecting pipe joint and the wall of the indoor unit. Refer to Fig.49.
Fig.49 Fig.50
Cautions: After the pipes are wrapped by protective materials, never bend the pipes to form very small
angle, and otherwise the pipes may crack or break.
3. Use adhesive tape to wrap the pipes:
①
Use adhesive tape to bundle the connecting pipe and the cables together. To prevent condensate from
overowing out from the drainage pipe, separate the drainage pipe rm the connecting pipe and the cables.
Fig.46
Fig.48
Fig.47