◆Installation Services—Install Indoor Unit
Notes:
If the connecting cable is not long enough, please contact the designated service station for a piece of
special cable with sufficient length. No joints are allowed in the middle of the cable.
Be sure to connect the cable correctly. Incorrect connection will cause fault to some electrical parts.
Tighten the terminal screw to avoid looseness.
After tightening the screw, gently pull the cable for tightness.
Incorrect connection of earthing cable might cause electric shock.
Be sure to fix the junction cover plate securely and press it closely against connecting cable.
Improper fixing of junction cover plate might allow dust or water to enter or expose connecting
terminal directly under the external force, whereas fire or electric shock might occur.
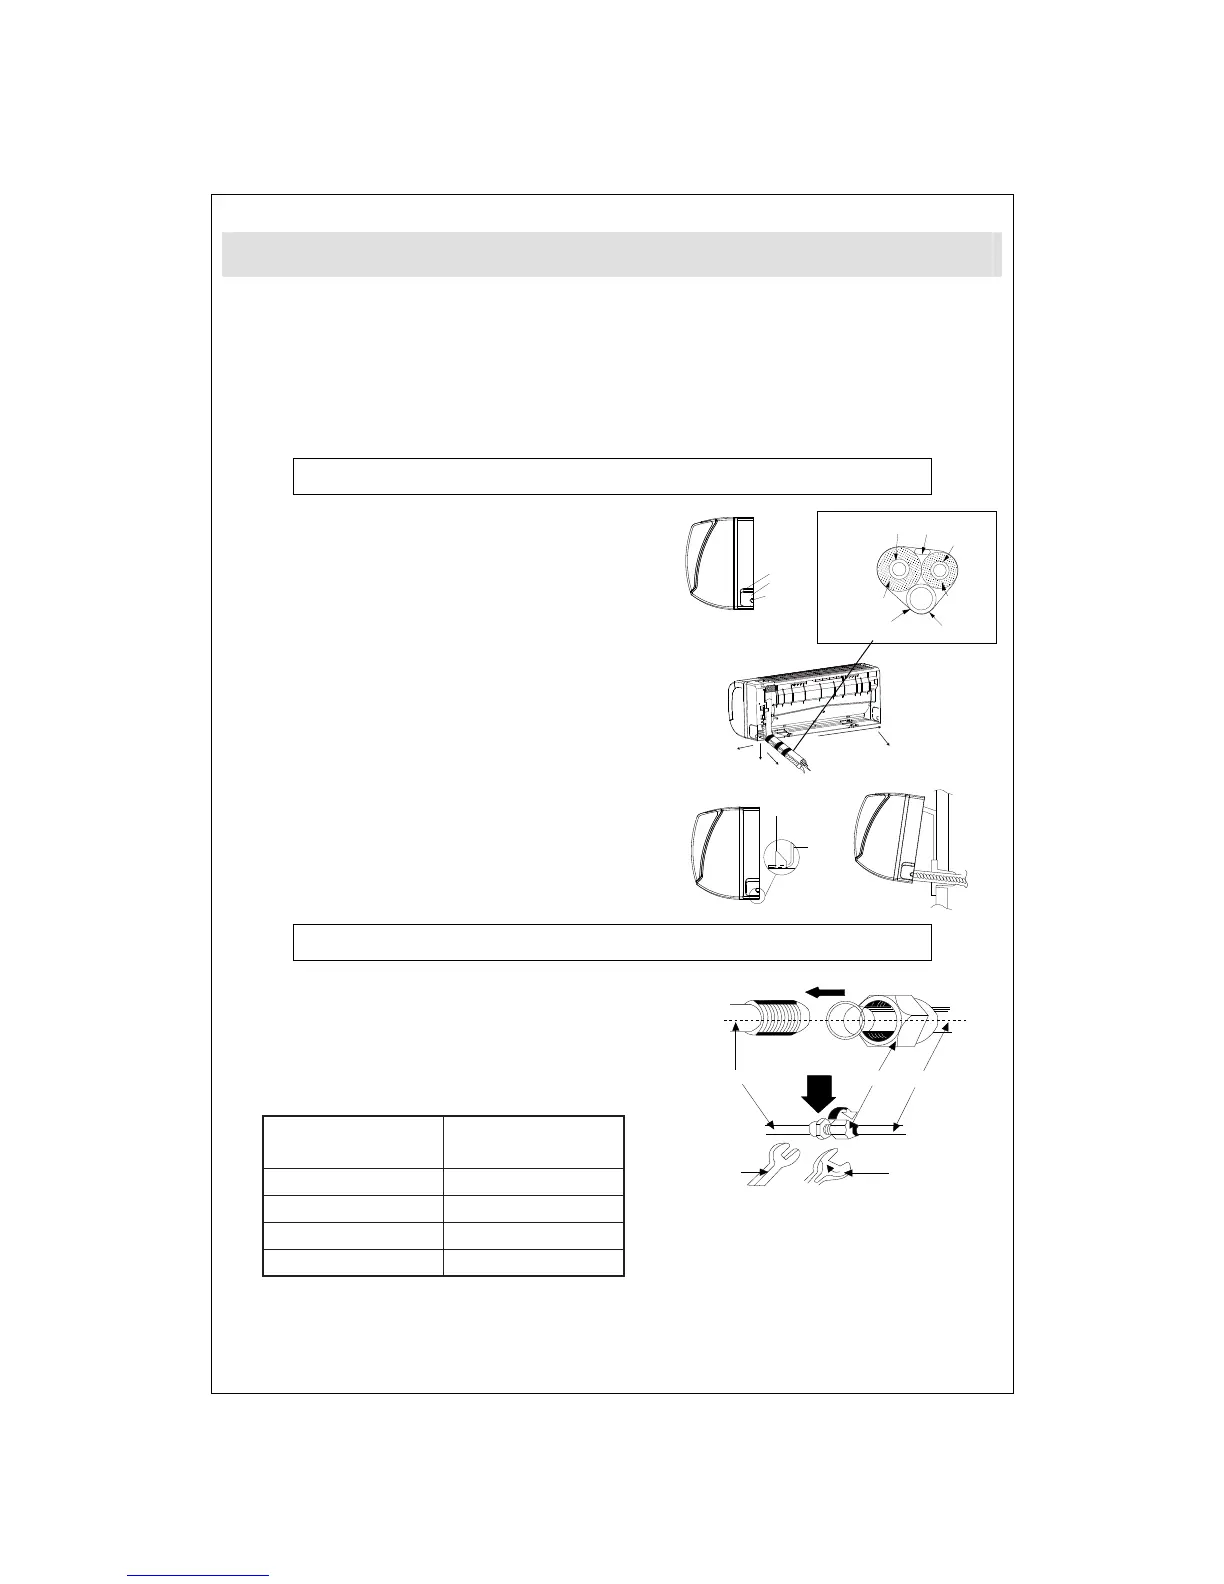
Installing Indoor Unit
Fitting pipe can come out from four directions, i.e. right,
rear right, left and rear left.
1. When laying the pipe (line) at the left or right side, cut as
needed the extra part of the fitting pipe left at the
tube-exit plate of the unit base. (See Fig. 9).
(1) When only drawing out the power line, cut extra part
1.
(2) When drawing out the connecting pipe and the
electrical line, cut extra parts 1 & 2 (or 1, 2 & 3);
2. Pull out the fitting pipe from bottom case. Use adhesive
tape to bondage the fitting pipe, electrical cable and
drain hose properly and then pass them through the
fitting pipe hole (See Fig. 10).
3. Hung the claws at the rear side of the indoor unit to the
hook on the wall-mounting frame. Move the unit left and
right to see if it is steady. (See Fig 11)
4. The installation height of the indoor unit must be at least
2.4m.
Installing Connecting Pipe
1. The taper end of the connecting pipe must be in line
with the corresponding tape face of the valve joint.
Hexagon Nut
Tightening Torque
(N·m)
φ6
15~20
50~55
Notes: Connect the connecting pipe to the indoor unit first and then connect it to the outdoor unit. Pay
attention to the bending and layout when preparing the connecting pipe in order not to harm it. Do
not screw the joint nut too tightly, otherwise leakage will be caused.
Fitting pipe
on air side
Electrical cable for
external connection
Fitting pipe on
liquid side
Extra Part 2
Extra Part 3
Extra Part 1
Heat insulation of
fitting pipe on air side
Heat insulation
of fitting pipe on
liquid r side
Drainage pipe
Finally, wrap with
adhesive tape.
Fig. 9
Left
Left Rear
Right
Lower Right
Right Rear
Fig. 10
Fixing Hook
Mounting
Plate
Mounting
Plate
Fig. 11
Conical Nut
Fitting Pipes of
Indoor Unit
Fittin