Connect the Nitro’s positive (+) RED battery clamp to the positive
(+) battery terminal.
Stand as far back from the battery as possible, and do not face
battery when making final connection.
Carefully connect the negative (-) BLACK charger clamp to the
negative (-) BLACK battery terminal. Ensure connection is secure.
Connect the charger’s AC power cable to a grounded AC power
outlet.
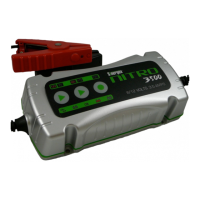
Nitro’s LED indicators will light to show power the charger. Using
the Simple Touch panel, select the battery’s voltage, 6 or 12 Volts,
and select the battery type, GEL or Standard.
The Nitro will now automatically assess the condition of your
battery and deliver the optimum charge.
When charging is completed, disconnect power cable from the AC
power and disconnect cables and clamps in reverse order from
which they were connected.
If using the Nitro for maintenance charging, leave charger
connected to the battery and the Nitro will keep your battery at the
optimum level of charge.
2. CHARGING
Once you have connected the Nitro battery charger to AC power,
it will sound a tone for 0.5 seconds and the Simple Touch power
panel LEDs light for two seconds.
Connection with reversed polarity – If the DC battery clamps
are connected improperly to the battery terminals, the Reverse